How to Repair a Bathtub Faucet: A Comprehensive Guide
A leaky or malfunctioning bathtub faucet can be an annoyance that compromises the comfort and efficiency of your bathroom. However, with a little know-how and the right tools, repairing a faucet is a DIY project that can save you time and money. Here's a step-by-step guide to help you tackle this task confidently.
### Tools and MaterialsBefore you begin, gather the following tools and materials:
- Adjustable wrench
- Phillips and flat-head screwdrivers
- Allen wrench (if required)
- Replacement faucet parts (if necessary)
- Teflon tape
- Plumber's putty
- Bucket
- Rags
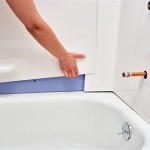
Locate the water shut-off valves under the sink or behind the bathtub. Turn them clockwise to close both the hot and cold water supply.
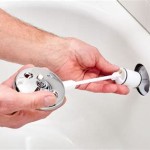
### Step 2: Remove the Faucet HandleDepending on your faucet design, the handle may be attached with a set screw or a cap. Use an Allen wrench or screwdriver to remove the set screw or cap. Then, pull the handle straight up to detach it.
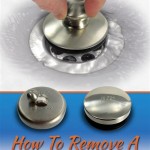
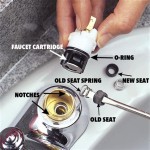
### Step 3: Remove the CartridgeOnce the handle is removed, you'll see a cartridge secured by a retaining nut. Use an adjustable wrench to loosen the nut and remove the cartridge.
### Step 4: Inspect the Cartridge and WasherExamine the cartridge for any signs of damage or wear. If damaged, replace it with a new one. Also, check the rubber washer on the bottom of the cartridge and replace it if it's worn or cracked.
### Step 5: Apply Plumber's PuttyApply a small amount of plumber's putty around the base of the cartridge. This will help seal the cartridge and prevent leaks.
### Step 6: Reinsert the CartridgeSlide the cartridge back into the faucet body and tighten the retaining nut using an adjustable wrench.
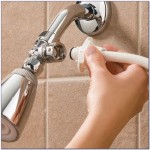
### Step 7: Reinstall the Faucet HandleApply a thin layer of Teflon tape to the threads of the handle and then screw it back onto the faucet. Tighten it securely with an Allen wrench or screwdriver, as per the manufacturer's instructions.
### Step 8: Turn on the Water SupplyOpen the water shut-off valves under the sink or behind the bathtub. Check for any leaks around the handle or the faucet base. If there are any leaks, tighten the retaining nut or apply more plumber's putty as needed.
### ConclusionBy following these steps carefully, you can successfully repair a bathtub faucet and restore it to optimal working condition. Remember to take safety precautions, such as wearing gloves and eye protection, while working with plumbing fixtures. If you encounter any difficulties or have any concerns, don't hesitate to consult a professional plumber for assistance.

How To Fix A Leaking Bathtub Faucet Diy Family Handyman

How To Fix A Leaky Bathtub Faucet 6 Ways Stop Drips

How To Fix A Leaking Bathtub Faucet Diy Family Handyman

How To Fix A Leaking Bathtub Faucet The Home Depot

How To Fix A Leaking Bathtub Faucet Diy Family Handyman

Faucet Repair How To A Leaky Bath

How To Fix A Leaking Bathtub Faucet The Home Depot

Diy Bathtub Faucet Repair

How To Fix A Leaking Bathtub Faucet The Home Depot

Bathtub Spout With Diverter Replacement Fix Leaking Tub Jonny Diy
Related Posts