Essential Aspects of Bathtub Repair: A Comprehensive Guide
Bathtub maintenance is essential to ensure the longevity and functionality of this vital bathroom fixture. Whether you're dealing with minor chips and scratches or more substantial damage, knowing how to repair a bathtub is a valuable skill. This article provides a step-by-step guide to help you restore your bathtub to its former glory.
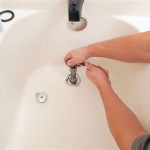
1. Determine the Extent of the Damage
Before embarking on repairs, it's crucial to assess the severity of the damage. Inspect the bathtub for chips, scratches, cracks, or leaks. Determine if the damage is localized or widespread. This information will help you select the appropriate repair method.
2. Gather Necessary Materials
Based on the extent of the damage, you'll need to gather specific materials for the repair. These may include a bathtub repair kit, waterproof sealant, fiberglass cloth, sandpaper, and a cleaning solution. Make sure you have all the necessary tools and materials before starting the job.
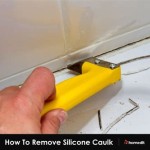
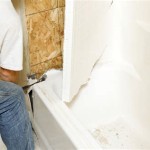
3. Prepare the Bathtub Surface
To ensure a successful repair, it's important to prepare the bathtub surface properly. Clean the area around the damaged area with a cleaning solution and allow it to dry completely. If the damage involves cracks or holes, use sandpaper to smooth out the edges and create a clean surface for the patch.
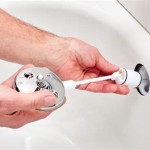
4. Apply the Repair Patch
Depending on the type of damage, you may need to use a bathtub repair kit or fiberglass cloth. If using a kit, follow the manufacturer's instructions. For fiberglass cloth, cut a piece large enough to cover the damaged area. Apply a layer of waterproof sealant to the bathtub surface and place the fiberglass cloth over it. Smooth out any wrinkles or bubbles.
5. Finish and Seal
Once the patch has dried, sand it smooth with fine-grit sandpaper to match the surface of the bathtub. Then, apply a generous layer of waterproof sealant around the perimeter of the patch and let it dry completely. This will provide a durable and watertight seal.
6. Touch-Up and Maintain
For aesthetic purposes, you may want to touch up the repaired area with paint or glaze that matches the color of the bathtub. To maintain the repair and prevent further damage, clean the bathtub regularly and avoid using harsh chemicals or abrasive cleaners.
Additional Tips:
- Practice on a scrap piece of fiberglass before attempting the actual repair.
- Allow sufficient drying time between each step.
- Use gloves and safety glasses for protection.
- If the damage is extensive or you lack the necessary skills, consider consulting a professional plumber.
- Regular maintenance and timely repairs can extend the lifespan of your bathtub and prevent costly replacements.

Repairing A Ed Bathtub Or Shower

A Smart Repairs Solution For Baths

Why Do Bathtubs How To Maintain Repair Bathtub S 2024

How To Repair Bath Enamel Metro Plumb

Easy Ways To Fix A Chipped Bathtub 14 Steps With Pictures

Fiberglass Tub Repair Service S And Holes Filled

Shurbond Bathtub Chip Repair

How To Repair A Rusted Bathtub Happy Tubs

Repairing Vs Replacing Your Bathtub
:max_bytes(150000):strip_icc()/SPR-Home-best-tub-repair-kits-4158688-5f0f2377a9764effbcbed17ad02e85cf.jpg?strip=all "The 9 Best Tub Repair Kits Of 2024")
The 9 Best Tub Repair Kits Of 2024
Related Posts