How To Remove Sealant From Acrylic Bathtub Walls
Removing sealant from acrylic bathtub walls can be a delicate process. Acrylic, while durable, is also susceptible to scratches and damage from harsh chemicals or abrasive tools. The objective is to remove the old sealant without causing any harm to the underlying acrylic surface. This article provides a comprehensive guide on the tools, materials, and techniques necessary for successfully removing sealant from acrylic bathtub walls.
Before starting any sealant removal project, it is crucial to identify the type of sealant used. Common types include silicone, acrylic, and latex-based sealants. Silicone sealants are known for their flexibility and water resistance, making them a popular choice for bathrooms. Acrylic and latex sealants are generally easier to work with but may not offer the same level of water resistance as silicone. Knowing the type of sealant helps in selecting the appropriate removal methods and solvents.
Safety is paramount when working with sealants and solvents. Adequate ventilation is essential, so open windows and doors to ensure proper airflow. Wear appropriate personal protective equipment (PPE), including gloves, eye protection, and a mask, especially when using chemical solvents. This will prevent skin and eye irritation, as well as protect the respiratory system from harmful fumes. Ensuring a safe working environment minimizes the risk of accidents and health hazards.
Essential Tools and Materials
The right tools and materials are crucial for efficient and damage-free sealant removal. Gathering these items beforehand will streamline the process and prevent unnecessary delays.
1. Putty Knife or Scraper: A sharp, flexible putty knife or plastic scraper is essential for lifting and removing the bulk of the sealant. Opt for plastic scrapers, as they are less likely to scratch the acrylic surface compared to metal ones. A variety of sizes and shapes can be useful for accessing different areas and contours.
2. Utility Knife or Razor Blade: A utility knife or razor blade can be used for making precise cuts along the edges of the sealant. Exercise extreme caution when using these tools to avoid accidentally cutting or scratching the acrylic. Retractable blades are recommended for safety and to prevent accidental damage.
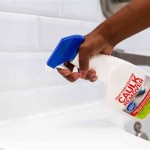
3. Sealant Softener or Solvent: Chemical solvents are often necessary to soften the remaining sealant residue. Commercially available sealant removers are specifically formulated to break down different types of sealants. Mineral spirits, rubbing alcohol, or vinegar can also be used as alternative solvents, although their effectiveness may vary depending on the type of sealant.
4. Cleaning Supplies: After the sealant is removed, thorough cleaning is necessary to prepare the surface for new sealant. This includes a mild detergent, warm water, a soft cloth or sponge, and a scrub brush for stubborn residue. Avoid abrasive cleaners or scouring pads, as they can scratch the acrylic surface.
5. Heat Gun or Hair Dryer: Heat can soften the sealant and make it easier to remove. A heat gun or hair dryer can be used to apply gentle heat to the sealant, but exercise caution to avoid overheating and damaging the acrylic. Keep the heat source moving and avoid concentrating it on one spot for too long.
6. Safety Gear: As previously mentioned, safety gear is essential. This includes gloves (nitrile or rubber), eye protection (goggles or safety glasses), and a mask (especially when using chemical solvents).
Step-by-Step Sealant Removal Process
The following steps outline the process of removing sealant from acrylic bathtub walls. It is essential to proceed carefully and patiently to avoid damaging the acrylic surface.
1. Preparation: Begin by thoroughly cleaning the area around the sealant with a mild detergent and warm water. This removes dirt, grime, and other debris that may interfere with the removal process. Dry the area completely before proceeding.
2. Scoring the Sealant: Use a utility knife or razor blade to carefully score along both edges of the sealant. This separates the sealant from the acrylic surface and prevents it from pulling away paint or other finishes. Hold the blade at a shallow angle and apply consistent pressure to avoid scratching the acrylic. Making clean, precise cuts is crucial for a smooth removal process.
3. Initial Removal: Insert the putty knife or scraper under the edge of the sealant and gently lift it away from the acrylic. Work slowly and carefully, applying even pressure to avoid tearing the sealant. If the sealant is particularly stubborn, use a heat gun or hair dryer to soften it before attempting to lift it. Continue lifting and peeling the sealant, working along the entire length of the seam. Dispose of the removed sealant properly.
4. Applying Sealant Softener: After removing the bulk of the sealant, there will likely be residue remaining on the acrylic surface. Apply a sealant softener or solvent to the residue, following the manufacturer's instructions. Allow the solvent to sit for the recommended time, typically 15-30 minutes, to soften the residue. For stubborn residue, reapplication may be necessary. Ensure adequate ventilation during this step.
5. Scraping Residue: Once the sealant residue has softened, use a plastic scraper or putty knife to gently scrape it away. Work slowly and carefully, applying even pressure to avoid scratching the acrylic. If the residue is still difficult to remove, reapply the solvent and allow it to sit for a longer period. Avoid using excessive force, as this can damage the surface. Patience is key to removing the residue effectively.
6. Cleaning and Final Preparation: After removing all the sealant residue, thoroughly clean the acrylic surface with a mild detergent and warm water. Use a soft cloth or sponge to remove any remaining solvent or residue. Rinse the area completely and dry it thoroughly. Inspect the surface for any remaining sealant or damage. If necessary, repeat the cleaning process. Allow the area to dry completely before applying new sealant.
Tips and Tricks for Difficult Sealant Removal
Some sealant removal projects may present unique challenges. The following tips and tricks can help overcome these obstacles and ensure a successful outcome.
1. Dealing with Stubborn Sealant: If the sealant is particularly stubborn, try using a combination of heat and solvent. Apply heat to the sealant for a short period, then immediately apply the solvent. This can help the solvent penetrate the sealant more effectively. Repeat this process as needed to soften the sealant and make it easier to remove.
2. Removing Sealant from Corners and Edges: Corners and edges can be particularly difficult to clean. Use a small, angled scraper or a utility knife with a sharp blade to carefully remove sealant from these areas. Exercise extreme caution to avoid scratching the acrylic. Applying solvent to these areas can also help soften the sealant and make it easier to remove.
3. Protecting the Acrylic Surface: To prevent scratches and damage to the acrylic surface, use painter's tape to protect the surrounding areas. Apply the tape along the edges of the sealant before starting the removal process. This will prevent the scraper or utility knife from accidentally scratching the acrylic. Additionally, use plastic scrapers instead of metal ones to minimize the risk of scratches.
4. Alternative Solvents: If commercial sealant removers are not available, alternative solvents such as mineral spirits, rubbing alcohol, or vinegar can be used. However, these solvents may not be as effective as commercial removers, and their effectiveness may vary depending on the type of sealant. Always test the solvent on a small, inconspicuous area before applying it to the entire surface to ensure it does not damage the acrylic.
5. Preventative Measures: To prevent sealant from sticking too strongly in the future, consider applying a thin layer of petroleum jelly or silicone grease to the acrylic surface before applying new sealant. This will create a barrier between the sealant and the acrylic, making it easier to remove the sealant in the future. Ensure that the surface is completely clean and dry before applying the new sealant.
Proper technique, patience, and the right tools are essential for successfully removing sealant from acrylic bathtub walls without causing damage. Taking the time to prepare the area, use appropriate solvents, and proceed carefully will result in a clean surface ready for new sealant application.

How To Remove Silicone Sealant Diy Guide Removing Old Beginners Removal

Remove And Replace Your Old Silicone

How To Remove Caulk Ace Hardware

How To Remove And Replace Your Tub Shower Caulk Anderson Lumber

How To Remove Old Shower Silicone Caulk And Apply New Look Pro

Most People Are Re Caulking Their Bathtub Wrong Here S The Right Way

How To Remove Old Caulk Dap Global
How To Remove Silicone Caulk From Fibreglass Shower Stalls
How To Remove Silicone Caulk Best Method

How To Re Caulk A Shower Dap Global
Related Posts


