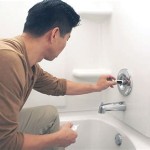
How To Remove a Moen Pop-Up Bathtub Drain Stopper: A Comprehensive Guide
Moen pop-up bathtub drain stoppers are a common feature in many homes, known for their ease of use and simple design. However, these stoppers can sometimes become stuck or require removal for cleaning or repair. While some Moen stoppers can be removed by hand, others necessitate the use of a specialized tool. This article provides a detailed, step-by-step guide on how to remove a Moen pop-up bathtub drain stopper, with specific attention to cases requiring a removal tool.
Before attempting any removal, it's crucial to identify the specific type of Moen pop-up drain stopper installed. Moen offers a variety of stopper designs, and the removal method can vary significantly depending on the model. Some stoppers feature a simple lift-and-turn mechanism, while others employ a more intricate linkage system accessible from beneath the tub. Incorrectly attempting to remove a stopper can lead to damage to the stopper itself, the drain mechanism, or even the bathtub's finish.
The most effective way to identify the specific model is to consult the original installation instructions or the Moen website. If the model number is unavailable, a visual inspection of the stopper and its visible components can often provide clues. Pay close attention to the shape of the stopper, any visible screws or levers, and the presence of a linkage rod extending from the overflow drain. Knowing the specific type is the first and arguably most important step in a successful removal process.
Identifying the Correct Removal Tool
When a Moen pop-up drain stopper is designed for removal with a tool, the tool is typically a small, specialized wrench or a set of pliers designed to grip the stopper's inner mechanism. Often, the need for a tool indicates a more secure, tamper-resistant design. Attempts to force the stopper without the correct tool can result in irreparable damage and potential blockages in the drain line.
The specific type of tool required often depends on the stopper's design. Some stoppers use a slot or indentation on the underside of the stopper head, requiring a flat-head screwdriver or a similar tool for leverage. Others require a wrench to grip a specific part of the linkage mechanism accessible from within the drain. The correct tool will allow for a smooth, controlled removal, minimizing the risk of damage.
If the original tool is lost or unavailable, specialized drain stopper removal tools can be purchased from most hardware stores or plumbing supply retailers. These tools are often designed with multiple tips or adjustable jaws to accommodate various stopper designs. When purchasing a replacement tool, it’s advisable to bring the old stopper or a detailed photograph to ensure compatibility. Online retailers like Amazon can also offer suitable replacements, often with detailed descriptions and customer reviews.
Step-by-Step Instructions for Removal Using a Tool
Once the correct tool has been identified, the removal process can be initiated. Prior to starting, it’s recommended to gather all necessary supplies, including the tool itself, a pair of gloves, a bucket or container to catch any debris, and a flashlight to improve visibility. Adequate lighting is crucial for identifying the correct points of contact on the stopper and ensuring a secure grip with the tool.
Step 1: Preparation: Begin by thoroughly cleaning the area around the drain opening. This helps to prevent any loose debris from falling into the drainpipe during the removal process. Use a damp cloth to wipe away any soap scum, hair, or other build-up. Place the bucket or container directly beneath the drain opening to catch any water or debris that may be dislodged during removal.
Step 2: Access the Stopper Mechanism: Depending on the type of stopper, access to the removal point may vary. Some stoppers require a simple lift-and-turn motion to expose the inner mechanism, while others may need a slight push to release a locking mechanism. Consult the stopper's specific instructions or the manufacturer's guide for details on accessing the removal point.
Step 3: Engage the Removal Tool: Carefully insert the removal tool into the designated slot or opening on the stopper. Ensure that the tool is securely seated and that there is a firm grip. If using pliers, be mindful not to damage the stopper's finish by applying excessive pressure. The goal is to apply consistent, controlled force to disengage the stopper from the drain mechanism.
Step 4: Rotate or Pull to Remove: Depending on the stopper's design, the removal process may involve rotating the tool clockwise or counterclockwise, or gently pulling upwards. Apply consistent, even pressure while rotating or pulling. Avoid jerking or forcing the stopper, as this can damage the mechanism or the drainpipe. If resistance is encountered, double-check that the tool is properly engaged and that the correct technique is being used.
Step 5: Clean the Stopper: Once the stopper is removed, thoroughly clean it to remove any accumulated hair, soap scum, or other debris. Use a mild detergent and a soft brush to scrub the stopper clean. Rinse thoroughly with water and allow it to dry completely before re-installing or storing it.
Addressing Common Issues During Removal
Despite following these instructions carefully, several common issues can arise during the removal process. One of the most frequent problems is a stopper that is stuck due to accumulated debris or corrosion. In such cases, applying a penetrating lubricant, such as WD-40 or a similar product, can help to loosen the stopper. Allow the lubricant to soak for several minutes before attempting to remove the stopper again.
Another common issue is damage to the stopper or the removal tool. If the stopper is made of plastic, it can become brittle over time and prone to cracking. Applying excessive force with the removal tool can exacerbate this problem. If the stopper is severely damaged, it may be necessary to replace it entirely. Similarly, if the removal tool is damaged, it's important to replace it with a sturdy, high-quality tool to avoid further complications.
In some cases, the linkage mechanism beneath the tub may become disconnected or damaged, preventing the stopper from being removed. This is more common in older homes with outdated plumbing systems. If the linkage mechanism is the problem, it may be necessary to access it from beneath the tub to make repairs or adjustments. This may require the assistance of a qualified plumber.
Finally, if the stopper is severely corroded or damaged, it may be difficult or impossible to remove it without causing further damage. In such cases, it may be necessary to consult with a professional plumber to assess the situation and determine the best course of action. A plumber has the expertise and tools to safely remove the stopper and repair any damage to the drainpipe.
Preventative maintenance is key to avoiding many of these issues. Regularly cleaning the stopper and drain can help to prevent the accumulation of debris that can cause the stopper to become stuck. Avoid using harsh chemicals or abrasive cleaners, as these can damage the stopper's finish and accelerate corrosion. Periodically inspecting the stopper and linkage mechanism can help to identify potential problems before they become major issues.
By following these detailed instructions and addressing any common issues that may arise, removing a Moen pop-up bathtub drain stopper can be a straightforward process. However, if any doubt exists regarding one's ability to safely remove the stopper, consulting with a qualified plumber is always the best course of action. Proper maintenance and timely repairs can help to ensure the longevity and functionality of the bathtub drain system.
Remember to always consult the specific instructions provided by Moen for the particular model of bathtub drain stopper installed. This guide offers a general overview, but manufacturer-specific guidelines are crucial for a successful and damage-free removal.

How To Remove Moen Popup Bathtub Drain Stopper

Remove Pop Up Bath Tub Drain Stopper 3 Ways

Replacing A Tub Drain Bathtub Removal And Replacement

How To Remove A Bathtub Drain Stopper

How To Remove A Bathtub Drain Stopper

Bathroom Repair How To A Pop Up Tub Drain Stopper

How To Remove The Bathtub Drain Diy Guide Fixed Today Plumbing

How To Remove A Bathtub Drain The Home Depot

How To Remove Pop Up Tub Stopper Easy Method

So Easy How To Remove A Watco Pop Up Drain Plug
Related Posts


