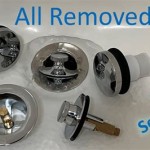
How to Remove a Moen Pop-Up Bathtub Drain Stopper
Moen pop-up bathtub drain stoppers are a common feature in many modern bathrooms. Their sleek design and convenient operation often make them desirable. However, like any mechanical component, they can sometimes malfunction, become clogged with hair and debris, or simply need to be removed for cleaning or replacement. Understanding the mechanism of a Moen pop-up drain stopper and how to safely remove it is essential for proper maintenance and troubleshooting. This article will provide a comprehensive guide on various methods to remove Moen pop-up bathtub drain stoppers, addressing different designs and potential challenges encountered during the process.
Before attempting any removal procedure, it is crucial to identify the specific type of Moen pop-up drain stopper installed in the bathtub. Moen offers several variations, each with slightly different removal techniques. Common types include the lift-and-turn, push-and-seal, and toe-touch mechanisms. Incorrectly attempting to remove the stopper can potentially damage the drain assembly or the stopper itself. It is also recommended to have basic plumbing tools readily available, such as pliers, screwdrivers (both flathead and Phillips head), and potentially a pair of needle-nose pliers. Protection is also important; wearing gloves will protect the hands and prevent potential contamination.
Identifying Your Moen Pop-Up Drain Stopper Type
The first step involves accurately identifying the type of Moen pop-up drain stopper. This is crucial because the removal method varies significantly based on the design. Observing the stopper’s operation will often provide a clear indication. A lift-and-turn stopper typically has a visible knob or handle on top that needs to be turned to open and close the drain. A push-and-seal stopper, as the name suggests, operates by pressing down on the stopper to seal or release the drain. A toe-touch stopper similarly requires pressing down on the stopper with one's toe to activate the mechanism. Understanding these different mechanisms is the foundation for successfully removing the stopper without causing damage.
Visual inspection can further help identify the type of stopper. Examine the base of the stopper where it meets the drain opening. Look for any visible screws, slots, or levers. Note the shape and design of the stopper's top. Is it a simple, flat disc, or does it have a more complex shape with a button or lever integrated into it? Consult the Moen product documentation if it's available. Many Moen products have specific model numbers stamped on the stopper or the drain flange itself. This information can be used to find detailed instructions and diagrams online or in the product manual.
If uncertainty remains, comparing the stopper's appearance to images and descriptions on the Moen website or other plumbing supply websites may help. Pay attention to the specific wording used to describe different Moen stopper models, as this can often give clues to the removal process. Once the stopper type is confirmed, the appropriate removal technique can be applied.
Removing a Lift-and-Turn Moen Pop-Up Drain Stopper
The lift-and-turn Moen pop-up drain stopper is one of the more common designs. The removal process typically involves these steps. First, ensure the stopper is in the fully open position. This will allow for easier access to the components underneath. Grasp the stopper firmly by its knob or handle. Rotate the stopper counterclockwise. Many lift-and-turn stoppers are designed with a threaded connection to the drain body, so unscrewing it is a key part of the process.
Continue rotating the stopper until it is completely disengaged from the drain. If the stopper is particularly stubborn and difficult to turn, applying gentle pressure with pliers (padded with a cloth to prevent scratching) may provide additional leverage. However, be cautious not to overtighten or force it, as this could damage the threads or the stopper itself.
Once the stopper is unscrewed, carefully lift it out of the drain opening. Examine the stopper and the drain opening for any debris, hair, or other obstructions. Clean these thoroughly before reassembling the stopper or installing a new one. Inspect the rubber O-ring or sealing washer at the base of the stopper for any signs of wear or damage. If the O-ring is cracked or deteriorated, it should be replaced to ensure a proper seal and prevent leaks.
In some cases, the stopper may be difficult to unscrew due to mineral buildup or corrosion. Applying a penetrating oil or lubricant, such as WD-40, to the threads can help loosen the connection. Allow the lubricant to soak in for several minutes before attempting to unscrew the stopper again. If the stopper still resists turning, gently tapping it with a rubber mallet may help break the bond between the threads. Remember to exercise caution and avoid using excessive force, as this could damage the drain assembly.
Removing a Push-and-Seal Moen Pop-Up Drain Stopper
The push-and-seal Moen pop-up drain stopper, also known as a push-button stopper, presents a slightly different removal challenge. These stoppers often lack a visible handle or knob, requiring a different approach to disengage them from the drain body. Typically, the removal process involves carefully prying the stopper out of the drain opening.
First, ensure the stopper is in the fully open position. This may require pressing down on it once, then releasing, to ensure it is not in the locked or sealed position. Obtain a thin, flat tool, such as a flathead screwdriver or a putty knife. Wrap the tip of the tool with a soft cloth to prevent scratching the drain flange or the stopper finish.
Carefully insert the wrapped tool between the edge of the stopper and the drain flange. Gently pry upwards, working around the circumference of the stopper. Avoid applying excessive force to any one point, as this could damage the stopper or the drain. The goal is to gradually loosen the stopper from the drain body.
As the stopper begins to lift, continue working around the edge with the tool, applying gentle pressure to each point. Eventually, the stopper should pop free from the drain opening. Once the stopper is removed, inspect it for any debris, hair, or other obstructions. Clean the stopper and the drain opening thoroughly before reassembling or replacing the stopper.
Some push-and-seal stoppers may have a small set screw or access point located on the side of the stopper. This screw may need to be loosened or removed to release the stopper from the drain body. Consult the Moen product documentation or online resources for specific instructions on how to remove stoppers with set screws. If resistance is encountered during the prying process, double-check for any hidden screws or locking mechanisms before applying more force.
Addressing Common Challenges and Troubleshooting
Despite following the recommended removal procedures, certain challenges may arise when attempting to remove a Moen pop-up drain stopper. One common issue is a stopper that is stuck or difficult to remove due to mineral buildup, corrosion, or accumulated debris. In these situations, several troubleshooting techniques can be employed.
First, try applying a penetrating oil or lubricant, such as WD-40 or Liquid Wrench, to the base of the stopper where it meets the drain flange. Allow the lubricant to soak in for several minutes, or even hours, to help loosen the bond between the stopper and the drain body. After soaking, try gently wiggling the stopper back and forth, or rotating it if it is a lift-and-turn model, to further break up the buildup.
If lubrication alone is not sufficient, consider using a specialized drain cleaning tool, such as a drain snake or a flexible grabber tool, to remove any visible debris or obstructions from the drain opening. Sometimes, hair or other materials can become entangled around the stopper mechanism, preventing it from being removed.
Another potential issue is a damaged or broken stopper. If the stopper is cracked or broken, it may be difficult to grasp or pry out of the drain opening. In these cases, use caution to avoid cutting or injuring yourself on any sharp edges. Consider using needle-nose pliers or a similar tool to carefully remove the broken pieces of the stopper. If a portion of the stopper is lodged deep within the drain, it may be necessary to disassemble the drain assembly from underneath the bathtub to access and remove the remaining pieces.
If all else fails, consider contacting a qualified plumber for assistance. A professional plumber has the experience and tools necessary to remove stubborn or damaged drain stoppers without causing further damage to the plumbing system. Attempting to force a stuck stopper or using improper tools can result in costly repairs to the drain assembly or the bathtub itself.
Finally, after removing the stopper, it is essential to thoroughly clean both the stopper and the drain opening to prevent future problems. Use a brush or cloth to remove any remaining debris, hair, or buildup. Consider using a drain cleaner solution to flush out any remaining residue. Regularly cleaning the drain and stopper will help maintain their proper function and prevent clogs from forming.

How To Remove Moen Popup Bathtub Drain Stopper

So Easy How To Remove A Watco Pop Up Drain Plug

How To Remove Bathtub Drain Stopper

Replacing A Tub Drain Bathtub Removal And Replacement

How To Remove Bathtub Drain Stopper

How To Remove A Bathtub Drain Stopper

How To Remove A Bathtub Drain The Home Depot

How Remove Moen Tub Stopper And Unclog Drain

How To Remove A Moen Bathtub Drain Stopper

How To Remove The Bathtub Drain Diy Guide Fixed Today Plumbing
Related Posts

