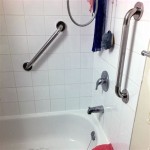
How to Remove Caulking From Acrylic Bathtub Walls
Removing old or damaged caulk from acrylic bathtub walls is a crucial step in maintaining a clean and watertight bathroom. Over time, caulk can become discolored, cracked, or even harbor mold and mildew. Replacing it not only improves the aesthetic appeal of the bathroom but also prevents water damage, which can lead to costly repairs. Acrylic, while durable, is susceptible to scratches and damage from harsh chemicals and abrasive tools. Therefore, taking a careful and systematic approach is essential to remove the old caulk effectively without harming the underlying acrylic surface.
Before embarking on the task, it is important to gather the necessary tools and materials. This preparation phase can significantly streamline the process and minimize the risk of damaging the acrylic surface. The appropriate tools will also make the removal process more efficient and less strenuous.
Safety precautions should also be considered. While removing caulk may seem like a simple task, it can involve the use of sharp tools and potentially irritating chemicals. Protecting oneself with appropriate safety gear is therefore of paramount importance.
Preparing for Caulking Removal
The initial step involves gathering the necessary tools and materials. The essential tools include a plastic putty knife or scraper, a utility knife (preferably with a retractable blade), caulk removal softener or gel, a heat gun or hair dryer (optional), a vacuum cleaner, and cleaning supplies. It is imperative to use a plastic putty knife or scraper, as metal tools can easily scratch the acrylic surface. A utility knife is needed to score and cut through the caulk, but it must be used with extreme caution to avoid damaging the bathtub wall. Caulk removal softeners or gels are specifically designed to break down the caulk's adhesive properties, making it easier to remove. A heat gun or hair dryer can be used to soften the caulk, but care should be taken to avoid overheating the acrylic. A vacuum cleaner is helpful for removing loose caulk debris, and cleaning supplies are necessary to prepare the surface for new caulk.
Once the tools are assembled, the next step is to prepare the work area. Clear the bathtub area of any personal items, such as shampoo bottles and soap dishes. Protect the surrounding surfaces, such as the bathroom floor, with drop cloths or old towels to prevent debris and cleaning solutions from causing damage. Adequate ventilation is also important, especially when using chemical caulk removers. Open windows or turn on the bathroom exhaust fan to ensure proper airflow. Good lighting is also essential to ensure visibility and prevent accidental damage to the acrylic surface.
Safety is paramount when dealing with sharp tools and chemical solutions. Wear safety glasses or goggles to protect eyes from flying debris and potential splashes. Gloves, preferably chemical-resistant gloves, should be worn to protect hands from irritants. A dust mask is advisable if working with moldy caulk, as mold spores can be harmful when inhaled. A well-ventilated area is crucial to minimize exposure to the fumes from chemical caulk removers.
Step-by-Step Caulking Removal Process
The first step in the actual removal process involves softening the existing caulk. Apply caulk removal softener or gel to the caulk lines. Follow the manufacturer's instructions regarding application and dwell time. Allow the softener to penetrate the caulk for the recommended period, typically 15-30 minutes. This will help break down the adhesive bond between the caulk and the acrylic surface, making it easier to remove. Alternatively, a heat gun or hair dryer can be used to soften the caulk. Apply heat to the caulk lines in short bursts, being careful not to overheat the acrylic. Overheating can cause the acrylic to warp or discolor.
After the caulk has been softened, use a utility knife to score along the top and bottom edges of the caulk line. This helps to separate the caulk from the acrylic surface and prevents damage to the surrounding area. Hold the utility knife at a shallow angle and apply gentle pressure. Avoid pressing too hard, as this can scratch the acrylic. Make several passes along the caulk line, gradually deepening the score until the caulk is completely separated from the wall and tub.
With the caulk scored, begin to remove it using a plastic putty knife or scraper. Insert the putty knife under the edge of the caulk and gently pry it away from the acrylic surface. Work slowly and carefully, applying steady pressure. If the caulk is stubborn, reapply caulk remover or use a heat gun to soften it further. Avoid using excessive force, as this can damage the acrylic. For larger sections of caulk, try pulling it away in one continuous piece. For smaller, more fragmented pieces, use the putty knife to scrape them away. If the caulk is particularly old or brittle, it may crumble during removal. In this case, take extra care to remove all the small pieces and debris.
After removing the bulk of the caulk, there will likely be residue remaining on the acrylic surface. Use a clean cloth and mineral spirits or rubbing alcohol to remove any remaining caulk residue. Apply the solvent to the cloth and gently wipe the area until the residue is dissolved. Avoid pouring the solvent directly onto the acrylic surface, as this can cause damage. For stubborn residue, use a scrub brush with soft bristles. Scrub the area gently until the residue is removed. Rinse the area thoroughly with water to remove any traces of the solvent.
Cleaning and Preparing the Surface for Recaulking
After removing the old caulk and residue, it is crucial to thoroughly clean and prepare the surface for new caulk. This step is essential to ensure a strong and lasting bond between the new caulk and the acrylic surface. A clean and dry surface will also prevent the growth of mold and mildew under the new caulk.
Begin by cleaning the area with a mild detergent and water. Use a soft cloth or sponge to scrub the surface, removing any dirt, soap scum, or other contaminants. Rinse the area thoroughly with water to remove all traces of the detergent. Avoid using harsh chemicals or abrasive cleaners, as these can damage the acrylic surface. For areas with mold or mildew, use a solution of bleach and water (1 part bleach to 10 parts water). Apply the solution to the affected areas and let it sit for 10-15 minutes. Scrub the area gently with a soft brush and rinse thoroughly with water. Ensure that all traces of bleach are removed, as bleach can interfere with the adhesion of the new caulk.
After cleaning, allow the area to dry completely before applying new caulk. Use a clean, dry cloth to wipe away any excess water. Allow the area to air dry for several hours, or overnight if possible. A completely dry surface is essential for a strong and lasting caulk bond. To speed up the drying process, a fan can be used to circulate air in the bathroom. Avoid using a heat gun or hair dryer to dry the area, as excessive heat can damage the acrylic.
Before applying new caulk, inspect the area for any gaps or imperfections. Fill any gaps or holes with backer rod or caulk filler. Backer rod is a foam material that is inserted into gaps before caulking. It provides a backing for the caulk and prevents it from sinking into the gap. Caulk filler is a putty-like material that can be used to fill small imperfections in the surface. Apply the backer rod or caulk filler according to the manufacturer's instructions. Ensure that the filler is flush with the surrounding surface. This step will create a smooth and even surface for the new caulk, resulting in a professional-looking finish. Once the filler is dry, lightly sand the area with fine-grit sandpaper to create a smooth surface.
Before beginning the recaulking proceed by masking the area. Apply painter’s tape above and below where the new caulk will be applied. The tape will create a clean line for the caulk and protect the other surfaces from having caulk applied directly to them.
By following these steps, the old caulk can be successfully removed from acrylic bathtub walls, and the surface can be properly prepared for recaulking. This meticulous approach will ensure a clean, watertight seal and prevent water damage to the bathroom.

How To Remove Caulk Ace Hardware

How To Remove Old Caulk Dap Global

How To Remove And Replace Your Tub Shower Caulk Stone S Home Centers

How To Remove Old Moldy Caulk In A Bathtub Without Damage Tips And Tricks Do It The Right Way

How To Remove Old Shower Silicone Caulk And Apply New Look Pro

Most People Are Re Caulking Their Bathtub Wrong Here S The Right Way

How To Remove And Replace Your Tub Shower Caulk Stone S Home Centers

Easily Remove Silicone Caulk Without Chemicals

How To Remove Caulk From Tub Diy Family Handyman

How To Remove Caulk When It S Old And Dingy Hometalk
Related Posts