Before writing, imagine you’re a seasoned plumber explaining the process to someone who has never attempted this task before.
How To Remove a Bathtub Drain Cover: A Comprehensive Guide
Removing a bathtub drain cover is a task that may become necessary for cleaning hair and debris, replacing a damaged cover, or accessing the drain for other plumbing repairs. While seemingly simple, understanding the different drain cover types and the appropriate removal techniques is crucial to avoid damage to the drain assembly or the bathtub itself. This article provides a detailed guide on how to effectively and safely remove various types of bathtub drain covers.
Identifying the Type of Bathtub Drain Cover
Before attempting removal, accurately identifying the specific type of drain cover is paramount. Bathtub drain covers come in several common designs, each requiring a different removal method. The most frequently encountered types include:
Pop-Up Drains: These drains feature a stopper that raises and lowers with a lever. The stopper is often a separate piece that fits snugly into the drain opening.
Lift-and-Turn Drains: These drains have a stopper that is twisted to open and close the drain. They usually have a visible screw on top of the stopper.
Toe-Touch Drains: These drains operate with a simple push of the foot. Pressing the stopper opens or closes the drain. These can be more complex to remove.
Snap-In Drains: These covers feature a simple, flat design that snaps directly into the drain opening. They are generally easy to remove.
Grid Drains: These are simple, stationary covers with holes or slots that allow water to pass through. They are often held in place by screws or can simply be lifted out if they are not attached.
Accurate identification is the first step in ensuring a successful and damage-free removal process. Misidentifying the drain type can lead to the application of incorrect techniques, potentially causing damage to the fixture.
Tools and Materials Required
Having the right tools readily accessible is crucial for efficiency and to minimize the risk of damage during the drain cover removal process. The specific tools needed will vary depending on the type of drain cover, but a general list includes:
Screwdrivers: A Phillips-head screwdriver and a flathead screwdriver are essential for various drain types. The size of the screwdriver head should match the screw on the drain cover.
Pliers: A pair of needle-nose pliers can be helpful for gripping small parts or maneuvering within the drain opening.
Drain Tool or Drain Key: For pop-up drains, a specialized drain tool or drain key is often needed to access and loosen the stopper.
Putty Knife or Flat Scraper: This tool may be necessary to gently loosen a stuck or corroded drain cover. The thin edge can be carefully inserted between the cover and the tub surface.
Gloves: Wearing gloves protects the hands from dirt, grime, and potential contaminants found in the drain.
Clean Rags: Rags are useful for wiping up spills, cleaning parts, and providing a clean surface to place removed components.
Penetrating Oil: For drain covers that are stuck due to corrosion, a penetrating oil can help to loosen them. Apply sparingly and allow it time to work.
Small Container: A small container is useful for containing any small parts, such as screws or washers, that are removed during the process.
Gathering these tools before beginning the removal process ensures that everything is readily available and prevents unnecessary delays.
Step-by-Step Removal Procedures for Different Drain Types
Once the drain type has been identified and the necessary tools have been gathered, the specific removal procedure can be initiated. The following sections outline the recommended steps for removing the most common types of bathtub drain covers.
Removing a Pop-Up Drain Cover:
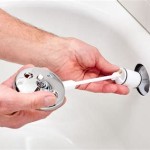
Pop-up drains are a common type. The process begins by lifting the stopper to its highest position. Look for a screw, often located at the base or side of the stopper. If a screw is present, use the appropriate screwdriver to loosen it. If there is no visible screw, the stopper might be held in place by friction or a clip mechanism.
If a drain key or specialized tool is needed, insert it into the drain and engage the stopper mechanism. Twist or manipulate the tool according to its design to release the stopper. Once the stopper is loosened, carefully lift it out of the drain. Be mindful of any connecting linkages or components that might be attached.
After removing the stopper, inspect the drain opening for any accumulated hair or debris. Clean the drain thoroughly before replacing the stopper.
Removing a Lift-and-Turn Drain Cover:
Lift-and-turn drains are characterized by the rotating stopper. The first step is to locate the screw on top of the stopper. Using the appropriate screwdriver, carefully unscrew the screw. If the screw is corroded or difficult to turn, apply a small amount of penetrating oil and allow it a few minutes to work.
After removing the screw, the stopper should be able to be lifted out of the drain. If the stopper is stuck, gently wiggle it back and forth while pulling upwards. Avoid applying excessive force, as this could damage the drain assembly.
Once the stopper is removed, inspect and clean the drain opening. Replace any worn or damaged components before reassembling the drain.
Removing a Toe-Touch Drain Cover:
Toe-touch drains can be more complex. Start by inspecting the stopper for any visible screws or release mechanisms. Some toe-touch drains have a removable top cap that can be unscrewed to reveal the internal mechanism. Others might require the entire stopper to be unscrewed from the drain body.
To unscrew the entire stopper, grip it firmly and rotate it counterclockwise. If the stopper is difficult to turn, use a wrench or pliers, but protect the finish with a cloth to prevent scratches. Be careful not to damage the internal components of the drain. If you can remove the top cap, you can often access the stopper by removing a screw inside.
Once the stopper is loosened, carefully remove it from the drain. Pay attention to the orientation of any internal components to ensure proper reassembly.
Removing a Snap-In Drain Cover:
Snap-in drain covers are the simplest to remove. Typically, these covers are held in place by friction. To remove them, simply grip the edge of the cover and pull upwards with a firm, steady motion. A flathead screwdriver or putty knife can be used to gently pry the cover if it is particularly tight.
Be careful not to scratch the bathtub surface when prying the cover. Once the cover is removed, clean the drain opening and replace the cover by aligning it with the drain and pressing it firmly into place.
Removing a Grid Drain Cover:
Grid drains are the simplest in design. These typically have screws attaching them to the drain, or they may be sitting loosely. If there is a screw, remove the screws and lift the drain cover up and out of the drain. If there are no screws, try prying the cover up with a flathead screwdriver. If you pry, be careful not to damage the bathtub finish.
Addressing Common Challenges
Several challenges may arise during bathtub drain cover removal. One of the most common is a stuck drain cover, often due to corrosion or accumulated debris. In such cases, applying penetrating oil and allowing it to soak for several minutes can help to loosen the cover. Gentle tapping with a rubber mallet can also help to break the bond.
Another common challenge is stripped screws. If the screw head is damaged, it may be difficult to grip with a screwdriver. In this situation, using a screw extractor or a specialized screwdriver designed for stripped screws can be effective. Alternatively, a rubber band placed between the screwdriver and the screw head can sometimes provide enough grip to turn the screw.
If the drain cover is particularly difficult to remove, it may be necessary to consult a professional plumber. Forcing the cover can damage the drain assembly or the bathtub itself, resulting in costly repairs. A plumber has the tools and expertise to safely remove the cover without causing damage.
Preventive Measures and Maintenance
To prevent future difficulties with drain cover removal, regular maintenance is essential. This includes periodically cleaning the drain to remove accumulated hair and debris. Using a drain screen or strainer can help to prevent larger objects from entering the drain and causing clogs.
Applying a small amount of plumber's grease to the threads of screws and the surfaces of drain covers can help to prevent corrosion and make removal easier in the future. Avoid using harsh chemicals or abrasive cleaners, as these can damage the drain assembly and the bathtub finish.
Regular inspection of the drain cover and surrounding area can help to identify potential problems early on. Addressing minor issues promptly can prevent them from escalating into more significant problems that require extensive repairs.
Understanding the different types of bathtub drain covers, using the correct tools, and following the appropriate removal procedures are crucial for a successful outcome. Regular maintenance and preventive measures can help to ensure that the drain functions properly and that future removals are straightforward and hassle-free.

How To Remove A Bathtub Drain The Home Depot

4 Easy Ways To Remove A Tub Drain Stopper Wikihow

How To Remove A Bathtub Drain Stopper

How To Remove A Bathtub Drain Stopper Mr Rooter

How To Remove A Bathtub Drain Forbes Home

How To Remove A Bathtub Drain The Home Depot

4 Easy Ways To Remove A Tub Drain Stopper Wikihow

How To Remove A Bathtub Drain Stopper

How To Remove Bathtub Drain Stopper That Spins Freely

How To Remove A Bathtub Drain Stopper
Related Posts

