How to Reglaze a Bathtub
Reglazing a bathtub is a great way to update the look of your bathroom without having to replace the entire fixture. It's a relatively simple process that can be completed in a few hours. Here are the essential steps on how to reglaze a bathtub:
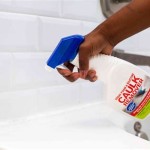
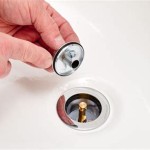
Prepare the Bathtub
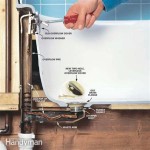
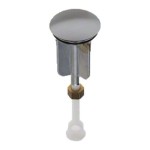
Start by cleaning the bathtub thoroughly with a degreaser and a sponge. Remove any hardware, such as the drain stopper and overflow plate. Sand the surface of the bathtub lightly with fine-grit sandpaper to remove any scratches or imperfections.
Apply the Primer
Apply a thin coat of bathtub primer to the entire surface of the bathtub. This will help the reglazing material to adhere better. Allow the primer to dry completely according to the manufacturer's instructions.
Apply the Reglazing Material
Mix the reglazing material according to the manufacturer's instructions. Apply a thin, even coat of the material to the entire surface of the bathtub, using a brush or roller. Allow the first coat to dry completely.
Apply Additional Coats
Apply two or three additional coats of the reglazing material, allowing each coat to dry completely before applying the next. The more coats you apply, the more durable the finish will be.
Sand and Polish
Once the final coat of reglazing material has dried, sand the surface of the bathtub lightly with fine-grit sandpaper to smooth out any rough spots. Polish the surface of the bathtub with a polishing compound to bring out the shine.
Reinstall the Hardware
Reinstall the drain stopper and overflow plate. Allow the reglazing material to cure for 24 hours before using the bathtub.
By following these steps, you can reglaze your bathtub and give it a fresh, new look.

How To Reglaze A Bathtub And Tile Surround Daly Digs

Tub Reglazing How To Prepare Your Bathtub Surface

How Long Does Reglazing A Bathtub Last

From 279 Bathtub Refinishing Tile Reglazing Az

How Much Does Reglazing Cost Newshine Bathtub Refinishing

How To Reglaze A Bathtub Step By Full Reglazing In Depth Process Dp Tubs

West Palm Beach Bathtub Reglazing Resurfacing And Refinishing 561 394 6116

From 279 Bathtub Refinishing Tile Reglazing Az

Bathroom Resurfacing Resurface Old Bathtub Alaska Superior Refinishing Of

A Bathtub Refinishing Resurfacing Reglazing Tile Countertop Bathroom Columbus Oh