How to Re-Caulk a Moldy Bathtub: A Step-by-Step Guide
Mold in the bathtub can be unsightly, unhygienic, and harmful to health. If you have noticed mold growth around your bathtub, it's essential to address the issue promptly. Re-caulking the tub is a crucial step in eliminating mold and improving the overall aesthetics of your bathroom.
Re-caulking requires some preparation and careful execution. Here's a step-by-step guide to help you do it right:
Step 1: Safety First
Before you begin, ensure you have adequate ventilation in the bathroom. Mold spores can be harmful, so it's best to open windows or use a fan to keep the air circulating.
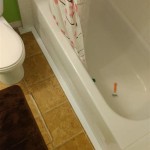
Step 2: Remove the Old Caulk
Use a utility knife or caulk removal tool to carefully remove the old caulk around the bathtub. Take your time and ensure you get all the old caulk out, especially in areas where mold has grown.
Step 3: Clean the Surface
Thoroughly clean the bathtub surface where you'll be applying the new caulk. Use a cleaner designed to remove mold and mildew. Rinse the area well with clean water and allow it to dry completely.
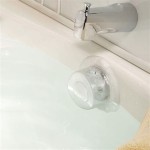
Step 4: Apply Painter's Tape
Apply painter's tape around the edges of the bathtub, about 1/8 inch away from the edge. This will help you achieve clean, straight lines when applying the new caulk.
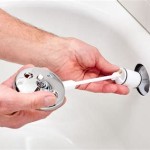
Step 5: Apply the New Caulk
Use a caulk gun to apply the new caulk along the edges of the bathtub. Hold the gun at a 45-degree angle and apply a smooth, even bead of caulk. Make sure the caulk fills the gap between the tub and the wall or tiles.
Step 6: Smooth the Caulk
Use a caulk finishing tool or your finger to smooth the caulk. Wet your finger or the tool to prevent the caulk from sticking. Ensure the caulk is evenly distributed and forms a tight seal.
Step 7: Remove the Painter's Tape
Gently remove the painter's tape while the caulk is still wet. This will give you clean, precise edges.
Step 8: Let the Caulk Cure
Allow the caulk to cure for at least 24 hours before using the bathtub. Refer to the manufacturer's instructions for the specific curing time. Keep the area well-ventilated during this time.
Additional Tips:
- Use a high-quality caulk specifically designed for bathrooms and showers.
- Choose a caulk color that matches the bathtub or bathroom décor.
- If you notice mold growth in the future, inspect the caulk and reapply it if necessary.
- Regular cleaning and maintenance can help prevent mold growth in the bathroom.

How To Replace Bathroom Caulking Remove Mold Completely Diy Re

Diffe Methods To Safely Remove Moldy Caulk

How To Replace Moldy Caulk In A Bathtub Or Shower

I Found Mold In The Shower Caulking What Should Do

How To Remove Mold From Shower Caulking Home Like You Mean It

How To Remove Mold From Shower Caulking Tips Tricks And Secrets

How To Replace Moldy Caulk In A Bathtub Or Shower

Dealing With Nasty Grout Caulk In The Apartment Bathroom Door Sixteen

How To Replace Moldy Caulk In A Bathtub Or Shower

Fixing Moldy Caulking In The Bathroom 12 Steps With Pictures Instructables