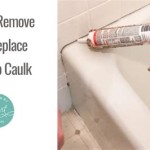
How To Re-Caulk A Bathtub
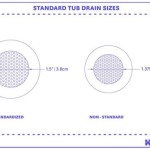
Caulk is a waterproof sealant that is used to fill gaps between the bathtub and the surrounding walls or tiles. Over time, caulk can become discoloured, cracked, or moldy, which can lead to leaks and water damage.
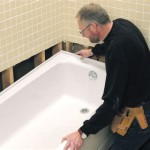
Re-caulking a bathtub is a relatively simple task that can be completed in a few hours. Here are the steps on how to do it:
1. Remove the Old Caulk
Use a utility knife or a caulk removal tool to carefully cut away the old caulk. Be careful not to damage the bathtub or the surrounding surfaces.
2. Clean the Surface
Once the old caulk is removed, clean the surface of the bathtub and the surrounding area with a cleaner and degreaser. This will help to remove any dirt, debris, or mildew that could prevent the new caulk from adhering properly.
3. Apply Painter's Tape
Apply painter's tape to the edges of the bathtub and the surrounding surfaces. This will help to create a clean line and prevent the caulk from getting on the surrounding surfaces.
4. Apply The Caulk
Cut the tip of the caulk tube at a 45-degree angle. Apply a thin, even bead of caulk to the gap between the bathtub and the surrounding surfaces. Use your finger or a caulk finishing tool to smooth out the caulk and create a neat finish.
5. Remove the Painter's Tape
Once the caulk has been applied, remove the painter's tape. Be careful not to smudge the caulk.
6. Allow The Caulk To Dry
Allow the caulk to dry completely before using the bathtub. The drying time will vary depending on the type of caulk that you use, but most caulks will take 24 hours to dry completely.
Re-caulking a bathtub is an important task that can help to prevent leaks and water damage. By following these steps, you can easily re-caulk your bathtub and keep it looking its best.

How To Caulk A Bathtub On Sutton Place

How To Re Caulk A Bathtub

How To Re Caulk A Bathtub

How To Caulk A Bathtub 13 Steps With Pictures Wikihow

How To Caulk A Bathtub 13 Steps With Pictures Wikihow

Caulking A Bathtub Simple Steps For Successful Seal

How To Caulk A Shower Or Tub True Value

How To Caulk A Bathtub On Sutton Place
Recaulk A Tub In 5 Easy Steps Plus My Trick For Perfect Lines Living Rich On Less

Recaulking Failing Caulk Is Important When Should I Recaulk My Shower
Related Posts