How To Put Caulking Around a Bathtub
Caulking around a bathtub is an essential part of bathroom maintenance. It creates a waterproof seal, preventing water from seeping into the surrounding walls and causing damage. A fresh coat of caulk can also enhance the appearance of the bathroom, making it look cleaner and more modern. This guide will provide a step-by-step explanation of how to apply bathtub caulk effectively.
1. Preparing the Surface
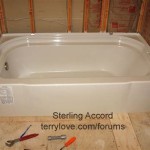
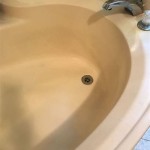
Before applying new caulk, you must thoroughly prepare the existing surface. This includes removing old caulk, cleaning the area, and ensuring it is dry.
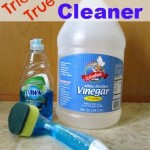
Start by removing the old caulk using a utility knife or a caulk remover tool. Carefully score the old caulk along its edge and pry it away from the surface. You may need to use a putty knife to remove any stubborn residue. Once the old caulk is removed, clean the area with a cleaning solution suitable for your bathroom surface. Use a damp cloth and a mild cleaner, such as dish soap or a bathroom cleaner, to remove any dirt, grime, or mildew. Rinse the area thoroughly and allow it to dry completely before proceeding.
2. Applying the Caulk
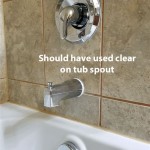
Once the surface is prepared, you can begin applying the caulk. Select a high-quality silicone caulk specifically designed for bathrooms. It is also essential to use a caulk gun designed to comfortably and efficiently apply caulk. Ensure the caulk gun is loaded correctly, and you have a clean nozzle tip.
Begin by applying the caulk in a continuous bead along the bathtub edge. Use a steady hand and apply even pressure to ensure a smooth and consistent bead. It's important to create a slightly rounded bead, slightly wider than the intended width of the caulk line. It will allow for proper tool smoothing.
3. Smoothing and Finishing
After applying the caulk, use a damp finger or a caulk tool to smooth and shape the bead. Work the caulk into the seam and create a smooth, even line. Avoid pressing too hard, which can push the caulk into the tub or wall.
Allow the caulk to dry completely before applying any sealant or paint. The drying time will vary depending on the type of caulk and the environmental conditions. Refer to the manufacturer's instructions for specific drying times.
For a professional look, you can use a caulk remover tool to clean up any excess caulk. This tool helps to create a smooth, even line and remove any imperfections.

How To Caulk A Bathtub 13 Steps With Pictures Wikihow

Most People Are Re Caulking Their Bathtub Wrong Here S The Right Way

How To Caulk A Shower Or Bathtub Diy Family Handyman

How To Caulk A Bathtub 13 Steps With Pictures Wikihow

How To Caulk A Bathtub

How To Re Caulk A Bathtub

How To Re Caulk A Shower Or Bathtub

Prevent Water Damage Replace The Old Caulk Around Your Tub 1 Tom Plumber

Bathroom Plumbing And Caulking Tips How To Caulk A Bathtub

How To Caulk A Shower Or Bathtub True Value Hardware
Related Posts