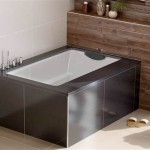
How To Paint Bathtub Tile: A Comprehensive Guide
Painting bathtub tile presents a cost-effective alternative to complete bathroom renovations. Updating the appearance of outdated or discolored tile can significantly enhance the aesthetic appeal of a bathroom without the extensive labor and expense associated with demolition and replacement. This process, however, requires careful preparation, appropriate materials, and meticulous application to ensure a durable and visually pleasing finish.
The success of painting bathtub tile hinges on proper surface preparation. Existing soap scum, mildew, and mineral deposits must be thoroughly removed. Furthermore, a strong bonding primer specifically designed for glossy surfaces is essential. The choice of paint, typically a two-part epoxy or specialized tile paint, is also critical for withstanding the humid environment and frequent water exposure within a bathroom.
Key Point 1: Essential Preparation for Bathtub Tile Painting
Prior to commencing any painting, thorough cleaning and surface preparation are paramount. This stage directly impacts the adhesion and longevity of the paint finish. Ignoring this step can lead to premature peeling, chipping, and an overall unsatisfactory result. The process involves several sub-steps that demand attention to detail.
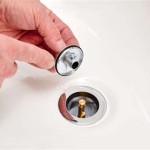
Begin by removing all items from the bathtub and surrounding area. This includes shower curtains, bath mats, toiletries, and any detachable hardware such as showerheads or drain stoppers. Clearing the space provides unobstructed access to the tile surface and prevents accidental paint splatters on surrounding fixtures.
Next, perform a preliminary cleaning to remove loose debris, dust, and dirt. Use a brush or vacuum attachment to eliminate any surface particles. This initial cleaning facilitates the subsequent cleaning and degreasing processes.
The primary cleaning step involves a heavy-duty cleaner and degreaser specifically formulated for bathrooms. These cleaners are designed to dissolve soap scum, mildew, and hard water stains that commonly accumulate on bathtub tile. Follow the manufacturer's instructions for dilution and application. Typically, the cleaner is sprayed or applied with a sponge, allowed to dwell for a specified period, and then thoroughly rinsed with clean water.
For stubborn stains or mildew, a more aggressive approach may be required. A solution of bleach and water (in a well-ventilated area, with appropriate safety precautions such as gloves and eye protection) can be applied to affected areas. Allow the bleach solution to sit for several minutes before scrubbing and rinsing thoroughly. Alternatively, specialized mildew removers can be employed. Always test any cleaning solution in an inconspicuous area first to ensure it does not damage the tile surface.
After cleaning, thoroughly rinse the tile with clean water to remove all traces of the cleaning solution. Any residual cleaner can interfere with the adhesion of the primer and paint. Allow the tile to dry completely before proceeding to the next step.
Once the tile is dry, inspect it for any cracks, chips, or damaged grout. These imperfections should be repaired before painting. Use a waterproof epoxy filler to repair chips and cracks in the tile. For damaged grout, remove the loose or crumbling grout with a grout removal tool and replace it with new grout. Allow the filler and grout to cure completely according to the manufacturer's instructions before continuing.
Sanding the tile surface is a critical step in preparing it for painting. Sanding creates a slightly rough surface that provides better adhesion for the primer. Use a fine-grit sandpaper (around 220-grit) to lightly sand the entire tile surface. Be careful not to apply excessive pressure, as this can damage the tile. The goal is to create a profile for the primer to grip, not to remove the existing finish entirely.
After sanding, thoroughly clean the tile again to remove any sanding dust. Use a tack cloth or damp cloth to wipe down the entire surface. Ensure that the tile is completely clean and dry before proceeding to the next step of applying the primer.
Key Point 2: Selecting and Applying the Correct Primer and Paint
Choosing the right primer and paint is crucial for a durable and long-lasting finish on bathtub tile. Not all primers and paints are created equal, and selecting products specifically formulated for bathroom environments is essential. These products must be able to withstand humidity, water exposure, and frequent cleaning.
The primer's primary function is to create a strong bond between the tile surface and the paint. Look for a primer specifically designed for glossy surfaces, such as tile or ceramic. Epoxy-based primers are often recommended for their excellent adhesion and resistance to moisture. Consider a two-part epoxy primer for maximum durability. Apply the primer in thin, even coats, following the manufacturer's instructions for application and drying time. Typically, two coats of primer are recommended for optimal adhesion.
When selecting paint, two-part epoxy paints are generally considered the best option for bathtub tile. These paints offer superior durability, water resistance, and chemical resistance compared to regular paints. They are designed to withstand the harsh conditions of a bathroom environment and provide a hard, durable finish. Alternatively, specialized tile paints are available, which are formulated specifically for use on tile surfaces. These paints often contain additives that enhance their adhesion and durability.
Before applying the paint, thoroughly mix the two parts of the epoxy paint according to the manufacturer's instructions. Accurate mixing is essential for proper curing and performance. Use a paint stick or mechanical mixer to ensure that the two parts are completely combined. Allow the mixture to sit for the recommended induction time before applying.
Apply the paint in thin, even coats using a high-quality brush or roller. Avoid applying too much paint in one coat, as this can lead to drips and runs. Two to three thin coats are typically recommended for optimal coverage and durability. Allow each coat to dry completely before applying the next coat, following the manufacturer's recommended drying time.
When applying paint, work in a well-ventilated area and wear appropriate safety gear, such as a respirator and gloves. Epoxy paints can release fumes that can be harmful if inhaled. Ensure adequate ventilation to minimize exposure to these fumes. Also, protect surrounding surfaces with drop cloths or plastic sheeting to prevent paint splatters.
After applying the final coat of paint, allow it to cure completely according to the manufacturer's instructions. Curing time can vary depending on the type of paint and the ambient temperature. Avoid using the bathtub or exposing the painted surface to water until the paint has fully cured. Premature exposure to water can damage the uncured paint and compromise its durability.
Key Point 3: Proper Application Techniques and Post-Painting Care
The method of application significantly influences the final appearance and longevity of the painted bathtub tile. Consistent, even coats and careful attention to detail are crucial for achieving a professional-looking finish. Proper post-painting care is equally important for maintaining the integrity of the painted surface.
Employing the appropriate tools is paramount for a smooth, uniform finish. High-density foam rollers are often preferred for applying paint to tile surfaces, as they minimize brush strokes and provide even coverage. Use a high-quality brush for detail work, such as painting corners and edges. Ensure that both the brush and roller are clean and in good condition before use.
When applying paint, maintain a consistent application technique. Avoid applying too much pressure, which can cause the paint to sag or run. Use smooth, overlapping strokes to ensure even coverage. Pay close attention to corners and edges, ensuring that these areas are thoroughly coated.
Between coats, lightly sand the painted surface with fine-grit sandpaper (around 320-grit) to remove any imperfections or brush strokes. This step creates a smoother surface for the subsequent coat of paint to adhere to. Be sure to remove all sanding dust before applying the next coat.
Once the final coat of paint has been applied and allowed to cure completely, consider applying a clear sealant for added protection. A clear epoxy sealant can provide an extra layer of protection against water damage and wear and tear. Apply the sealant in thin, even coats, following the manufacturer's instructions for application and drying time.
After the paint has cured and any sealant has been applied, allow the bathroom to air out completely to remove any residual fumes. Ensure adequate ventilation by opening windows and doors. This will help to dissipate any lingering odors and create a more comfortable environment.
Maintaining the painted bathtub tile involves regular cleaning and care. Use a mild, non-abrasive cleaner to clean the tile surface. Avoid using harsh chemicals or abrasive cleaners, as these can damage the paint finish. Wipe down the tile after each use to prevent soap scum and mildew from building up. Regularly inspect the painted surface for any signs of damage, such as chips or cracks. Repair any damage promptly to prevent further deterioration.
Avoid using abrasive cleaning tools, such as scouring pads or steel wool, as these can scratch the painted surface. Instead, use a soft sponge or cloth to clean the tile. Also, be mindful of the water temperature when cleaning the tile. Extremely hot water can soften the paint and make it more susceptible to damage.
By following these guidelines, homeowners can successfully paint their bathtub tile and achieve a durable, visually appealing finish that revitalizes their bathroom. While painting bathtub tile is a viable option, remember its limitations compared to full tile replacement. The longevity of the painted surface depends heavily on the quality of materials used, the thoroughness of the preparation, and the adherence to proper application techniques. Regular maintenance and careful cleaning are essential for preserving the beauty and integrity of the painted tile surface.

Yes You Can Paint Your Bathtub And Tile Here S How Toolbox Divas

One Room Challenge How To Paint Shower Tile Updated Your Ugly Dated For 50

How To Refinish Outdated Tile Yes I Painted My Shower Wildfire Interiors

How To Diy Paint Shower Tile One Year Later Review Rust Oleum Tub Refinishing Kit

How To Paint A Tub With Rustoleum What Not Do

Let S Paint The Shower Tile My Perpetual Project

Bathroom Makeover Part 2 How To Paint Shower Tile Our Aesthetic Abode

How To Paint Shower Tiles White Petite Modern Life

How To Paint Tile Floor Angela Marie Made

Refresh Your Bathroom Tile With Grout Paint Arched Manor
Related Posts