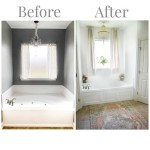
How to Install a Bathtub Surround Wall: A Comprehensive Guide
Installing a bathtub surround wall is a common home improvement project that enhances the aesthetic appeal and functionality of a bathroom. A well-installed surround can prevent water damage, reduce mold and mildew growth, and provide a durable, easy-to-clean surface. This article provides a detailed guide on how to install a bathtub surround wall, covering preparation, installation, and finishing touches.
I. Preparation and Planning
Before commencing the installation process, thorough preparation is crucial. This involves assessing the existing conditions, gathering necessary tools and materials, and planning the installation sequence. A well-prepared workspace minimizes delays and ensures a professional-looking result.
1. Assessing the Existing Conditions: Begin by carefully examining the existing wall surrounding the bathtub. Look for signs of water damage, mold, or mildew. Address any underlying issues before proceeding with the surround installation. Ensure that the existing wall is structurally sound and free from loose or crumbling material. If there is existing tile, determine whether it needs to be removed. If the tile is firmly adhered and in good condition, a surround can sometimes be installed directly over it, though this may require adjustments to plumbing fixtures and trim.
2. Gathering Tools and Materials: To complete the installation effectively, assemble all necessary tools and materials. Essential tools include a measuring tape, level, pencil, utility knife, caulk gun, drill with appropriate drill bits, circular saw or jigsaw (for cutting surround panels), safety glasses, and gloves. Required materials include the bathtub surround kit (panels, corner pieces, adhesive), caulk (silicone or acrylic latex), shims, and cleaning supplies.
3. Planning the Installation Sequence: Review the manufacturer's instructions for the specific bathtub surround kit. Each kit may have slightly different installation procedures. It is important to understand the recommended sequence of installation, including the order in which panels are installed and the adhesive application process. A clear understanding of the process will prevent errors and ensure a smooth installation.
4. Ensuring Proper Ventilation: Working in a well-ventilated area is essential, especially when using adhesives and sealants. Open windows and doors to allow for adequate air circulation. Consider using a fan to improve ventilation and dissipate any fumes. Proper ventilation reduces the risk of respiratory irritation and ensures a safer working environment.
II. Installation Process
The installation process involves carefully adhering the surround panels to the wall, ensuring a watertight seal, and properly aligning all components. Precision and attention to detail are critical for achieving a professional and long-lasting result.
1. Preparing the Walls: The wall surface must be clean, dry, and free of any debris. If old tile was removed, ensure that all mortar or adhesive residue is removed as well. Use a scraper or putty knife to remove any remaining material. Clean the wall with a suitable cleaning solution to remove any dirt, grease, or soap scum. Rinse the wall thoroughly with water and allow it to dry completely before proceeding.
2. Dry Fitting the Panels: Before applying adhesive, dry fit each panel to ensure proper fit and alignment. Hold the panels up against the wall to check for any gaps or overlaps. Use a pencil to mark any areas that need to be trimmed or adjusted. This step is crucial for identifying potential problems and making necessary adjustments before the adhesive is applied. Proper dry fitting ensures a seamless and professional-looking installation.
3. Cutting the Panels: If the panels need to be cut to fit the dimensions of the bathtub area, use a circular saw or jigsaw. Measure carefully and mark the cutting lines clearly. When cutting, use a fine-tooth blade to minimize chipping or splintering. Support the panel during cutting to prevent it from flexing or breaking. Take your time and make precise cuts to ensure a snug fit against the walls and tub.
4. Applying Adhesive: Apply adhesive to the back of the surround panels according to the manufacturer's instructions. Typically, the adhesive is applied in beads or ribbons, covering the entire surface evenly. Avoid applying too much adhesive, as this can cause the panels to slide or bulge. Follow the recommended drying time for the adhesive before proceeding to the next step. Using the correct type and amount of adhesive is essential for a secure and long-lasting bond between the panels and the wall.
5. Installing the Panels: Carefully position the first panel against the wall, aligning it with the top edge of the bathtub and the adjacent wall. Press the panel firmly against the wall to ensure good contact with the adhesive. Use shims to hold the panel in place if necessary. Repeat this process for the remaining panels, ensuring that each panel is properly aligned and secured. Work quickly but carefully to prevent the adhesive from drying before the panels are in place.
6. Installing Corner Pieces: Many bathtub surround kits include corner pieces to provide a clean and finished look at the corners of the enclosure. Apply adhesive to the back of the corner pieces and position them carefully over the seams between the panels. Press firmly to ensure good adhesion. Use caulk to seal the edges of the corner pieces and prevent water from seeping behind the surround.
III. Sealing and Finishing
Once the panels and corner pieces are installed, sealing the seams and edges with caulk is crucial for creating a watertight barrier. Proper caulking prevents water damage and mold growth, ensuring the longevity of the surround. Finishing touches, such as installing trim and cleaning the area, complete the installation process.
1. Applying Caulk: Apply a bead of caulk along all seams between the panels, where the panels meet the bathtub, and around any fixtures, such as faucets or showerheads. Use a high-quality silicone or acrylic latex caulk that is specifically designed for bathrooms. Ensure that the caulk is applied smoothly and evenly, creating a watertight seal. Use a wet finger or a caulk smoothing tool to remove excess caulk and create a clean, professional-looking finish.
2. Curing Time: Allow the caulk to cure completely according to the manufacturer's instructions. This typically takes 24 to 48 hours. Avoid using the shower or bathtub during the curing time to ensure that the caulk sets properly. Proper curing is essential for creating a durable and watertight seal.
3. Installing Trim (Optional): Some bathtub surround kits include trim pieces to cover the edges of the panels and provide a finished look. Install the trim according to the manufacturer's instructions. Use adhesive or small nails to secure the trim in place. Trim can enhance the appearance of the surround and provide additional protection against water damage.
4. Cleaning and Inspection: After the caulk has cured and any trim has been installed, clean the entire area thoroughly. Remove any excess adhesive, caulk, or debris. Inspect the surround carefully to ensure that all seams are properly sealed and that there are no gaps or imperfections. Address any issues promptly to prevent water damage. Cleaning and final inspection are essential for ensuring a professional and long-lasting installation.
5. Re-installing Plumbing Fixtures: Once the surround installation is complete, re-install any plumbing fixtures that were removed, such as showerheads, faucets, and drain components. Ensure that all connections are tight and leak-free. Apply plumber's tape to threaded connections to prevent leaks. Test the plumbing fixtures thoroughly to ensure that they are functioning properly.
Installing a bathtub surround wall is a manageable DIY project that can significantly improve the appearance and functionality of a bathroom. By following these detailed steps and paying close attention to detail, homeowners can achieve a professional-looking result that enhances the value and enjoyment of their home.

How To Install A Bath Tub Surround

How To Install A Bath Tub Surround

How To Install A Bath Tub Surround

How To Install A Glue Up Shower Enclosure The Home Depot

3 Ways To Install A Tub Surround Wikihow Life

The Complete Guide To Installing Tile On Shower Or Bathtub Walls

How To Install A Bathtub An Acrylic Tub And Surround Diy

How To Tile A Bathtub Surround The Handyman S Daughter

How To Install A Bath Tub Surround

Semi Diy Bathroom Remodel Replacing A Tub Surround The Bathtub Tile
Related Posts