How to Install Bathtub Panels
Bathtub panels, also known as surround panels, are a popular choice for bathroom renovations. They offer a quick and easy way to update the look of your bathtub without the hassle and expense of a full-blown remodel. They are typically made from materials like PVC, acrylic, or fiberglass, making them water-resistant and easy to clean. Installing bathtub panels requires some basic DIY skills and tools, but it's a project that most homeowners can handle themselves. Here's a step-by-step guide to help you install your bathtub panels successfully.
Step 1: Preparing the Bathtub and Wall
Before you begin, it's crucial to prepare the bathtub and surrounding wall area. This involves cleaning the area and making sure everything is level and smooth. 1.
Clean the area:
Remove any existing caulk, mildew, soap scum, or other debris from the bathtub and surround. 2.Level the area:
Ensure the bathtub and surrounding wall are level. If there are any uneven areas, you may need to use a leveling compound to smooth them out. 3.Patch any cracks or holes:
Fill any cracks or holes in the wall with patching compound or spackle. Once it dries, sand the area smooth for a clean finish.Step 2: Measuring and Cutting the Panels
The next step is to measure the dimensions of the bathtub and cut the panels to size. 1.
Measure the area:
Measure the height, width, and depth of the area where the panels will be installed. 2.Cut the panels:
Use a sharp utility knife or a circular saw with a fine-tooth blade to cut the panels to the required dimensions. 3.Ensure proper fit:
Test-fit the panels before applying any adhesives or fasteners. Make adjustments as needed to ensure a perfect fit. Remember to measure twice and cut once!Step 3: Installing the Bathtub Panels
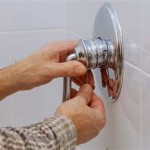
Once the panels are cut to size, you can start installing them. Most bathtub panels come with adhesive strips or clips, making installation a simple process. 1.
Apply adhesive strips:
Clean the back of the panels with rubbing alcohol to ensure a secure bond. Apply the adhesive strips to the back of the panels according to the manufacturer's instructions. 2.Install panels:
Starting from the bottom, carefully press the panels against the wall, ensuring they are lined up correctly. Use a level to ensure that the panels are straight. 3.Secure with clips:
If the panels come with clips, attach them to the panel edges and secure them to the wall. Be sure to follow the manufacturer's instructions for installing the panels, as different brands may have slightly different methods.Step 4: Caulking and Finishing Touches
After installing the panels, you need to seal the gaps between the panels and the bathtub, as well as around the edges, using caulk. 1.
Apply caulk:
Use a caulk gun to apply a bead of caulk around the edges of the panels and along any seams where necessary. 2.Smooth the caulk:
Use a damp finger or a caulk tool to smooth out the caulk and create a clean finish. 3.Clean up:
Once the caulk is dry, wipe away any excess residue with a damp cloth. For a more polished look, you can install trim pieces around the edges of the panels.Step 5: Installation Tips
Here are a few tips for a successful installation: *
Wear gloves:
Wear gloves to protect your hands during the installation process. *Use a sharp blade:
A sharp utility knife or circular saw will ensure clean cuts and prevent the panels from chipping. *Take your time:
Don't rush the installation process. Measuring correctly and double-checking your work will ensure a professional finish. *Follow manufacturer instructions:
Carefully follow the manufacturer's instructions for your specific brand of bathtub panels.Step 6: Maintenance
Once the panels are installed, regular cleaning and maintenance will keep them looking their best. 1.
Clean with mild soap and water:
Clean the panels with a mild soap and water solution and a soft cloth. 2.Avoid harsh chemicals:
Avoid using harsh chemicals or abrasive cleaners that could damage the panels. 3.Check for damage:
Regularly check the panels for any signs of damage, such as scratches, cracks, or loose clips.
How To Install A Bath Tub Surround

How To Fit A Bath Panel Step By Guide

How To Fit An Acrylic Bath Panel Bathroom Installation Guides From Victoria Plum

How To Install A Bath Tub Surround

How To Install A Glue Up Shower Enclosure The Home Depot

The Complete Guide To Installing Tile On Shower Or Bathtub Walls

How To Install Wood Planking On A Bathtub Brepurposed

Installing A Bathtub Access Panel 15 Acre Homestead

Replacing A Bathtub Fine Homebuilding

How To Install A Glue Up Shower Enclosure The Home Depot
Related Posts