How to Install a Bathtub Door
Installing a bathtub door can significantly enhance your bathroom's functionality and aesthetic appeal. Bathtub doors provide privacy, prevent water from splashing, and contribute to a more modern and luxurious feel. However, the installation process can seem daunting, but with the right tools, materials, and understanding of the steps involved, it is a manageable task for DIY enthusiasts. This article outlines a comprehensive guide to installing a bathtub door, ensuring a smooth and successful project.
1. Preparation and Planning
Before embarking on the installation process, thorough preparation is crucial. This involves assessing the existing bathtub and surrounding area, gathering the necessary tools and materials, and carefully planning the installation process.
a) Assess the Bathtub and Surroundings
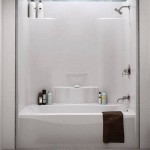
Begin by examining the bathtub and its surrounding area. Measure the width and height of the bathtub opening, taking into account any existing molding or trim. Check for any existing plumbing or electrical fixtures that might interfere with the door installation. Additionally, assess the condition of the walls and floor around the bathtub, ensuring they are level and stable. If any repairs or modifications are necessary, address them before proceeding to the installation.
b) Gather Tools and Materials
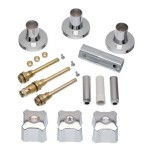
Once the assessment is complete, gather the necessary tools and materials. This will include: * A Bathtub Door Kit: Choose a kit that includes the door frame, door panel, hinges, handle, and necessary hardware. * Level * Tape Measure * Pencil * Drill with appropriate drill bits * Caulking gun * Safety Glasses * Gloves * Silicone sealant
c) Plan the Installation
Before starting the installation, plan the placement of the door frame. Determine the desired opening width and ensure it aligns with your bathroom layout. Mark the desired positioning on the bathtub walls using a level and pencil. This step is crucial for ensuring a proper and aesthetically pleasing installation.
2. Installing the Door Frame
Once the preparation is complete, you can begin installing the door frame. This is a critical step that determines the stability and overall appearance of the door.
a) Prepare the Frame
Start by positioning the frame according to your marked placement on the bathroom walls. Ensure the frame is level using a level, adjusting its position as needed. The frame should be square and plumb.
b) Attach the Frame to the Wall
Use the provided screws or fasteners to securely attach the door frame to the bathtub walls. Drill pilot holes before driving in the screws to minimize the risk of cracking the walls. Make sure the screws are long enough to penetrate the walls and provide adequate hold.
c) Seal the Frame
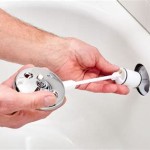
After attaching the frame, apply silicone sealant around the perimeter of the frame to create a watertight seal. This helps prevent leaks and improves the overall durability of the door installation. Use a caulking gun to apply a smooth and even bead of sealant, ensuring it adheres firmly to the frame and wall.
3. Installing the Door Panel
Once the frame is securely in place, you are ready to install the door panel. This step requires careful handling to ensure proper alignment and functionality.
a) Install Hinges
Begin by attaching the hinges to the door panel and the door frame. Ensure the hinges are properly aligned and secured using the provided screws or fasteners. If the hinges are not adequately aligned, it will affect the door's smooth opening and closing function.
b) Mount the Handle
Attach the handle to the door panel using the provided screws or fasteners. Ensure the handle is securely mounted and positioned at a comfortable height. Apply pressure to the handle to ensure it does not loosen or wobble.
c) Install the Door
Carefully hang the door panel onto the hinges, ensuring it is aligned with the frame. Ensure the door opens and closes smoothly and that the handle is positioned at a comfortable height. If the door does not close properly, adjust the hinges or the frame placement until the door operates smoothly.
4. Final Touches
Once the door panel is installed, you can add finishing touches to complete the project. This includes sealing any gaps and ensuring the door operates properly
a) Seal the Gaps
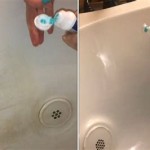
Inspect the door frame and the walls for any gaps or crevices. Apply silicone sealant to these areas to prevent water from leaking. Ensure the sealant is smooth and even.
b) Test the Door
After applying the sealant, open and close the door multiple times to ensure it operates smoothly. Check the door for proper alignment, and adjust the hinges or frame if necessary.

Shower Door Bathtub Install Do It Yourself

How To Install A Delta Tub And Shower Sliding Glass Doors

How To Install A Bathtub Shower Door Step By Guide Hubpages

How To Install Sliding Bathtub Shower Doors Delavin

How To Install Sliding Bathtub Shower Doors Delavin

How To Install Delta Shower Glass Door On A Bathtub

How To Install An Ovation Bathtub Door Diy Danielle

How To Install Diy Bathtub Doors Or Panels

How To Install Sliding Bathtub Shower Doors Delavin

How To Install A Basic Sliding Tub Shower Door