How to Install a Shower Screen on a Bathtub Drain: A Comprehensive Guide
Installing a shower screen on a bathtub equipped with a drain can significantly enhance bathroom functionality and aesthetics. This process, while potentially manageable for experienced DIY enthusiasts, requires careful planning, precise execution, and adherence to safety guidelines. This article provides a detailed, step-by-step guide on how to successfully install a shower screen, addressing key considerations and potential challenges encountered during the installation process.
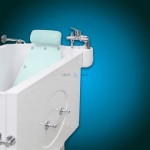
Before embarking on this project, it is crucial to understand the different types of shower screens available and select one that complements the existing bathroom design and meets specific functional requirements. Common types include fixed screens, hinged screens, sliding screens, and bi-fold screens. Each type offers distinct advantages in terms of space utilization, accessibility, and cleaning convenience. Consider the dimensions of the bathtub, the available space around it, and the desired water containment level when making a selection.
The compatibility of the chosen shower screen with the existing bathtub drain system is also a paramount consideration. Although the shower screen itself does not directly interact with the drain, its placement and the subsequent increased water usage necessitate that the drain system is functioning optimally to prevent water accumulation and potential overflows. Ensure the drain is clear of obstructions and that the plumbing is in good working order prior to installation. Problems with the drain should be addressed first before installing the shower screen.
Preparing for the Installation
Proper preparation is critical for a smooth and successful shower screen installation. This phase involves gathering the necessary tools and materials, preparing the work area, and carefully inspecting the components of the shower screen kit. A thorough approach during this stage minimizes potential errors and ensures a professional-looking finished product.
Essential tools typically include a measuring tape, level, drill with appropriate drill bits (for tile, if necessary), screwdriver set, pencil, caulking gun, and utility knife. Materials required beyond those included in the shower screen kit may consist of silicone sealant, shims, and possibly additional screws or anchors depending on the wall construction. Having all these items readily available streamlines the installation process and reduces the likelihood of interruptions.
The work area surrounding the bathtub should be thoroughly cleaned and cleared of any obstructions. This includes removing bath mats, toiletries, and any other items that might impede movement or become damaged during the installation. Covering the bathtub with a protective sheet or drop cloth is recommended to prevent scratches or dents from tools or falling debris. Proper ventilation is also crucial, especially when working with sealants and adhesives. Open windows or use a ventilation fan to minimize exposure to fumes.
Before starting the actual installation, carefully review the manufacturer's instructions included with the shower screen kit. Familiarize oneself with the different components, their functions, and the recommended installation sequence. Pay close attention to any specific warnings or cautions provided by the manufacturer. This step is vital for understanding the nuances of the particular shower screen model and avoiding potential pitfalls.
Step-by-Step Shower Screen Installation
The following steps outline a general procedure for installing a shower screen. It's important to remember that specific instructions may vary depending on the type and model of shower screen. Always consult the manufacturer's instructions for detailed guidance.
Step 1: Marking the Mounting Points. Using a measuring tape and level, carefully determine the desired location for the shower screen's mounting brackets or profiles. Hold the bracket against the wall and mark the positions for the screw holes with a pencil. Accurate marking is crucial for ensuring the screen is aligned correctly and securely attached.
Step 2: Drilling Pilot Holes. Using a drill with an appropriate drill bit (e.g., a tile drill bit for tiled walls), carefully drill pilot holes at the marked locations. The depth of the pilot holes should match the length of the screws being used. If drilling into tile, use a slow speed and apply gentle pressure to avoid cracking the tile. Consider using masking tape over the drilling area to minimize chipping.
Step 3: Installing the Mounting Brackets. Align the mounting brackets with the pilot holes and secure them to the wall using screws. Ensure the brackets are level and firmly attached. If the wall is uneven, use shims to create a level surface for the brackets. Tighten the screws securely, but avoid over-tightening, which could damage the wall or the brackets.
Step 4: Installing the Shower Screen. Carefully lift the shower screen and position it within the mounting brackets. Secure the screen to the brackets according to the manufacturer's instructions. This may involve using screws, clamps, or other fastening mechanisms. Ensure the screen is properly aligned and securely attached to prevent movement or instability.
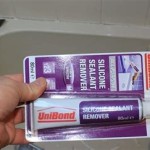
Step 5: Sealing the Joints. Apply a bead of silicone sealant along the edges of the shower screen where it meets the wall and the bathtub. This creates a watertight seal that prevents water from leaking out of the shower area. Use a caulking gun for a smooth and consistent application. Smooth the sealant with a wet finger or a specialized smoothing tool to create a clean and professional finish.
Step 6: Curing and Testing. Allow the sealant to cure completely according to the manufacturer's instructions. This typically takes 24 to 48 hours. Once the sealant is cured, test the shower screen by running water over it and checking for leaks. If any leaks are detected, re-apply sealant to the affected areas.
Addressing Potential Challenges
Installing a shower screen can present various challenges, particularly in older homes or bathrooms with non-standard layouts. Being prepared to address these challenges proactively can save time and frustration.
Uneven Walls: Walls that are not perfectly plumb can make it difficult to install a shower screen properly. Use a level to identify any unevenness and compensate for it using shims. Shims can be placed behind the mounting brackets to create a level surface. In extreme cases, it may be necessary to modify the shower screen or the wall itself to achieve a proper fit.
Tile Drilling: Drilling into tile can be challenging, as it is prone to cracking. Use a specialized tile drill bit and apply slow, steady pressure. Consider using masking tape over the drilling area to minimize chipping. If a tile cracks, it may need to be replaced before proceeding with the installation.
Plumbing Obstructions: Hidden pipes or wires behind the wall can pose a risk during drilling. Use a stud finder or a pipe detector to identify the location of any obstructions before drilling. If an obstruction is encountered, adjust the mounting position of the shower screen or consult a professional plumber or electrician for assistance.
Inadequate Drainage: As mentioned earlier, if the existing bathtub drain is slow or clogged, the increased water usage from the shower screen can lead to water accumulation and overflows. Clean the drain thoroughly before installing the shower screen. If the drain remains slow, consider using a drain cleaner or consulting a plumber.
Alignment Issues: Proper alignment of the shower screen is crucial for preventing leaks and ensuring smooth operation. Use a level and measuring tape to ensure the screen is perfectly aligned before securing it to the mounting brackets. If the screen is misaligned, it may be necessary to loosen the brackets and reposition them.
Sealant Problems: Improper application of sealant can lead to leaks and a messy appearance. Use a caulking gun for a smooth and consistent application. Smooth the sealant with a wet finger or a specialized smoothing tool. Allow the sealant to cure completely before using the shower. If the sealant cracks or peels, it may need to be removed and re-applied.
By addressing these potential challenges proactively and following the steps outlined in this guide, individuals can successfully install a shower screen on a bathtub drain and enjoy the benefits of a more functional and aesthetically pleasing bathroom.

Fitting A Bath Shower Screen

How To Replace An Over Bath Screen Seal

Shower Without A Door How To Install Glass Panel Bathroom Remodel Part 8

How To Replace A Shower Drain From The Top Family Handyman

All You Need To Know About Over Bath Shower Screens

How To Install A Tub Drain 10 Steps With Pictures Wikihow

How To Install A Shower Screen Tutorial Guide Diy

How To Install A Shower Pan The Home Depot

Pfister Bath Drain Stopper With Linkage Antique Brass Pp972 601n

How To Install A Shower Pan The Home Depot
Related Posts