How To Install A Center Drain Bathtub Faucet Cartridges
Center drain bathtub faucets are remarkable for their simple yet functional design, allowing for seamless water flow and effortless temperature adjustment. When it comes to maintaining these faucets, replacing the cartridges is a crucial task that ensures optimal performance and eliminates annoying drips or leaks.
Installing center drain bathtub faucet cartridges may initially seem daunting, but with the right tools and a step-by-step guide, you can tackle this plumbing project with confidence. So, gather your tools, clear your workspace, and follow along as we delve into the essential aspects of cartridge replacement.
Essential Tools and Materials
- Adjustable wrench or basin wrench
- Replacement cartridges (compatible with your faucet model)
- Plumber's putty or silicone sealant
- Screwdriver (Phillips or flathead, depending on the faucet)
- Allen wrench (if required for handle removal)
Step-by-Step Installation Guide
Step 1: Prepare the Faucet
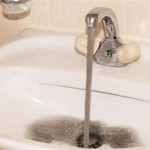
Turn off the water supply to the faucet. Open the hot and cold handles to release any remaining water pressure. Use a towel to absorb excess water around the faucet.
Step 2: Remove the Handle
Locate the setscrew or cap on the handle. Use the appropriate wrench or screwdriver to remove it. Gently pull the handle straight up to detach it from the cartridge.
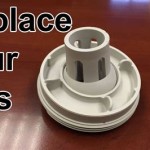
Step 3: Unscrew the Cartridge
Place the adjustable wrench or basin wrench over the cartridge housing. Turn counterclockwise to loosen and remove the cartridge.
Step 4: Inspect and Clean
Examine the old cartridge for any signs of damage or wear. Clean the cartridge housing thoroughly with a rag to remove any debris or mineral buildup.
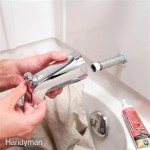
Step 5: Install New Cartridges
Apply a thin bead of plumber's putty or silicone sealant around the base of the new cartridge. Carefully insert the cartridge into the housing and turn it clockwise to tighten securely.
Step 6: Reinstall the Handle
Align the handle with the cartridge and push it down until it snaps into place. If the handle has a setscrew, tighten it using the appropriate wrench or screwdriver.
Step 7: Test the Faucet
Turn on the water supply and open both handles to check for leaks or drips. If everything is functioning properly, you have successfully installed the new cartridges.
Congratulations! You have now mastered the art of replacing center drain bathtub faucet cartridges. With regular maintenance and timely replacements, you can ensure your faucet operates smoothly and efficiently for years to come.

Bath Tub Cartridge Replacement Ifixit Repair Guide

How To Install A Tub Drain 10 Steps With Pictures Wikihow

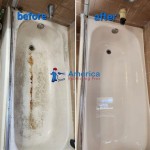
How To Fix A Leaking Bathtub Faucet Diy Family Handyman

Replace A Moen Shower Cartridge Fix Leaky Tub Faucet

Easy Replacement Of A Bathtub Drain

How To Install A Bathtub Drain Brass Tub For Clawfoot

How To Change A Bathtub Faucet 14 Steps With Pictures Wikihow

How To Replace Leaky Cartridges In A Bathroom Faucet Repair

Why Is My Tub Still Leaking After Replacing The Cartridge I Replaced In S Handle Moen 1222b And Faucet What Could Be

How To Fix A Leaking Bathtub Faucet The Home Depot
Related Posts