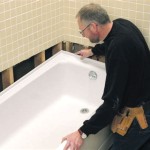
How to Install a Center Drain Bathtub Faucet Cartridge
A bathtub faucet cartridge is a device that controls the flow of water into and out of the bathtub. It is located inside the faucet handle and consists of a number of rubber seals and a plastic or metal core. Over time, the seals can wear down and begin to leak, which can lead to a number of problems, including water damage and decreased water pressure. If you are experiencing any of these problems, it is likely that you will need to replace the faucet cartridge.
Replacing a bathtub faucet cartridge is not a difficult task, but it does require some basic plumbing skills. If you are not comfortable working with plumbing, it is best to call a professional plumber. However, if you are handy and have some experience with plumbing, you should be able to replace the cartridge yourself in a matter of minutes.
To replace the bathtub faucet cartridge, you will need the following tools and materials:
- Phillips head screwdriver
- Flathead screwdriver
- Adjustable wrench
- New bathtub faucet cartridge
Once you have gathered your tools and materials, follow these steps to replace the bathtub faucet cartridge:
1. Turn off the water supply to the bathtub. There will be two shut-off valves under the sink, one for hot water and one for cold water. Turn both valves clockwise to turn off the water.
2. Open the faucet handle to release any remaining water in the faucet.
3. Remove the faucet handle. There will be a small screw on the bottom of the handle. Use a Phillips head screwdriver to remove the screw and then pull the handle straight up to remove it.
4. Remove the cartridge retainer nut. The cartridge retainer nut is located behind the faucet handle. Use an adjustable wrench to loosen the nut and then remove it by hand.
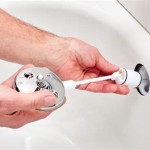
5. Remove the old cartridge. The cartridge is held in place by a rubber O-ring. Use a flathead screwdriver to pry the O-ring off of the cartridge and then pull the cartridge straight out of the faucet.
6. Install the new cartridge. Insert the new cartridge into the faucet body and push it in until it is seated against the O-ring. Then, use an adjustable wrench to tighten the cartridge retainer nut.
7. Reinstall the faucet handle. Align the handle with the cartridge and then push it down until it snaps into place. Then, use a Phillips head screwdriver to tighten the screw on the bottom of the handle.
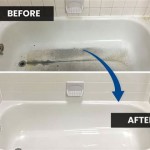
8. Turn on the water supply to the bathtub and check for leaks. If there are any leaks, tighten the cartridge retainer nut or the faucet handle screw until the leak stops.
Replacing a bathtub faucet cartridge is a simple task that can be completed in a matter of minutes. By following these steps, you can save yourself the cost of hiring a plumber.

Bath Tub Cartridge Replacement Ifixit Repair Guide

How To Replace A Single Handle Shower Cartridge In 3 Steps

How To Fix A Leaking Bathtub Faucet Diy Family Handyman

How To Install A Tub Drain 10 Steps With Pictures Wikihow

How To Replace A Bathtub Cartridge

Installing A Tub Faucet Fine Homebuilding

Easy Replacement Of A Bathtub Drain

Replace A Moen Shower Cartridge Fix Leaky Tub Faucet

How To Replace Leaky Cartridges In A Bathroom Faucet Repair

How To Replace A Delta Cartridge And Fix Leaky Bathtub Faucet It Tutorials
Related Posts