How To Install A Bathtub Faucet Valve
Replacing a bathtub faucet valve can significantly improve water pressure and resolve leaks. While a seemingly complex task, homeowners with basic plumbing knowledge can often accomplish this project successfully. This article provides a step-by-step guide to installing a new bathtub faucet valve.
Before Beginning: It is crucial to gather the necessary tools and materials. These typically include a new bathtub faucet valve (ensure compatibility with existing plumbing), adjustable wrench, pipe wrench, plumber's putty, Teflon tape, Phillips screwdriver, flathead screwdriver, bucket, and rags or towels.
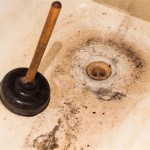
Step 1: Shut Off the Water Supply: Locate the main water shut-off valve for the house and turn it clockwise to stop the water flow. Turn on the bathtub faucet to release any remaining water in the pipes. Place a bucket under the pipes to catch any residual drips.
Step 2: Access the Valve: Depending on the bathtub configuration, accessing the valve may require removing an access panel behind the wall or accessing the valve from below the bathtub. Refer to the manufacturer's instructions for specific access procedures.
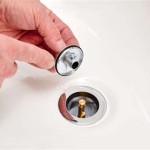
Step 3: Remove the Old Faucet Handles: Typically, faucet handles are secured with screws hidden beneath decorative caps. Use a flathead screwdriver to pry off the caps, revealing the screws. Remove the screws and carefully pull off the handles.
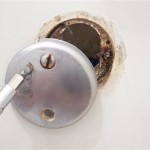
Step 4: Remove the Faceplate/Escutcheon: After removing the handles, the faceplate or escutcheon can be removed. This is usually held in place by screws or clips. Identify the fastening method and remove the faceplate, exposing the valve body.
Step 5: Disconnect the Water Supply Lines: Using an adjustable wrench, carefully disconnect the hot and cold water supply lines from the valve body. Have a bucket and rags ready to catch any remaining water in the lines.
Step 6: Remove the Old Valve: The method for removing the old valve varies depending on the type of valve and its installation. Some valves are secured with threaded connections, while others require loosening a retaining nut or clip. Consult the manufacturer's instructions for specific removal procedures.
Step 7: Prepare the New Valve: Before installing the new valve, carefully read the manufacturer's instructions. Apply plumber's putty to the base of the new valve where it will contact the bathtub surface. This helps create a watertight seal.
Step 8: Install the New Valve: Insert the new valve into the designated opening and secure it according to the manufacturer’s instructions. Ensure the valve is properly aligned and tightened to prevent leaks.
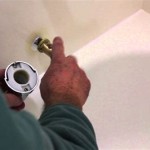
Step 9: Connect the Water Supply Lines: Using an adjustable wrench, connect the hot and cold water supply lines to the new valve. Wrap the threads of the supply lines with Teflon tape before connecting them to ensure a tight seal. Do not overtighten the connections, as this can damage the valve or the supply lines.
Step 10: Reinstall the Faceplate/Escutcheon: Align the faceplate or escutcheon over the valve body and secure it with the appropriate screws or clips. Ensure it sits flush against the wall or bathtub surface.
Step 11: Reinstall the Faucet Handles: Reattach the faucet handles by aligning them with the valve stems and securing them with the screws. Replace the decorative caps.
Step 12: Turn the Water Supply Back On: Slowly turn the main water supply valve counterclockwise to restore water flow to the house. Check for leaks around the valve, supply lines, and faucet handles. If leaks are detected, tighten connections as needed. If leaks persist, re-evaluate the installation process and ensure all connections are properly sealed.
Post-Installation Check: Run the hot and cold water through the bathtub faucet to ensure proper function. Check the water temperature and pressure. Inspect all connections again for leaks. It is recommended to monitor the area for leaks over the next few days.
Seeking Professional Assistance: If encountering any difficulties or uncertainties during the installation process, it is advisable to seek professional plumbing assistance. A qualified plumber can ensure the job is completed correctly and prevent potential water damage. They possess the experience and expertise to handle complex plumbing situations and can provide valuable advice.

Install A 1 Handle Tub And Shower Faucet Rona

Install A 1 Handle Tub And Shower Faucet Rona

Installing A Tub Faucet Fine Homebuilding

Shower Faucet Installation Diy Family Handyman

Fixing Faucets How To Replace A Difficult Tub Faucet Cartridge

Here S How Replace A Shower Mixing Valve

How To Fix A Leaking Bathtub Faucet Diy Family Handyman

How To Install Bathtub Shower Faucet Diy Step By Part 5

How To Fix A Leaky Bathtub Faucet 6 Ways Stop Drips

Bath Tub Cartridge Replacement Ifixit Repair Guide
Related Posts