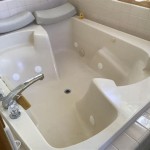
How to Install a Bathtub Drain Kit
A bathtub drain kit is a crucial component that ensures proper drainage and prevents water leakage in your bathroom. Installing a drain kit is a relatively straightforward task that can be completed in a few simple steps. By following these instructions, you can ensure a trouble-free and efficient installation.
Materials Required
- Bathtub drain kit
- Plumber's putty
- Adjustable wrench
- Channel-lock pliers
- Flashlight or headlamp (optional)
Step 1: Remove the Old Drain
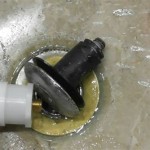
Start by removing the old drain. Use an adjustable wrench to loosen the drain flange (the metal ring around the drain hole) and the overflow plate (the smaller plate on the side of the tub). Once loosened, carefully remove both pieces.
Step 2: Clean the Drain Hole
Thoroughly clean the drain hole and the surrounding area. Remove any debris or old sealant using a cloth or sponge. Apply a thin layer of plumber's putty around the drain hole to create a watertight seal.
Step 3: Install the Overflow Tube
Take the overflow tube from the drain kit and insert it into the overflow hole. Adjust the height so that the top of the tube is level with the top of the tub deck. Secure the tube by tightening the locking nut underneath the tub.
Step 4: Install the Tub Drain Assembly
Apply a generous amount of plumber's putty to the base of the tub drain assembly. Carefully insert the assembly into the drain hole, ensuring it sits securely on the plumber's putty.
Step 5: Tighten the Drain Flange
Place the drain flange over the tub drain assembly and tighten it by hand. Use an adjustable wrench to further tighten the flange until it is snug against the tub. Do not overtighten.
Step 6: Install the Overflow Plate
Position the overflow plate over the overflow tube and tighten its screws using a Phillips head screwdriver. Ensure the plate is securely attached and sits flush against the tub.
Step 7: Install the Stopper
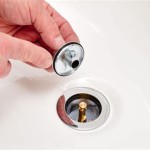
Insert the bathtub stopper into the drain assembly. It should fit snugly and allow for easy opening and closing.
Step 8: Test the Drain
Turn on the water and allow it to run for a few minutes. Check for any leaks around the drain or overflow plate. If you notice any leaks, tighten the connections as needed.
Conclusion
Congratulations! You have successfully installed your bathtub drain kit. By following these steps carefully, you can ensure a watertight seal and trouble-free drainage in your bathroom for years to come.

How To Install New Tub Drain Installing Universal Kit 2024

Bathtub Drain Kit Installation Step By

Plumbing How Do I Replace A Broken Bathtub Drain Home Improvement Stack Exchange
Bath S Drain Installation

How To Install A Cable Drive Bath Drain Aubuchon Hardware

Plumbing Do Tub Drains Of The Same Diameter Ever Have Diffe Thread Per Inch Counts Home Improvement Stack Exchange

Master Plumber Shows How To Remove Install Bathtub Waste And Overflow

Easy Install Tub Drain Rough In Kit Barclay S Limited

How To Install A Bathtub Drain

Easy To Install Universal Tub Drain Trim Kits Fits Common Tubs
Related Posts

