How to Install a Bathtub: A Comprehensive Guide
Installing a bathtub may seem like a daunting task, but with careful planning and a bit of elbow grease, it's a project that most homeowners can tackle. Here's a step-by-step guide to help you navigate the process successfully:
Materials Required:
Before you begin, ensure you have gathered the necessary materials:
- Bathtub
- Drain assembly
- Faucet
- Tub surround (if desired)
- Caulk
- Shims
- Level
- Wrench
- Screwdriver
- Hacksaw or PVC cutter
Step 1: Preparation
Begin by removing the old bathtub and any existing plumbing fixtures. Thoroughly clean the area where the new tub will be installed.
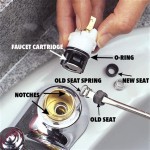
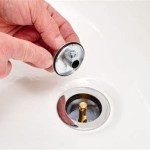
Step 2: Install the Drain Assembly
Assemble the drain assembly according to the manufacturer's instructions. Install it into the bathtub drain hole and secure it with a washer and nut.
Step 3: Position the Bathtub
Place the bathtub in its designated location. Use shims to level the tub from side to side and front to back. The tub should be flush with the surrounding walls.
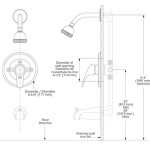
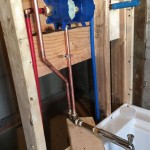
Step 4: Connect the Plumbing
Attach the bathtub drainpipe to the drain assembly. Cut the excess pipe with a hacksaw or PVC cutter. Connect the water supply lines to the faucet according to the manufacturer's instructions.
Step 5: Seal the Edges
Apply a bead of caulk around the edges of the bathtub where it meets the walls and floor. Smooth out the caulk with your finger or a caulk tool.
Step 6: Install the Surround (Optional)
If desired, install a tub surround. Follow the manufacturer's instructions for proper installation.
Step 7: Test the Bathtub
Turn on the water and check for any leaks. If there are no leaks, you have successfully installed your bathtub.
Tips:
- Always follow the manufacturer's instructions.
- Wear safety glasses and gloves when working with tools.
- If you encounter any difficulties, don't hesitate to seek professional assistance.
- Installing a bathtub can be physically demanding, so consider getting help if needed.
- Enjoy your newly installed bathtub!

5 Key Steps To Installing A Bathtub Smart Tips

How To Install A Bathtub

Installing A Bathtub Bob Vila

Correctly Installing A Bath Bathroom Guru

Replacing A Bathtub Fine Homebuilding

Correctly Installing A Bath Bathroom Guru

How To Install A Bath Tub Surround

How Long Does It Take To Install A Bathtub Bathwraps

Can I Install A Bathtub Myself Considerations And Steps Home Efficiency Guide

Correctly Installing A Bath Bathroom Guru