How to Fix Stuck Bathtub Faucet Diverters
A bathtub faucet diverter is a crucial component that redirects water flow between the bathtub spout and the showerhead. When functional, it allows for a seamless transition between filling the tub and taking a shower. However, a stuck diverter can be a significant inconvenience, preventing the user from properly utilizing the shower function. Identifying the cause of the stuck diverter is the first step towards resolving the issue. Common culprits include mineral buildup, corrosion, worn-out components, and general wear and tear. Understanding the specific type of diverter present in the faucet is also essential, as different types require different troubleshooting methods. This article will provide a comprehensive guide to diagnosing and repairing various types of stuck bathtub faucet diverters.
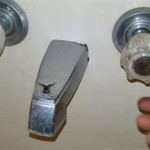
There are primarily three types of bathtub faucet diverters: lift-rod diverters, tee diverters, and push-button diverters. The lift-rod diverter, typically located on the bathtub spout itself, is activated by pulling up on a rod. The tee diverter, also located on the spout, usually involves turning a small lever. The push-button diverter is often integrated into the faucet handle. Identifying the diverter type will streamline the troubleshooting process, as the internal mechanisms and potential points of failure differ for each.
Identifying the Diverter Type and Accessing Internal Components
Before attempting any repairs, the specific type of diverter needs to be determined. As mentioned earlier, the three main types are lift-rod, tee, and push-button diverters. Lift-rod diverters are easily recognizable by the small rod or knob protruding from the spout, which is pulled up to divert water. Tee diverters feature a small lever or handle that is turned to redirect the water flow. Push-button diverters are integrated into the faucet handle and are engaged by pushing a button or rotating a dial.
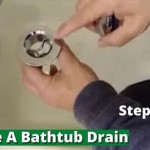
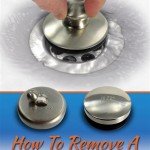
Once the type is identified, accessing the internal components is often necessary. For lift-rod and tee diverters, this typically involves removing the bathtub spout. Before removing the spout, the water supply to the faucet must be shut off to prevent flooding. Locate the shut-off valves for both hot and cold water lines, usually found under the sink or in an access panel behind the tub. Turn the valves clockwise until they are fully closed. After shutting off the water, open the faucet to relieve any remaining pressure in the pipes.
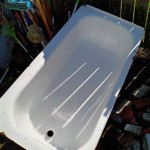
To remove the bathtub spout for lift-rod or tee diverters, locate any set screws securing it to the pipe. These screws are usually located on the underside or back of the spout. Loosen the set screws using an Allen wrench or screwdriver. Once the set screws are loose, gently twist and pull the spout away from the wall. If the spout is difficult to remove, it may be corroded or sealed with plumber's putty. In this case, use a utility knife to carefully score around the edge of the spout where it meets the wall to break the seal. A pipe wrench may be needed to gently twist the spout loose if it is still stuck. Protect the finish of the spout by wrapping it with a soft cloth before using the wrench.
For push-button diverters, accessing the internal components usually requires disassembling the faucet handle. The method for disassembling the faucet handle varies depending on the model. Consult the faucet manufacturer's instructions or online resources for specific guidance on how to safely disassemble the handle without damaging it. Some handles may have a set screw concealed beneath a decorative cap or cover. Others may require unscrewing the entire handle assembly. Take photos of the disassembly process to aid in reassembly later.
Cleaning and Lubricating the Diverter Mechanism
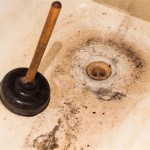
Once the diverter mechanism is accessible, cleaning and lubrication are often sufficient to resolve a sticking problem. Mineral buildup and corrosion are common causes of diverter malfunction. These deposits can obstruct the movement of the diverter valve, preventing it from functioning correctly.
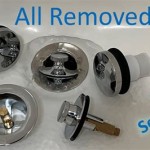
Begin by thoroughly cleaning all the accessible components of the diverter mechanism. Use a stiff-bristled brush and a cleaning solution specifically designed to remove mineral deposits, such as vinegar or a commercial descaling product. Soak the components in the cleaning solution for several hours, or even overnight, to loosen stubborn deposits. Be sure to thoroughly rinse all the parts with clean water after soaking to remove any remaining cleaning solution.
After cleaning, carefully inspect the diverter valve and other moving parts for signs of wear or damage. Look for cracks, chips, or excessive wear on rubber seals or O-rings. If any damaged components are found, they should be replaced. Replacement parts can usually be obtained from a local hardware store or online plumbing supply retailer. Ensure that the replacement parts are compatible with the specific make and model of the faucet.
Once the components are clean and any necessary replacements have been made, lubricate the moving parts with a silicone-based plumbing grease. Silicone grease is non-toxic and safe for use in potable water systems. Apply a thin, even coat of grease to the diverter valve, O-rings, and any other moving parts. This lubrication will help to ensure smooth and effortless operation of the diverter and prevent future sticking issues. Avoid using petroleum-based lubricants, as they can damage rubber seals and O-rings over time.
After lubricating the diverter mechanism, reassemble the faucet and test its operation. Turn on the water supply and check for leaks. If the diverter still sticks or leaks, further troubleshooting may be necessary. Ensure that all components are properly aligned and securely fastened. If the problem persists, consider replacing the entire diverter valve assembly.
Replacing Worn or Damaged Components
If cleaning and lubricating the diverter mechanism fails to resolve the issue, replacing worn or damaged components may be necessary. Common parts that require replacement include O-rings, rubber seats, and the diverter valve itself.
O-rings provide a watertight seal between the diverter valve and the faucet body. Over time, these O-rings can become brittle, cracked, or worn, leading to leaks and difficulty in diverting water. Replacing the O-rings is a relatively simple and inexpensive repair that can often restore the diverter to proper function. To replace the O-rings, first identify the correct size and type of O-ring required for the faucet. Consult the faucet manufacturer's specifications or bring the old O-ring to a hardware store for comparison. After obtaining the correct replacement O-rings, carefully remove the old O-rings from the diverter valve using a small screwdriver or pick. Be careful not to scratch or damage the valve body during this process. Lubricate the new O-rings with silicone grease before installing them onto the valve. Ensure that the O-rings are properly seated in their grooves to create a watertight seal.
Rubber seats, also known as valve seats, provide a sealing surface for the diverter valve. These seats can become worn or damaged over time, leading to leaks and difficulty in diverting water. Replacing the rubber seats requires removing the old seats from the faucet body. The method for removing the seats varies depending on the faucet design. Some seats are press-fit into the faucet body and can be pried out with a screwdriver. Other seats are threaded and can be unscrewed using a special seat wrench. After removing the old seats, clean the seat recesses thoroughly and install the new seats. Ensure that the new seats are properly seated and aligned to create a watertight seal.
In some cases, the diverter valve itself may be worn or damaged beyond repair. Replacing the entire diverter valve assembly is often the most effective solution in these situations. Diverter valve assemblies are available in a variety of sizes and styles to fit different faucet models. To replace the diverter valve, first remove the old valve from the faucet body. The method for removing the valve varies depending on the faucet design. Some valves are held in place by screws or clips, while others are press-fit into the faucet body. After removing the old valve, install the new valve in its place. Ensure that the new valve is properly aligned and securely fastened. Connect the water lines to the new valve and test for leaks.
When replacing any faucet component, it is crucial to use the correct replacement parts and to follow the manufacturer's instructions carefully. Using incompatible parts or improper installation can lead to further damage or leaks. If unsure about any aspect of the repair, consult a qualified plumber.
After completing the repairs, carefully reassemble the faucet and test its operation to ensure that the diverter functions correctly. Turn on the water supply and check for leaks. If any leaks are detected, tighten the connections or replace any damaged seals. Verify that the diverter switches smoothly between the bathtub spout and the showerhead. If the diverter still sticks or leaks after replacing the components, it may indicate a more complex plumbing issue that requires professional attention.

Diy How To Fix Shower Tub Stuck Spout Vinegar Diverter Bathtub

How To Fix A Stuck Bathtub Spout Leaking

How To Free A Stuck Shower Faucet Spout

Shower Tub Diverter Quick Fix Pull Spout Repair For Sticky Leaky

Tub Faucet Spout Diverter Pull Lever Broke Off Diy Fix

Troubleshooting A Stuck Shower Faucet Diverter Doityourself Com

Tub Faucet Spout Diverter Pull Lever Broke Off Diy Fix

Tub Spout Diverter How To Fix From Beginning The End Using Danco Repair Kit

Repair Leaking Tub Spout Diverter Pull In Shower Mode

How To Fix A Shower Diverter Repair Or Replace
Related Posts