How To Fix a Stripped Bathtub Faucet Handle
A stripped bathtub faucet handle is a common household plumbing issue. It refers to a condition where the splines (grooves or ridges) inside the handle’s opening or on the faucet stem have worn down or been damaged, preventing the handle from properly gripping the stem. As a result, the handle spins freely without turning the water supply on or off effectively. This can lead to inconvenience, water wastage, and potentially higher water bills. Fortunately, there are several methods to address this problem, ranging from simple, temporary fixes to more involved repairs. This article details various approaches to resolving a stripped bathtub faucet handle, outlining the necessary tools, steps, and considerations for each method.
Before commencing any repair, it is crucial to identify the type of faucet handle involved. Common types include compression faucets, ball faucets, cartridge faucets, and ceramic disc faucets. Each type has a distinct internal mechanism and may require different tools and techniques for repair. A compression faucet, the oldest type, uses rubber washers to seal the water flow. Ball faucets feature a slotted ball that controls the water flow. Cartridge faucets use a cartridge that moves up and down to regulate the water. Ceramic disc faucets employ two ceramic discs with precisely aligned openings to control water flow. Understanding the specific type of faucet is essential for selecting the appropriate repair strategy.
Safety is paramount when working with plumbing fixtures. Prior to starting any repair, the water supply to the bathtub faucet must be shut off. This typically involves locating the shut-off valves for the hot and cold water lines serving the bathroom. These valves are usually located beneath the sink or in an accessible area near the bathtub. If individual shut-off valves are not present, it may be necessary to shut off the main water supply to the entire house. Once the water supply is turned off, open the faucet to relieve any residual water pressure in the pipes.
Temporary Fixes for a Stripped Faucet Handle
In situations where an immediate and permanent repair is not feasible, temporary fixes can provide short-term functionality. These methods often involve increasing the friction between the handle and the faucet stem, allowing for a more secure grip and improved water control.
One temporary fix involves using Teflon tape. Teflon tape, also known as plumber's tape, is a thin, non-adhesive tape used to seal pipe threads. It can also be used to add a layer of material to the faucet stem, increasing its diameter and improving the grip with the handle. To apply Teflon tape, first remove the faucet handle by loosening the set screw or unscrewing it, depending on the faucet design. Clean the faucet stem to remove any debris or corrosion. Wrap several layers of Teflon tape around the stem, ensuring that the tape is applied evenly and tightly. Reinstall the handle and test its functionality. The added thickness of the Teflon tape may provide enough friction to allow the handle to turn the stem effectively.
Another temporary solution involves using small pieces of metal or plastic shim stock. Shim stock consists of thin, precisely sized pieces of material used to fill gaps or adjust clearances. Small pieces of shim stock can be inserted into the stripped splines of the faucet handle, effectively reducing the space between the handle and the stem. This creates a tighter fit and allows for better engagement. To use shim stock, remove the faucet handle and carefully inspect the inside of the handle where the splines are located. Cut small pieces of shim stock that are slightly larger than the stripped areas. Insert the shim stock into the stripped splines, ensuring that they are evenly distributed. Reinstall the handle and test its operation. If the handle still slips, add more shim stock until a secure grip is achieved.
It is essential to acknowledge that these temporary fixes are not permanent solutions and may need to be repeated periodically as the added material wears down or deteriorates. They are best suited for situations where a more thorough repair is not immediately possible or as a stopgap measure until a replacement handle or stem can be obtained.
Replacing the Faucet Handle
Replacing the faucet handle is a more reliable solution for a stripped handle. This involves removing the damaged handle and installing a new handle that is compatible with the existing faucet stem. Before purchasing a replacement handle, it is essential to identify the make and model of the faucet to ensure proper fit and compatibility.
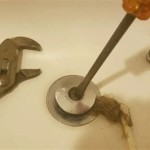
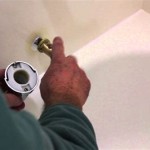
To remove the old handle, first locate and loosen the set screw. The set screw is typically located on the side or front of the handle and may be concealed beneath a decorative cap. Use an Allen wrench or screwdriver of the appropriate size to loosen the set screw. Once the set screw is loosened, the handle should slide off the stem. If the handle is stuck, gently tap it with a rubber mallet or apply penetrating oil to loosen any corrosion or buildup. Avoid using excessive force, as this could damage the faucet stem or surrounding fixtures.
With the old handle removed, visually inspect the faucet stem for any damage or corrosion. If the stem is also damaged, it may be necessary to replace the entire faucet stem assembly. Before installing the new handle, clean the faucet stem to remove any debris or corrosion. Apply a small amount of plumber's grease to the stem to improve lubrication and prevent future corrosion. Slide the new handle onto the stem and tighten the set screw securely. Ensure that the handle is properly aligned and that it turns smoothly without slipping. Test the faucet to verify that the water flow is properly controlled.
When selecting a replacement handle, consider the material and finish. Common handle materials include metal, plastic, and ceramic. Metal handles are generally more durable and resistant to wear and tear, while plastic handles are more affordable. Ceramic handles offer a decorative touch but may be more prone to cracking or breaking. Choose a handle with a finish that matches the existing bathroom fixtures for a cohesive look. It is also important to select a handle that is easy to grip and turn, especially for individuals with limited hand strength or dexterity.
Replacing the Faucet Stem
If the faucet stem is also damaged or corroded, replacing the stem along with the handle may be the most effective solution. This involves disassembling the faucet body and installing a new stem assembly. Replacing the stem can be more complex than replacing the handle alone, but it can restore the faucet to like-new condition and prevent future problems.
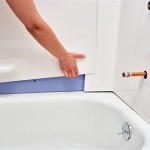
Prior to beginning the stem replacement, the water supply must be shut off, and any remaining water pressure in the pipes must be released. Remove the faucet handle, escutcheon (decorative plate), and any other components that are obstructing access to the stem. Depending on the type of faucet, the stem may be held in place by a retaining nut or a threaded connection. Use a wrench of the appropriate size to loosen the retaining nut or unscrew the stem assembly. Be careful not to damage the surrounding fixtures or pipes.
Once the stem assembly is removed, carefully inspect the valve seat inside the faucet body. The valve seat is the surface against which the stem's washer or cartridge seals to stop the flow of water. If the valve seat is corroded or damaged, it may need to be repaired or replaced. A valve seat wrench can be used to remove and replace the valve seat. If the valve seat is not removable, a valve seat grinding tool can be used to smooth and resurface the seating surface.
Before installing the new stem assembly, clean the inside of the faucet body to remove any debris or corrosion. Apply a small amount of plumber's grease to the threads of the stem assembly to improve lubrication and prevent future corrosion. Install the new stem assembly and tighten the retaining nut or threaded connection securely. Reinstall the escutcheon, handle, and any other components that were removed. Turn the water supply back on and test the faucet for leaks. If any leaks are present, tighten the connections or replace any worn or damaged washers or O-rings.
When selecting a replacement stem, it is essential to choose a stem that is compatible with the existing faucet body. Refer to the faucet manufacturer's specifications or consult with a plumbing supply store to ensure proper fit and compatibility. It is also important to select a stem made from high-quality materials that are resistant to corrosion and wear. Brass stems are generally more durable and resistant to corrosion than plastic stems. Stainless steel stems offer superior corrosion resistance, especially in areas with hard water or high mineral content.
Addressing a stripped bathtub faucet handle requires a systematic approach, starting with identifying the faucet type and the extent of the damage. Temporary fixes can provide immediate relief; however, replacing the handle or the stem assembly offers a more long-term solution. Careful planning, the use of appropriate tools, and adherence to safety precautions are essential for a successful repair.

How To Simply Fix Loose Faucet Handles Diy Family Handyman

How To Fix A Stripped Bathtub Faucet Handle 3 Easy Methods

What To Do If Is Rusted Out Or Broken In Shower Faucet Handle Shaft Easy Fix Diy Repair

How To Repair A Stripped Bath Faucet

Sometimes Stuck Shower Faucet Handles Get Their Own

How To Fix A Stripped Faucet Handle In 10 Minutes Or Less Ricks Plumbing

Stripped Shower Handle Delta Monitor 1700 Series

Shower Handle Stuck Complete A Z Tutorial

How To Quickly Fix A Spinning Faucet Handle Waldman Plumbing And Heating Inc

How To Remove Bathtub Faucet Stems Quick And Easy
Related Posts