How To Fix A Pop Up Bathtub Drain Stopper
A pop-up bathtub drain stopper is a common feature in modern bathtubs, offering a convenient way to control water flow. However, these stoppers can malfunction, leading to slow draining, complete blockage, or failure to seal properly. Understanding the components of a pop-up drain and learning basic troubleshooting techniques can save time and money by avoiding costly plumbing service calls. This article provides a detailed guide on diagnosing and resolving common issues associated with pop-up bathtub drain stoppers.
The functionality of a pop-up drain relies on a series of interconnected parts working in unison. The primary components include the stopper itself, the rocker arm (also known as a pivot rod or actuator), the lift rod (typically located behind the overflow plate), and the connecting linkage. When the lift rod is raised or lowered, it manipulates the rocker arm, which in turn raises or lowers the stopper, either sealing or opening the drain. Misalignment, debris accumulation, or wear and tear on these components can disrupt this mechanism.
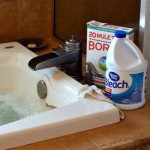
Before attempting any repairs, it is crucial to gather the necessary tools. A flathead screwdriver, a Phillips head screwdriver, a pair of pliers (preferably needle-nose), a small container or cup, paper towels or a rag, and potentially a penetrating lubricant (such as WD-40) are commonly required. A flashlight can also be beneficial for illuminating the drain mechanism. Safety glasses are recommended to protect the eyes from debris during the repair process.
Diagnosing the Problem
The first step in fixing a pop-up drain stopper is to accurately diagnose the issue. Common problems include a stopper that won't stay up, a stopper that won't stay down, a stopper that drains slowly even when open, or a stopper that is completely stuck. Each of these symptoms suggests a different potential cause.
If the stopper won't stay up, the most likely cause is a misalignment of the lift rod or rocker arm. Over time, the connecting linkage can become loose, preventing the rocker arm from fully engaging and holding the stopper in the open position. Similarly, if the stopper won't stay down, the issue may be related to an obstruction preventing a complete seal or a similar misalignment problem. A slow drain, even when the stopper is in the "up" position, typically indicates a build-up of hair, soap scum, or other debris around the stopper or within the drainpipe itself.
A completely stuck stopper often results from a significant accumulation of debris, corrosion, or a broken component within the drain mechanism. Attempting to force a stuck stopper can further damage the system, so a careful and methodical approach is necessary. A visual inspection, using a flashlight, is the initial step in identifying the source of the blockage or damage.
Begin by inspecting the stopper itself. Look for visible signs of damage, such as cracks or breaks. Check for any obvious obstructions, such as hair or soap residue, clinging to the stopper. Try to manually move the stopper up and down to assess its range of motion. If the stopper moves freely, the problem is likely located further down the drain mechanism. If the stopper is completely immobile, the obstruction is likely located very close to the stopper itself.
Cleaning and Adjusting the Drain Mechanism
Once the problem has been diagnosed, the next step is to clean and adjust the drain mechanism. This often involves removing the stopper, accessing the rocker arm, and clearing any obstructions. Begin by removing the overflow plate, typically located behind the faucet. This plate is usually held in place by one or two screws. After removing the screws, carefully pull the overflow plate away from the bathtub. The lift rod will be attached to the back of the plate.
With the overflow plate removed, the lift rod can be extracted. Inspect the lift rod for any bends, breaks, or corrosion. If the lift rod is damaged, it may need to be replaced. Next, locate the rocker arm within the drainpipe. It may be visible through the overflow drain opening, or it may be necessary to use a flashlight to locate it. The rocker arm is a small pivoting lever that connects to the lift rod and controls the movement of the stopper.
Using pliers or a small hook, carefully remove any debris from the rocker arm and the surrounding area. Common obstructions include hair, soap scum, and small objects that may have fallen into the drain. Once the area is clear of debris, inspect the rocker arm for any signs of damage or corrosion. If the rocker arm is damaged, it may need to be replaced. Sometimes, the rocker arm is connected to the stopper with a screw or clip. If this is the case, you can disconnect them to thoroughly clean the stopper.
After cleaning the drain mechanism, it is time to adjust the lift rod. Reinsert the lift rod into the overflow drain opening and attach it to the rocker arm. Be sure to align the rod properly. Some lift rods have multiple holes for adjustment. Experiment with different hole positions to find the optimal setting for raising and lowering the stopper. The goal is to achieve a full seal when the stopper is down and a full opening when the stopper is up. Tighten the screw or clip connecting the lift rod to the overflow plate and test the operation of the stopper. Repeat adjustments as necessary until the stopper functions correctly.
If the stopper continues to drain slowly, even after cleaning and adjusting the drain mechanism, the problem may be located further down the drainpipe. In this case, consider using a drain snake or auger to clear any obstructions. Insert the drain snake into the drain opening and carefully push it down the pipe. Rotate the snake to break up any clogs. Once the clog is broken up, flush the drain with hot water to clear any remaining debris. Avoid using harsh chemical drain cleaners, as these can damage the drainpipe and pose a health hazard.
Addressing Specific Stopper Types and Issues
While the general principles of pop-up drain repair apply to most systems, there are variations in stopper design that may require specific attention. Some stoppers are designed to be easily removed by simply twisting and pulling them upward. Others may require the use of a specialized tool or a specific sequence of maneuvers to dislodge them. Consult the manufacturer's instructions or search online for videos demonstrating the proper removal technique for the specific stopper type.
One common type of pop-up stopper is the "push-and-seal" stopper. These stoppers typically have a spring-loaded mechanism that allows them to be opened and closed by simply pressing down on them. Problems with push-and-seal stoppers often involve a malfunctioning spring or a build-up of debris within the stopper mechanism. To clean a push-and-seal stopper, it may be necessary to disassemble it carefully. This usually involves unscrewing or unclipping the stopper into its component parts. Clean each part thoroughly with soap and water, and then reassemble the stopper. Ensure that the spring is properly seated and that all parts are securely connected.
Another common issue is a stripped or damaged rocker arm. The rocker arm is typically made of plastic or metal and can be prone to wear and tear over time. If the rocker arm is stripped, it will no longer be able to properly engage with the lift rod, resulting in a malfunctioning stopper. In this case, the rocker arm will need to be replaced. Replacement rocker arms can be purchased at most hardware stores or plumbing supply stores. To replace the rocker arm, simply remove the old rocker arm and install the new one in its place.
Corrosion can also be a significant problem, particularly in areas with hard water. Corrosion can cause the stopper, rocker arm, and other drain components to seize up, making them difficult to move. To combat corrosion, consider using a penetrating lubricant. Spray the lubricant on the affected parts and allow it to soak in for several minutes. Then, try to gently move the parts to loosen them. Repeat this process as necessary until the parts move freely.
In instances where the drainpipe itself is significantly corroded or damaged, professional plumbing assistance may be required. Extensive corrosion can weaken the pipe walls, leading to leaks or even complete failure. Attempting to repair severely damaged drainpipes without the proper tools and expertise can be dangerous and may result in further damage. A qualified plumber can assess the extent of the damage and recommend the appropriate course of action, which may involve replacing a section of the drainpipe or the entire drain assembly.

Bathroom Repair How To A Pop Up Tub Drain Stopper

How To Remove Pop Up Tub Stopper Easy Method

How To Remove A Pop Up Tub Drain Plug Stopper Easy No Tools Needed

So Easy How To Remove A Watco Pop Up Drain Plug
How To Remove 6 Diffe Kinds Of Drain Stoppers

Remove Pop Up Bath Tub Drain Stopper 3 Ways
How To Remove 6 Diffe Kinds Of Drain Stoppers

Twist Pop Up Bath Waste Plug

How To Remove A Bathtub Drain The Home Depot
How To Remove 6 Diffe Kinds Of Drain Stoppers
Related Posts