How To Fix A Leaky Single Handle Bathtub Faucet
A leaky bathtub faucet can be a major annoyance, wasting water and driving up your utility bills. Fortunately, it's usually a relatively simple repair that you can do yourself with a few basic tools and a little bit of know-how.
Here's a step-by-step guide on how to fix a leaky single handle bathtub faucet:
## Step 1: Gather Your ToolsYou'll need the following tools for this repair:
- Phillips head screwdriver
- Flat head screwdriver
- Adjustable wrench
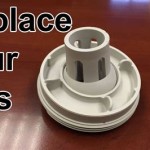
- Replacement cartridge
Before you start any work, it's important to turn off the water supply to the faucet. You'll usually find two shut-off valves under the sink, one for the hot water and one for the cold water. Turn both valves clockwise until they're fully closed.
## Step 3: Remove the HandleOnce the water supply is turned off, you can start removing the handle. Use a Phillips head screwdriver to remove the screw that secures the handle to the faucet body. Once the screw is removed, you should be able to pull the handle straight up to detach it from the faucet.
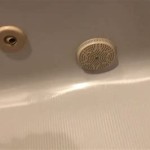
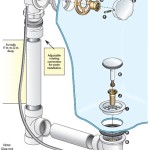
## Step 4: Remove the CartridgeWith the handle removed, you'll see the cartridge assembly. This is the part that controls the flow of water through the faucet. To remove the cartridge, use a flat head screwdriver to pry off the retaining clip that holds it in place. Once the retaining clip is removed, you can pull the cartridge straight out of the faucet body.
## Step 5: Install the New CartridgeTake the new cartridge and insert it into the faucet body. Make sure that the cartridge is properly aligned and that the retaining clip is securely in place.
## Step 6: Reinstall the HandleOnce the cartridge is installed, you can reinstall the handle. Align the handle with the faucet body and push it down until it's snug. Use a Phillips head screwdriver to tighten the screw that secures the handle to the faucet body.
## Step 7: Turn On the Water SupplyTurn on the shut-off valves under the sink to turn the water supply back on. Check for any leaks around the faucet. If there are no leaks, your repair is complete!

How To Fix Leaking Bathtub Faucet

How To Fix A Leaky Single Handle Tub Shower Faucet Danco

How To Repair A Leaky Single Lever Moen Bath Or Shower Faucet Older Style

How To Fix A Leaky Bathtub Faucet Delta Shower Cartridge L Replace

How To Fix A Leaking Single Handle Bathtub Faucet Quick And Easy Tub Repair Shower

How To Replace A Moen Cartridge And Fix Leaky Bathtub Faucet It Tutorials

Faucet Repair How To A Leaky Bath

How To Replace A Delta Cartridge And Fix Leaky Bathtub Faucet It Tutorials

Fix The Leaky Delta Bathtub Faucet A Step By Leak Repair Guide Shower Handles

How To Fix A Bathtub Faucet From Leaking Dripping 3 Steps