How To Fix a Leaky Bathtub Faucet Without Turning Off The Water
A dripping bathtub faucet is more than just an annoyance; it's a financial drain and a potential source of water damage. While the standard procedure for fixing a leaky faucet involves shutting off the water supply, there are situations where this isn't feasible or desirable. This article outlines methods to address a leaky bathtub faucet without turning off the main water supply. It's crucial to understand that these methods are typically short-term solutions or troubleshooting steps, and a complete repair will likely require shutting off the water at some point.
Attempting to repair a faucet without turning off the water requires careful planning and execution. It's essential to identify the source of the leak and understand the faucet's mechanism before proceeding. This approach might involve working with a continuous flow of water, so having the necessary tools readily available and a clear understanding of each step is paramount. Furthermore, these methods might only provide temporary relief, and consulting a qualified plumber for a permanent solution is always recommended.
Understanding the Faucet Type and Leak Source
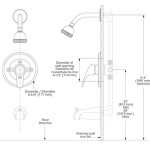
Before attempting any repair, accurately identifying the type of faucet is crucial. The most common types include compression faucets, ball faucets, cartridge faucets, and ceramic disc faucets. Each type has a distinct internal mechanism, and the troubleshooting steps vary accordingly. Understanding the faucet type allows for a more targeted approach and reduces the risk of damaging the fixture further.
Compression faucets are typically the oldest type and are characterized by two separate handles for hot and cold water. Leaks in compression faucets often stem from worn-out rubber washers or seats. Ball faucets, identifiable by a single handle that controls both water flow and temperature, often leak due to worn O-rings and springs within the ball assembly. Cartridge faucets also use a single handle but employ a cartridge mechanism to control water flow. Leaks in cartridge faucets usually originate from a faulty cartridge or worn O-rings. Finally, ceramic disc faucets, known for their smooth operation, utilize ceramic cylinders to control water flow. Leaks in these faucets can be caused by damaged ceramic discs or seals.
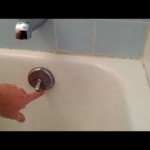
Determining the source of the leak is equally important. Is the water dripping from the spout, around the handle, or from the base of the faucet? A leak from the spout usually indicates a problem with the internal components, such as washers, O-rings, or cartridges. A leak around the handle often points to worn O-rings or packing nuts. A leak from the base of the faucet could suggest issues with the mounting hardware or seals. Accurately pinpointing the leak source streamlines the repair process and helps identify the necessary replacement parts.
Visual inspection is key. Examine the faucet closely for any signs of wear, corrosion, or damage. Check the handles for looseness or play. If possible, disassemble the faucet partially (while being mindful of the water flow) to inspect the internal components for wear or damage. Taking pictures during disassembly helps with reassembly later.
Temporary Measures to Reduce Water Flow
While completely stopping the water flow without turning off the water supply is generally impossible, several techniques can significantly reduce the flow, making the repair process more manageable. These techniques offer a temporary respite and allow for a more controlled repair environment.
One approach involves using a wet/dry vacuum cleaner to continuously remove the dripping water. Place the hose of the vacuum cleaner directly under the faucet spout to capture the water as it drips. While this doesn't stop the leak, it prevents water from accumulating in the tub and allows for better visibility and accessibility during the repair. Ensure the vacuum cleaner is designed for wet use to avoid damage.
Another technique involves using absorbent materials to soak up the water. Place towels, sponges, or even absorbent diapers around the faucet base to contain the dripping water. Regularly replace the saturated materials with dry ones to maintain control over the water flow. This method is particularly useful for leaks around the handle or base of the faucet.
For certain faucet types, applying plumber's grease or silicone sealant to specific areas can temporarily reduce the leak. For example, applying plumber's grease to the O-rings of a ball faucet can sometimes create a temporary seal, slowing down the drip. Similarly, applying a small amount of silicone sealant around the base of the faucet can temporarily stop a leak from that area. However, it's crucial to remember that these are temporary fixes and a proper repair is still necessary.
Another method involves carefully adjusting the water pressure using the individual shut-off valves located under the sink, if available. While these valves may not completely stop the flow to the bathtub faucet, they can significantly reduce the pressure, minimizing the leak. Slowly turn the valves clockwise to reduce the water flow. Be cautious not to overtighten the valves, as this can damage them.
Troubleshooting and Component Replacement (With Limited Water Flow)
With the water flow somewhat controlled, the next step involves troubleshooting the leak and replacing the faulty components. This requires a methodical approach and a keen eye for detail. Safety is paramount, and wearing appropriate safety glasses and gloves is recommended.
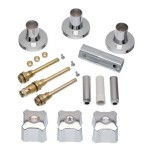
For compression faucets, the most common culprit is a worn-out rubber washer. This washer sits at the bottom of the valve stem and creates a seal against the valve seat when the faucet is turned off. Over time, the washer can become brittle and cracked, leading to leaks. To replace the washer, carefully disassemble the faucet handle and valve stem. Remove the old washer and replace it with a new one of the same size and type. Applying a small amount of plumber's grease to the new washer helps to create a better seal.
For ball faucets, the O-rings and springs within the ball assembly are often the source of leaks. These small components can wear out over time, allowing water to escape. To replace them, disassemble the faucet handle and remove the ball assembly. Carefully inspect the O-rings and springs and replace any that are worn or damaged. A special tool called a ball faucet wrench is often required for this procedure.
For cartridge faucets, the cartridge itself is usually the cause of leaks. The cartridge controls the flow of water and can become damaged or worn over time. To replace the cartridge, remove the faucet handle and any retaining clips or nuts. Carefully pull out the old cartridge and insert the new one, ensuring it is properly aligned. Reassemble the faucet and test for leaks.
For ceramic disc faucets, leaks can be caused by damaged ceramic discs or seals. These faucets are more complex to repair and often require specialized tools and knowledge. If a ceramic disc faucet is leaking, it's often best to consult a qualified plumber.
During the component replacement process, ensure the faucet components are thoroughly cleaned. Remove any mineral deposits or corrosion from the valve seats and other internal parts. A small brush or a specialized valve seat wrench can be helpful for this task. Applying plumber's grease to all moving parts during reassembly helps to ensure smooth operation and prevent future leaks.
It is important to note that attempting these repairs with limited water flow can be challenging. The continuous dripping can make it difficult to see what you are doing and can also make it harder to grip small parts. Patience and careful attention to detail are essential.
After reassembling the faucet, carefully test for leaks. Turn the faucet on and off several times, checking for any signs of dripping or leaking. If the leak persists, re-examine the components and ensure they are properly installed and sealed.
While the methods outlined in this article can provide temporary relief from a leaky bathtub faucet without turning off the water supply, they are not a substitute for a proper repair. It's important to remember that these techniques are often short-term solutions and a complete repair, which typically involves shutting off the water supply, is usually necessary to permanently fix the problem.

Fix A Leaky Bathtub Faucet Without Shutting Off Water

How To Fix A Leaky Bathtub Faucet 6 Ways Stop Drips

How To Fix A Leaking Bathtub Faucet The Home Depot

Can You Fix A Leaky Faucet Without Turning Off The Water Learntodiy360 Com

Fix A Leaky Bathtub Faucet Without Shutting Off Water

How To Fix A Leaking Bathtub Faucet The Home Depot

How To Fix A Leaky Bathtub Faucet 6 Ways Stop Drips

How To Fix A Leaking Bathtub Faucet Diy Family Handyman

How To Fix A Leaking Bathtub Faucet The Home Depot

Shower Faucet Won T Turn Off Short Version
Related Posts