How to Fix a Hole in a Bathtub?
A hole in your bathtub can be a frustrating and potentially costly problem. However, it is a problem that you can usually fix yourself with a little time and effort. Here are the steps on how to fix a hole in a bathtub:
1. Gather your materials
You will need the following materials to fix a hole in a bathtub:
- A bathtub repair kit
- A drill
- A screwdriver
- A utility knife
- A wet/dry vacuum cleaner
- A sponge
- A bucket of water
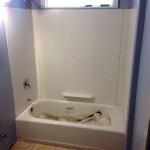
2. Prepare the area
Before you begin repairing the hole, you need to prepare the area. This involves cleaning the area around the hole with a sponge and bucket of water. You should also use a wet/dry vacuum cleaner to remove any debris from the hole.
3. Drill a pilot hole
Once the area is clean, you need to drill a pilot hole in the center of the hole. The pilot hole should be slightly smaller than the diameter of the repair plug that came with your bathtub repair kit.
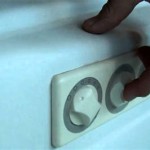
4. Insert the repair plug
After you have drilled the pilot hole, you need to insert the repair plug into the hole. The repair plug should be slightly larger than the diameter of the hole. You should use a screwdriver to tighten the repair plug into place.
5. Apply the sealant
Once the repair plug is in place, you need to apply a sealant around the edges of the plug. The sealant will help to keep the plug in place and prevent water from leaking through the hole.
6. Allow the sealant to dry
Once you have applied the sealant, you need to allow it to dry completely. The drying time will vary depending on the type of sealant that you are using. Once the sealant is dry, you can test the repair by filling the bathtub with water.

How To Fix A Hole In Bathtub Easy Diy Guide

Large Rusted Holes In Bathtub Repair And Refinish

Fiberglass Tub Repair Service S And Holes Filled

Ed Bathtub Floor Repair Leaking Tub Or Shower

How To Repair A Rusty Hole In Your Steel Bathtub

Bathtub Hole Repair Happy Tubs

Fix Whole In Bathtub Faucet Doityourself Com Community Forums

Repairing A Ed Bathtub Or Shower

Pin On Home Ideas

How To Fix A Hole In The Bathtub Diy Repair Bathroom Makeover
Related Posts