How to Fill In a Sunken Bathtub Surround
Sunken bathtub surrounds, often characterized by a noticeable depression or dip behind the bathtub itself, can present both aesthetic and functional problems. These depressions can accumulate moisture, leading to mold growth, structural damage, and an overall unsightly appearance. Addressing this issue promptly and effectively is crucial for maintaining the integrity and longevity of the bathroom. The process of filling in a sunken bathtub surround requires careful planning, proper material selection, and adherence to specific techniques to ensure a durable and water-resistant repair.
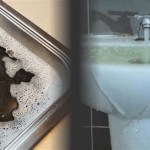
The causes of a sunken bathtub surround are varied. In many cases, inadequate support beneath the original surround material, combined with the weight of the bathtub and water, can contribute to the deformation. Water leaks, over time, can erode the underlying substrate, further exacerbating the issue. Improper installation techniques during the initial construction can also lead to premature failure and eventual sinking. Identifying the root cause of the problem is essential for preventing recurrence after the repair is completed.
Before commencing any repair work, a thorough assessment of the existing surround is necessary. This includes identifying the extent of the sinking, the type of material used for the surround (e.g., tile, acrylic, fiberglass), and the condition of the substrate beneath. Any existing mold or water damage must be addressed before proceeding with the filling process. Ignoring these underlying issues will compromise the integrity of the repair and potentially lead to further problems.
Preparation and Material Selection
Proper preparation is paramount for a successful repair. This involves cleaning the area thoroughly, removing any loose or damaged material, and ensuring a stable base for the new filler. The existing surround material should be free of soap scum, mildew, and other contaminants. A degreasing cleaner may be necessary to remove stubborn residues. Any cracked or crumbling sections of the surround should be carefully removed to provide a clean surface for the filler to adhere to.
Selecting the correct materials is equally important. Several options are available for filling a sunken bathtub surround, each with its own advantages and disadvantages. Cement-based patching compounds offer excellent durability and water resistance, making them suitable for tile surrounds. However, they can be more challenging to work with and may require specialized tools. Epoxy-based fillers provide superior adhesion and water resistance but can be more expensive. Acrylic-based fillers are easier to apply and offer good flexibility, making them a suitable choice for surrounds that are prone to movement.
For tile surrounds, a cement-based patching compound specifically designed for tile applications is recommended. This type of compound typically contains polymers that enhance its adhesion and flexibility, minimizing the risk of cracking. It is also important to choose a compound that is compatible with the existing grout and tile. For acrylic or fiberglass surrounds, an epoxy or acrylic-based filler that is specifically formulated for these materials is preferred. These fillers are designed to bond strongly to the plastic surface and resist water penetration.
In addition to the filler material, several other tools and supplies are required. These include a putty knife or trowel for applying the filler, a sanding block or sandpaper for smoothing the surface, a level for ensuring a flat finish, and a mixing container and mixing stick for preparing the filler. Safety equipment, such as gloves and eye protection, should also be worn to protect against potential irritants or chemicals.
Application Techniques
The application process begins with mixing the filler according to the manufacturer's instructions. It is crucial to follow these instructions precisely to ensure the correct consistency and performance of the material. Overmixing or undermixing can affect the adhesion, strength, and water resistance of the filler. The mixed filler should be applied in thin layers, allowing each layer to dry completely before applying the next. This technique minimizes shrinkage and cracking and ensures a more durable and stable repair.
Using a putty knife or trowel, apply the first layer of filler to the sunken area, pressing it firmly into the void to ensure good adhesion. Feather the edges of the filler to blend seamlessly with the existing surround material. Use a level to check that the surface is flat and even. If necessary, add more filler to low spots and remove excess filler from high spots. Allow the first layer of filler to dry completely according to the manufacturer's instructions. This typically takes several hours or even overnight, depending on the type of filler and the ambient temperature and humidity.
Once the first layer of filler is dry, inspect it for any cracks or imperfections. If necessary, apply a second layer of filler to address these issues. Repeat the application process, feathering the edges and checking for levelness. Continue applying layers of filler until the sunken area is completely filled and the surface is flush with the surrounding material. Allow the final layer of filler to dry completely before proceeding to the next step.
After the final layer of filler is dry, use a sanding block or sandpaper to smooth the surface and remove any imperfections. Start with a coarse grit sandpaper to remove any large bumps or ridges and then switch to a finer grit sandpaper to achieve a smooth, even finish. Be careful not to sand too aggressively, as this could damage the surrounding material. Wipe away any sanding dust with a damp cloth before proceeding to the final step.
Finishing and Sealing
The final step in the repair process is to seal the filled area to protect it from moisture and prevent future damage. The type of sealant used will depend on the type of surround material and the type of filler used. For tile surrounds, a high-quality grout sealant is recommended. This sealant will penetrate the grout lines and protect them from water penetration, preventing mold growth and staining. For acrylic or fiberglass surrounds, a silicone sealant that is specifically formulated for these materials is preferred. This sealant will create a waterproof barrier that will protect the underlying substrate from moisture.
Apply the sealant according to the manufacturer's instructions, using a caulking gun or sealant applicator. Be sure to apply a generous amount of sealant to all of the edges and seams of the filled area. Use a wet finger or a sealant smoothing tool to create a smooth, even bead of sealant. Wipe away any excess sealant with a damp cloth. Allow the sealant to dry completely according to the manufacturer's instructions. This typically takes several hours or even overnight, depending on the type of sealant and the ambient temperature and humidity.
Once the sealant is dry, inspect the repaired area for any gaps or imperfections. If necessary, apply a second coat of sealant to address these issues. Allow the second coat of sealant to dry completely before exposing the repaired area to water. To ensure that the bond between the old and new material is strong consider adding a reinforcing mesh during the fill process, embedded within the filler, particularly if the void is large or subject to significant stress.
Following these steps carefully will result in a successfully filled and sealed sunken bathtub surround, restoring both its functionality and aesthetic appeal. Regular inspection and maintenance of the bathroom, including addressing any leaks or water damage promptly, will help prevent future problems and extend the lifespan of the repair.

3 Installation Tips For Sunken Tubs Seattle Bathtub Guy

Sunken Tub With Shower Design Ideas

48 Dreamy Sunken Bathtubs To Relax In Digsdigs

48 Dreamy Sunken Bathtubs To Relax In Digsdigs

48 Dreamy Sunken Bathtubs To Relax In Digsdigs

48 Dreamy Sunken Bathtubs To Relax In Digsdigs

Sunken Bathtub With Cover Clearly To Be Considered Only For The Bath

What Is A Sunken Bathtub Introduction And Examples Badeloft

Is A Sunken Tub Right For You

10 Perfect Sunken Bathtubs For A Modern Bathroom Maison Valentina Blog