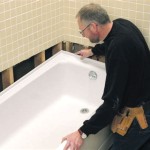
How To Clean Inside Bathtub Jets
Maintaining a clean and hygienic bathtub is crucial for personal hygiene and overall well-being. Bathtub jets, while providing a relaxing and therapeutic bathing experience, can harbor bacteria, mold, mildew, and accumulated soap scum, if not cleaned regularly. This buildup compromises water quality and can potentially lead to skin irritations or infections. This article provides a comprehensive guide on how to thoroughly clean the inside of bathtub jets, ensuring a safe and enjoyable bathing experience.
The frequency of cleaning bathtub jets depends on usage. If the bathtub is used frequently, cleaning the jets once a month is recommended. For less frequent use, cleaning every two to three months should suffice. However, any visible signs of buildup or discoloration warrant immediate cleaning, irrespective of the regular schedule.
Preparing for the Cleaning Process
Before initiating the cleaning process, it is imperative to gather the necessary supplies. These typically include white vinegar, baking soda, dish soap, a soft-bristled brush (such as an old toothbrush), a microfiber cloth, and safety gloves. White vinegar acts as a natural disinfectant and effectively dissolves mineral deposits and soap scum. Baking soda is a mild abrasive that aids in scrubbing away stubborn residues. Dish soap helps to break down greasy films. The soft-bristled brush allows for targeted cleaning of the jet nozzles, and the microfiber cloth facilitates wiping down surfaces without leaving streaks. Safety gloves protect the hands from prolonged exposure to cleaning agents.
Once the supplies are assembled, ensure proper ventilation by opening windows or turning on the bathroom exhaust fan. This helps to minimize the inhalation of cleaning fumes. It is also recommended to protect the surrounding bathroom surfaces, such as the floor and walls, by covering them with towels or plastic sheeting. This prevents accidental spills or splashes from damaging these areas.
Cleaning the Bathtub Jets: A Step-by-Step Guide
The cleaning process involves several key steps to ensure the thorough removal of accumulated debris and contaminants from within the bathtub jets. These steps are designed to be effective while minimizing the risk of damage to the bathtub components.
First, fill the bathtub with hot water, ensuring that the water level is at least two to three inches above the highest jets. The hot water helps to loosen any embedded dirt and grime within the jet system.
Next, add the cleaning solution to the water. A commonly used and effective solution consists of half a cup of white vinegar and a tablespoon of dish soap. For particularly stubborn buildup, a quarter of a cup of baking soda can be added to the mixture. The white vinegar acts as a natural disinfectant and descaling agent, while the dish soap helps to break down oily residues. Baking soda provides a gentle abrasive action to help scrub away stubborn deposits.
Once the cleaning solution is added, turn on the bathtub jets and let them run for approximately 15-20 minutes. This allows the cleaning solution to circulate throughout the jet system, effectively dislodging and dissolving any accumulated debris. It is important to monitor the jets during this process, ensuring that they are functioning properly and that no excessive foaming occurs. If excessive foaming is observed, add a small amount of cold water to the bathtub to reduce the suds.
After running the jets, turn them off and allow the cleaning solution to soak in the bathtub for at least an hour. This extended soaking period allows the cleaning solution to further penetrate and loosen any remaining dirt and grime within the jet system. For heavily soiled jets, an overnight soaking period may be necessary.
Following the soaking period, drain the bathtub and thoroughly rinse it with clean water. This removes any residual cleaning solution and dislodged debris from the bathtub and jet system. Use the showerhead or a handheld sprayer to ensure that all surfaces are thoroughly rinsed.
Inspect the jet nozzles for any remaining debris or discoloration. If necessary, use the soft-bristled brush to gently scrub the jet nozzles, removing any stubborn deposits. Pay particular attention to the areas around the jet openings, where buildup tends to accumulate. A toothpick or a small cleaning tool can be used to carefully remove any debris trapped within the jet openings.
Finally, refill the bathtub with cold water and run the jets for another 10-15 minutes to flush out any remaining debris or cleaning solution. This final rinse ensures that the jet system is completely clean and free of any potentially irritating residues.
Addressing Stubborn Buildup and Preventing Future Problems
In cases where stubborn buildup persists despite following the aforementioned steps, several alternative cleaning methods can be employed. A paste made from baking soda and water can be applied directly to the affected areas and allowed to sit for several minutes before scrubbing and rinsing. The abrasive properties of baking soda can effectively dislodge stubborn deposits.
Alternatively, a commercial jet cleaner specifically designed for bathtubs can be used. These cleaners typically contain stronger cleaning agents and may be more effective at removing particularly stubborn buildup. However, it is crucial to carefully follow the manufacturer's instructions and to ensure adequate ventilation when using these products.
To prevent future buildup and maintain the cleanliness of the bathtub jets, several preventative measures can be implemented. Regularly flushing the jet system with clean water after each use helps to remove any residual soap scum and debris. Avoiding the use of bath oils, bubble baths, and other products that can contribute to buildup is also recommended.
Installing a water softener can help to reduce the mineral content of the water, which can contribute to scale buildup in the jet system. Regularly inspecting the jets for any signs of buildup or discoloration and addressing them promptly can prevent minor problems from escalating into more significant issues. Draining the bathtub immediately after use, instead of allowing water to sit in the tub for extended periods, can also mitigate buildup.
Furthermore, consider replacing the jets periodically, especially if they are showing signs of wear and tear or if they are particularly difficult to clean. Over time, the internal components of the jets can become corroded or damaged, making them more susceptible to buildup and less effective at providing a relaxing bathing experience. Consult with a plumbing professional for guidance on selecting and installing replacement jets.
By diligently following these cleaning and preventative measures, individuals can effectively maintain the cleanliness and hygiene of their bathtub jets, ensuring a safe, enjoyable, and therapeutic bathing experience for years to come.

Are You Deep Cleaning Your Jetted Tub This Needs Done Whether Use Tiktok

How To Clean A Jetted Tub 14 Steps With Pictures Wikihow

How To Clean A Jetted Tub 14 Steps With Pictures Wikihow

How To Clean Bathtub Jets Jacuzzi Cleaning

Cool Your Jets Jetted Tub Cleaning House Work

How To Clean Your Jetted Tub Cleanings Cleaningyoulllove Cleani Tiktok

How To Clean The Jets In A Jet Tub All You Need Is One Ingredient Fabulessly Frugal

How To Clean A Jetted Bathtub Bond Cleaning In Brisbane

How To Clean Your Jetted Whirlpool Tub Get The Mold Out

Cleaning A Jetted Tub At Home How To Clean Bathtub

