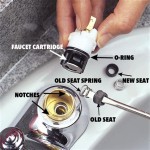
How To Change A Bathtub Drain
Changing a bathtub drain is a relatively simple plumbing repair that can be completed in a few hours. By following these step-by-step instructions, you can save yourself the cost of hiring a plumber.
Tools and Materials:
- Adjustable wrench
- Phillips screwdriver
- Flathead screwdriver
- Channellock pliers
- Putty knife
- New bathtub drain assembly
- Plumber's putty
- Bucket
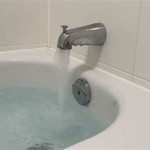
Before you begin, turn off the water supply to the bathtub. You can do this by closing the shut-off valves under the sink or by turning off the main water supply to your home.
Step 2: Remove the Drain CoverThe drain cover is typically held in place by a few screws. Use a Phillips screwdriver to remove the screws and then lift off the cover.
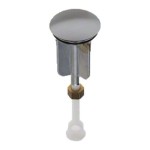
Step 3: Remove the Drain StopperThe drain stopper is the part of the drain that plugs the hole. It is usually attached to the drain body by a small screw. Use a flathead screwdriver to remove the screw and then pull out the stopper.
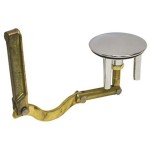
Step 4: Remove the Drain BodyThe drain body is the main part of the drain assembly. It is held in place by a nut that is located underneath the drain. Use an adjustable wrench to loosen the nut and then remove the drain body.
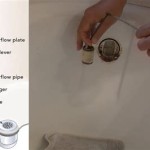
Step 5: Clean the Drain HoleOnce the drain body is removed, you can clean the drain hole. Use a putty knife to scrape away any old caulk or debris. You can also use a wet/dry vacuum to suck up any loose debris.
Step 6: Apply Plumber's PuttyApply a ring of plumber's putty around the base of the new drain body. This will help to seal the drain and prevent leaks.
Step 7: Install the New Drain BodyPlace the new drain body into the drain hole and hand-tighten the nut. Use an adjustable wrench to further tighten the nut, but be careful not to overtighten it.
Step 8: Install the Drain StopperInsert the drain stopper into the drain body and tighten the screw. The stopper should fit snugly into the drain body, but it should not be so tight that it is difficult to remove.
Step 9: Install the Drain CoverPlace the drain cover over the drain body and tighten the screws. The cover should fit snugly against the drain body, but it should not be so tight that it is difficult to remove.
Step 10: Turn on the Water SupplyOnce the new drain is installed, turn on the water supply and check for leaks. If there are any leaks, tighten the drain nut or replace the plumber's putty.
Congratulations! You have now successfully changed the bathtub drain.

How To Remove A Bathtub Drain Forbes Home

How To Replace A Bathtub Drain

Easy Replacement Of A Bathtub Drain

4 Easy Ways To Remove A Tub Drain Stopper Wikihow

How To Replace A Bathtub Drain

How To Remove 6 Diffe Bath Drain Types

4 Easy Ways To Remove A Tub Drain Stopper Wikihow

How To Replace A Tub Drain Ask This Old House

Diy How To Replace Bathtub Drain Stopper Tutorial Clogged

4 Easy Ways To Remove A Tub Drain Stopper Wikihow