How To Caulk a Bathtub Faucet: A Comprehensive Guide
Caulking around a bathtub faucet is a crucial maintenance task that prevents water damage, mold growth, and costly repairs. Over time, the existing caulk degrades, cracks, and loses its watertight seal. This allows water to seep behind the faucet escutcheon (the decorative plate surrounding the faucet), potentially damaging the wall and subfloor. Replacing the caulk is a relatively simple DIY project that can save homeowners significant expense and frustration. This article provides a detailed guide on how to properly caulk around a bathtub faucet, ensuring a long-lasting and watertight seal.
Key Point 1: Preparing the Area for Caulking
Proper preparation is paramount for achieving a professional-looking and effective caulk seal. This involves removing the old caulk, cleaning the area thoroughly, and ensuring it is completely dry. Failing to adequately prepare the surface will result in poor adhesion, leading to premature failure of the new caulk.
The first step is to gather the necessary tools and materials. These include: a utility knife or caulk removal tool, a plastic scraper or putty knife, cleaning supplies (such as mildew cleaner, rubbing alcohol, and water), paper towels or cloths, painter's tape, a caulking gun, and a tube of high-quality bathroom caulk (specifically formulated to resist mold and mildew). Silicone caulk is generally preferred for bathroom applications due to its flexibility and water resistance.
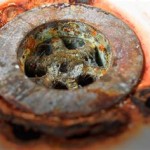
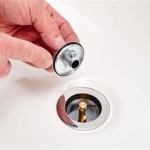
Next, the old caulk must be removed. Using a utility knife or caulk removal tool, carefully score along both edges of the existing caulk bead. Take care not to scratch the surrounding surfaces (the faucet escutcheon, the bathtub, or the wall). The goal is to loosen the caulk from its adhesion to the surfaces.
Once the caulk has been scored, use a plastic scraper or putty knife to gently lift and peel away the caulk. Work slowly and methodically to remove as much of the old caulk as possible. Avoid using metal scrapers, as they can easily scratch and damage the surrounding surfaces. For stubborn areas, a specialized caulk softening solution can be applied to make removal easier.
After removing the bulk of the old caulk, examine the area for any remaining residue. Use a plastic scraper or stiff brush to remove any small pieces or powdery residue. This step is crucial for ensuring proper adhesion of the new caulk.
With the old caulk removed, thoroughly clean the area. Use a mildew cleaner to remove any mold or mildew growth, which is common in bathroom environments. Follow the manufacturer's instructions for the mildew cleaner, and allow it to sit for the recommended time before rinsing with water.
After rinsing, use rubbing alcohol to further clean and degrease the area. This will remove any remaining soap scum, mineral deposits, or other contaminants that could interfere with caulk adhesion. Wipe the area dry with a clean paper towel or cloth. Ensure the area is completely dry before proceeding to the next step. Moisture trapped beneath the caulk can lead to mold growth and premature failure of the seal.
Finally, apply painter's tape to the edges of the faucet escutcheon, the bathtub, and the wall, creating a clean and defined line for the caulk bead. The tape should be applied approximately 1/8 inch away from the joint, leaving a narrow gap for the caulk. This step will help to create a professional-looking finish and prevent caulk from smearing onto the surrounding surfaces.
Key Point 2: Applying the New Caulk
Applying the caulk requires a steady hand and a consistent pressure to create a uniform and watertight seal. The objective is to fill the gap between the faucet escutcheon and the surrounding surfaces with caulk, creating a flexible and durable barrier against water penetration.
First, prepare the caulking gun and the tube of caulk. Cut the tip of the caulk tube at a 45-degree angle, using a utility knife. The size of the opening will determine the width of the caulk bead. In general, a smaller opening is preferable, as it allows for more control and prevents excessive caulk application. Pierce the inner seal of the caulk tube with a nail or wire to allow the caulk to flow freely.
Load the caulk tube into the caulking gun. Squeeze the trigger to advance the plunger and apply pressure to the caulk tube. Before applying caulk to the joint, practice on a piece of scrap paper or cardboard to get a feel for the gun and the flow of caulk. This will help to avoid mistakes and ensure a smooth and consistent application.
Position the tip of the caulk tube at the beginning of the joint, where the faucet escutcheon meets the bathtub or wall. Hold the caulking gun at a 45-degree angle and apply steady pressure to the trigger, moving the gun smoothly along the joint. Maintain a consistent speed and pressure to create a uniform bead of caulk. Avoid stopping and starting, as this can create unevenness in the caulk bead.
Overlap each pass of the caulk slightly to ensure complete coverage and eliminate any gaps. Aim for a bead of caulk that is slightly larger than the gap, as this will allow for proper shaping and smoothing. Avoid applying excessive caulk, as this will make the smoothing process more difficult and can lead to a messy finish.
If air bubbles or voids appear in the caulk bead, stop and correct the issue before proceeding. Use a wet finger or a damp cloth to smooth out the caulk and fill any gaps. Air bubbles can weaken the caulk seal and provide a pathway for water penetration.
Key Point 3: Smoothing and Finishing the Caulk
Smoothing and finishing the caulk bead is essential for creating a professional-looking and watertight seal. This process involves removing excess caulk, shaping the bead, and ensuring a smooth and uniform surface. A well-smoothed caulk bead will not only look better but will also be more durable and resistant to water damage.
Immediately after applying the caulk, use a wet finger or a specialized caulking tool to smooth the bead. Dip your finger in water with a few drops of dish soap to prevent the caulk from sticking. Run your finger along the caulk bead, applying gentle pressure to shape and smooth the surface. Wipe off any excess caulk from your finger with a clean paper towel or cloth.
Alternatively, use a specialized caulking tool with a rounded edge to smooth the caulk. These tools are available in various shapes and sizes to accommodate different joints and caulk bead widths. Apply gentle pressure and move the tool along the caulk bead in a smooth and consistent motion. Wipe off any excess caulk from the tool with a clean paper towel or cloth.
Pay close attention to the edges of the caulk bead where it meets the painter's tape. Ensure that the caulk is smoothly blended with the tape, creating a clean and defined line. Remove any excess caulk that may have squeezed out onto the tape.
Once the caulk has been smoothed, carefully remove the painter's tape. Pull the tape away from the joint at a 45-degree angle, taking care not to disturb the caulk. If any caulk is pulled away with the tape, immediately smooth it back into place with a wet finger or caulking tool.
Inspect the caulk bead for any imperfections, such as gaps, voids, or unevenness. Use a wet finger or caulking tool to correct any issues. Allow the caulk to dry completely according to the manufacturer's instructions. This usually takes 24 to 48 hours. Avoid using the bathtub or shower during this time to ensure that the caulk properly cures and forms a watertight seal.
After the caulk has dried, inspect the area again for any signs of leaks or imperfections. If any issues are found, address them promptly. This may involve applying additional caulk to fill gaps or smoothing out any unevenness. Regular inspection and maintenance of the caulk seal will help to prevent water damage and prolong the life of the caulk.
In summary, caulking around a bathtub faucet requires careful preparation, precise application, and thorough smoothing. By following these steps, homeowners can achieve a professional-looking and watertight seal that will protect their bathroom from water damage and mold growth. Regular maintenance and inspection of the caulk seal will ensure its long-lasting effectiveness.

How To Caulk Tub

How To Fix A Failed Tub Spout Seal Diy Friendly Task

How To Install A Tub Spout The Home Depot

How To Caulk A Bathtub 13 Steps With Pictures Wikihow

Great Way To Caulk Tub Valve Handle And Cover
:max_bytes(150000):strip_icc()/wipe_dap-56a73ba03df78cf77293815a.jpg?strip=all "How To Caulk Shower And Bathtub Trim")
How To Caulk Shower And Bathtub Trim

How To Seal Tub Spout And Valve Trim With Silicone Caulking The Fixer Clips

Had To Redo Some Old Ed Caulk Lines Around The Shower Handles And Faucet One Of Things I Do Most When Turn Apartments Always Use Good Caulking Apartmentmaintenance

How To Fix A Leaking Bathtub Faucet The Home Depot

How To Caulk A Bathtub 13 Steps With Pictures Wikihow
Related Posts