How to Caulk a Bathtub Wide Gap
A wide gap between the bathtub and the surrounding tile or wall can be a source of frustration and even lead to water damage. Caulking the gap effectively can prevent water from seeping in, keeping the bathroom clean and preventing potential mold growth. While a small gap might be manageable with standard caulking techniques, wider gaps require a different approach. This article will guide you through the process of caulking a bathtub wide gap using a combination of techniques for a long-lasting and watertight seal.
Step 1: Preparing the Surface
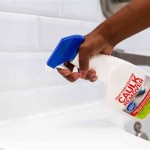
The success of your caulking project hinges on proper surface preparation. A clean, dry, and smooth surface allows for better adhesion of the caulk. Start by cleaning the area thoroughly using a cleaning agent suitable for your bathtub and surrounding surfaces. Focus on removing any mold, mildew, soap scum, or debris that can interfere with the caulk's bond. Once clean, allow the area to dry completely.
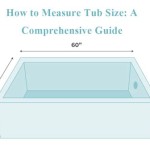
Next, address the gap itself. If the gap is wider than 1/4 inch, consider using backer rod to create a more stable base for the caulk. Backer rod is a flexible, foam-like material that comes in various sizes. Choose a size that fills most of the gap, leaving about 1/4 inch for the caulk to fill. Insert the backer rod into the gap, ensuring it's pushed all the way in and sits flush with the surrounding surfaces.
Finally, use a utility knife to trim the backer rod to the appropriate length, keeping it aligned with the edges of the gap. This step ensures an even and smooth surface for applying the caulk.
Step 2: Choosing and Applying the Caulk
For a bathtub, it's crucial to select a caulk specifically designed for wet areas. Silicone caulk is a popular choice due to its flexibility, water resistance, and mildew resistance. However, it can be difficult to remove and may not adhere as well to all surfaces. Alternatively, polyurethane caulk offers excellent adhesion and durability, but it can be less flexible than silicone. Consider your specific needs and surface properties when choosing the caulk.
Before applying the caulk, use painter's tape to mask off the areas adjacent to the gap. This helps prevent any unwanted caulk from adhering to the surrounding surfaces. Apply the caulk using a caulking gun, ensuring a smooth and consistent bead. Work in sections, gradually filling the gap while maintaining a consistent width. Avoid creating air pockets or gaps in the caulk bead.
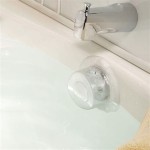
Once the caulk is applied, use a damp finger or a caulk smoothing tool to create a neat and smooth finish. Ensure the caulk is completely pressed into the gap and against the surrounding surfaces, creating a watertight seal. Remove any excess caulk using a damp rag or a utility knife. Be careful not to smear or distort the caulk during this process.
Step 3: Finishing Touches
After applying the caulk, allow it to cure completely as per the manufacturer's instructions. Typically, silicone caulk takes about 24 hours, while polyurethane caulk might take longer. Once cured, carefully remove the painter's tape. The caulked area should be smooth, clean, and free of excess caulk.
For a longer-lasting seal, consider applying a water-based sealant over the cured caulk. This extra layer provides further protection against water damage and mold growth. Apply the sealant using a brush or sponge, ensuring even coverage. Allow the sealant to dry completely before using the bathtub.
Regularly inspect the caulked area, especially after cleaning or using the bathtub. If you notice any signs of cracking, shrinking, or damage, re-caulk the affected area to maintain a watertight seal. By following these steps, you can ensure a long-lasting and functional caulk job, keeping your bathroom clean and free from water damage.

Rambling Moose Caulking The Tub Filling A Very Large Gap

Large Gap Between Tub And Tile 1 2 How To Caulk Doityourself Com Community Forums

Rambling Moose Caulking The Tub Filling A Very Large Gap

Diy Caulking Large Gaps Erin Knight

Large Gap Between Tub And Tile 1 2 How To Caulk Doityourself Com Community Forums

How To Caulk A Bathtub 13 Steps With Pictures Wikihow

Repairing Large Grout Gap Between Bathtub Wall Tiles Ceramic Tile Advice Forums John Bridge

Rambling Moose Caulking The Tub Filling A Very Large Gap

Dover Projects How To Caulk A Bathtub

Gap Between Bathtub And Tiled Wall Ceramic Tile Advice Forums John Bridge