How to Caulk a Bathtub Like a Pro
Caulking a bathtub is a simple but essential task that can help prevent water damage and keep your bathroom looking its best. By following these steps, you can easily caulk your bathtub like a pro.
Materials You'll Need
Before you start, gather the following materials:
- Caulk gun
- Caulk (silicone or acrylic)
- Caulk smoother
- Rubbing alcohol
- Clean cloth or paper towels
Step 1: Prepare the Surface
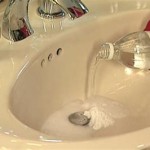
Clean the area around the bathtub where you'll be caulking with rubbing alcohol. This will remove any dirt, grime, or soap scum that could prevent the caulk from adhering properly.
Step 2: Apply the Caulk
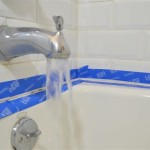
Load the caulk gun with a new tube of caulk. Cut the tip of the tube at a 45-degree angle, and insert the tube into the caulk gun. Apply a thin, even bead of caulk along the joint between the bathtub and the wall or tile.
Step 3: Smooth the Caulk
Immediately after applying the caulk, use a caulk smoother to smooth it out and create a clean, even finish. Wet the smoother with water or caulk softener to prevent the caulk from sticking to it.
Step 4: Remove Excess Caulk
Use a clean cloth or paper towels to wipe away any excess caulk that may have gotten on the bathtub or surrounding surfaces. Be careful not to smudge the caulk that you've already applied.
Step 5: Allow the Caulk to Cure
Allow the caulk to cure completely before using the bathtub. The curing time will vary depending on the type of caulk you've used. Silicone caulk typically takes 24 hours to cure, while acrylic caulk may only take a few hours.
Tips for Success
Here are a few tips for caulking a bathtub like a pro:
- Use a high-quality caulk that is specifically designed for bathroom use.
- Apply the caulk in a thin, even bead.
- Smooth the caulk immediately after applying it.
- Remove any excess caulk before it dries.
- Allow the caulk to cure completely before using the bathtub.

How To Caulk A Bathtub 13 Steps With Pictures Wikihow

How To Caulk A Bathtub On Sutton Place

How To Caulk A Bathtub 13 Steps With Pictures Wikihow

Caulking A Bathtub Simple Steps For Successful Seal

How To Caulk A Shower Or Tub True Value

How To Caulk A Bathtub On Sutton Place

How To Re Caulk A Bathtub

How To Caulk A Bathtub Cautionary Tale Designertrapped Com

How To Caulk A Bathtub With Beautiful Results

How To Caulk A Bathtub Like Pro