How to Attach a Shower Hose to a Bathtub Faucet
Adding a handheld shower to a bathtub faucet offers significant versatility, transforming a standard bathtub into a more functional and adaptable bathing space. This upgrade allows for easier rinsing, bathing of children or pets, and cleaning of the bathtub itself. While professional installation is always an option, attaching a shower hose to a bathtub faucet is a manageable DIY project for most homeowners with some basic plumbing knowledge and the right tools. This article provides a comprehensive guide on how to successfully complete this task.
Before initiating the installation process, proper preparation is crucial. This includes gathering the necessary tools and materials, assessing the existing faucet type, and understanding the potential compatibility issues. Neglecting these initial steps may result in delays, complications, or even damage to the plumbing system.
Identifying Your Faucet Type and Required Adapters
Bathtub faucets come in various designs, each requiring a slightly different approach for attaching a shower hose. The most common types include: diverter tub spouts with a built-in diverter lever, non-diverter tub spouts (often with a threaded end), and Roman tub faucets (typically deck-mounted with separate hot and cold water handles). Understanding your faucet type is the first step in determining the correct adapter or fitting needed for a secure and leak-proof connection.
Diverter tub spouts are generally the simplest to adapt. They usually have a built-in lever that, when pulled up, diverts the water flow from the spout to an overhead shower. Attaching a handheld shower to this type of faucet typically involves replacing the existing diverter mechanism with a diverter that also includes an outlet for the shower hose. These combination diverter valves are readily available at most hardware stores.
Non-diverter tub spouts often feature a threaded end. In this case, a diverter valve with corresponding threads can be screwed onto the spout. These diverter valves usually have two settings: one for the tub spout and one for the shower hose. When selecting a diverter valve, ensure the thread size matches the spout's thread size. Common thread sizes include 1/2-inch and 3/4-inch. An incorrect thread size will lead to leaks and an inability to establish a secure connection.
Roman tub faucets, being deck-mounted systems, require a different approach. In this instance, adding a handheld shower typically involves installing a separate diverter valve and shower hose connection point. This can be accomplished by tapping into the existing water supply lines under the bathtub deck. This method requires more extensive plumbing knowledge and may involve cutting and soldering pipes. For those unfamiliar with these techniques, professional installation is highly recommended.
Regardless of the faucet type, it is generally recommended to purchase a shower hose kit that includes all necessary adapters and fittings. This ensures compatibility and simplifies the installation process. Prior to purchase, check the kit contents and verify that they are suitable for the specific faucet type.
Gathering Tools and Materials
Having the necessary tools and materials readily available will streamline the installation process and prevent unnecessary trips to the hardware store. The following is a comprehensive list of recommended tools and materials:
- Adjustable Wrench: Used for tightening and loosening nuts and fittings. A pipe wrench may be necessary for stubborn connections.
- Plumber's Tape (Teflon Tape): Essential for sealing threaded connections and preventing leaks.
- Pliers: Useful for gripping and manipulating small parts.
- Screwdriver (Phillips and Flathead): May be needed for removing or adjusting faucet components.
- Bucket or Container: To catch any dripping water when disconnecting existing fixtures.
- Clean Rags or Towels: For cleaning up spills and protecting surfaces.
- New Shower Hose Kit with Diverter Valve: Ensure the kit is compatible with your faucet type.
- Measuring Tape: To measure thread sizes or pipe diameters.
- Optional: Thread Sealant Compound: An alternative to plumber's tape, providing an extra layer of leak protection.
The availability of these tools enables a smoother and more efficient installation. Ensure that tools are in good working condition and appropriate for the tasks involved. Worn or damaged tools can lead to stripped threads or other complications.
Step-by-Step Installation Guide
Once the faucet type has been identified and the necessary tools and materials have been gathered, the actual installation can begin. The following steps provide a detailed guide to attaching a shower hose to a bathtub faucet:
- Turn Off the Water Supply: Locate the shut-off valves for the hot and cold water supply lines to the bathtub faucet. These valves are typically located under the sink or near the bathtub. Turn both valves completely clockwise to shut off the water supply. It is essential to verify that the water is completely shut off before proceeding to the next step. Open the bathtub faucet briefly to release any remaining water pressure in the pipes.
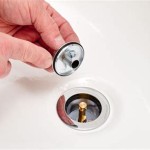
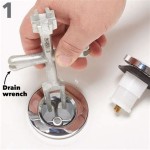
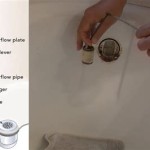
- Remove the Existing Tub Spout (if applicable): If the existing tub spout needs to be replaced with a diverter valve, carefully unscrew it from the water supply pipe. Depending on the spout type, it may be threaded or secured with a set screw. If threaded, turn the spout counterclockwise to loosen it. If a set screw is present, use the appropriate screwdriver to loosen the screw before unscrewing the spout. Be prepared for a small amount of water to drain from the pipe after removing the spout.
- Prepare the Water Supply Pipe: Clean the exposed water supply pipe thoroughly. Remove any old plumber's tape or sealant residue. Inspect the pipe for any signs of corrosion or damage. If necessary, use a wire brush to clean the threads.
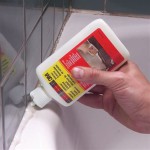
- Apply Plumber's Tape: Wrap the threads of the water supply pipe with several layers of plumber's tape. Wrap the tape in a clockwise direction, ensuring that each layer overlaps the previous one. This creates a watertight seal. Alternatively, apply thread sealant compound according to the manufacturer's instructions.
- Install the Diverter Valve: Carefully screw the diverter valve onto the water supply pipe. Turn the valve clockwise until it is snug but not overtightened. Overtightening can damage the threads or the valve. Use an adjustable wrench to tighten the valve further, but avoid excessive force.
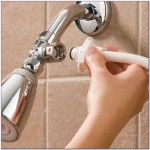
- Connect the Shower Hose: Attach one end of the shower hose to the designated outlet on the diverter valve. Most shower hoses have a threaded fitting that screws onto the valve. Tighten the fitting securely by hand, and then use an adjustable wrench for a final tightening. Avoid overtightening.
- Attach the Shower Head: Attach the shower head to the other end of the shower hose. Again, tighten the fitting securely by hand, and then use an adjustable wrench for a final tightening. Ensure the shower head is securely attached to prevent leaks and ensure stable operation.
- Test for Leaks: Slowly turn the water supply valves back on, one at a time. Carefully inspect all connections for leaks. If leaks are detected, turn off the water supply and tighten the connections further. If leaks persist, reapply plumber's tape or thread sealant compound.
- Test the Diverter Valve: With the water supply fully restored, test the diverter valve to ensure it functions correctly. Switch between the tub spout and the shower hose to verify proper water flow in both directions.
Following these steps carefully will ensure a successful installation and a leak-free connection. If encountering any difficulties or uncertainties, consulting a professional plumber is recommended.
Troubleshooting Common Issues
While the installation process is generally straightforward, certain issues may arise. Addressing these issues promptly and effectively is crucial to achieving a successful outcome.
Leaks: Leaks are the most common problem encountered during shower hose installation. They typically occur at threaded connections. To resolve leaks, first ensure that all connections are tightened properly. If leaks persist, turn off the water supply and remove the leaking component. Reapply plumber's tape or thread sealant compound to the threads and reassemble the connection. Ensure that the tape is applied correctly and that the layers overlap properly. In some cases, damaged threads may be the cause of the leak. If this is the case, the damaged component may need to be replaced.
Low Water Pressure: If the water pressure from the shower head is significantly lower than expected, several factors may be contributing. First, check the shower head itself for any debris or clogs. Remove the shower head and flush it with water to remove any obstructions. Second, ensure that the diverter valve is fully open to the shower head setting. A partially closed valve can restrict water flow. Third, check the water supply lines for any kinks or obstructions. Kinked pipes can significantly reduce water pressure. Finally, low water pressure may be indicative of a larger plumbing issue within the home. In this case, consulting a professional plumber is recommended.
Incompatible Fittings: Using incompatible fittings can lead to leaks and an inability to establish a secure connection. Ensure that all fittings are the correct size and thread type for the components being connected. Refer to the manufacturer's specifications for the fitting sizes and thread types. If using adapters, ensure that the adapter is compatible with both the faucet and the shower hose. Using adapters incorrectly can lead to damage to the threads and leaks.
Damaged Components: Damaged components, such as cracked pipes or stripped threads, can prevent a successful installation. Inspect all components carefully before installation. If any damage is detected, replace the damaged component before proceeding. Attempting to install damaged components can lead to leaks and further damage to the plumbing system.
By addressing these common issues proactively, a successful shower hose installation can be achieved. In cases where the problem persists or is beyond the scope of DIY repair, seeking professional assistance is always a prudent course of action.

No Shower Problem Install A Diverter In 1 Hour The Art Of Doing Stuff

Versa Spray 1 Portable 2 In Freestanding Handheld Shower Head Sprayer For Bathtubs Without Diverter White

How To Add Sprayer Bathtub

Bathtub Shower Attachment Decor Ideas

Versa Spray 1 Portable 2 In Freestanding Handheld Shower Head Sprayer For Bathtubs Without Diverter White

Rinseroo Slip On Shower Attachment Hose

No Shower Problem Install A Diverter In 1 Hour The Art Of Doing Stuff

How To Add A Handheld Shower Head Bathtub In 8 Easy Steps

Pin Page

Versa Spray 1 Portable 2 In Freestanding Handheld Shower Head Sprayer For Bathtubs Without Diverter White
Related Posts