Fix A Leaky Faucet Bathtub: Step-by-Step Guide
A leaky faucet can be a frustrating and costly problem. Not only does it waste water, but it can also damage your bathroom fixtures and flooring. If you're experiencing a leaky faucet, don't despair. With a few simple tools and a little bit of know-how, you can fix it yourself in no time.
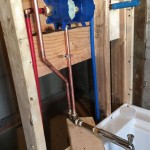
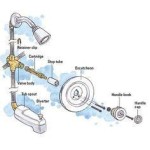
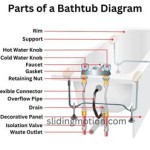
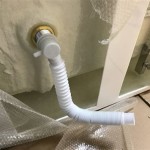
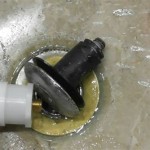
The most common cause of a leaky faucet is a worn-out washer. Washers are small, rubber discs that create a seal between the faucet stem and the faucet body. Over time, washers can become worn or damaged, causing water to leak through the faucet. If you suspect that the washer is the cause of your leak, you can replace it yourself with a few simple steps. Just be sure to turn off the water supply to the faucet before you start working on it.
In some cases, a leaky faucet may be caused by a faulty O-ring. O-rings are rubber seals that create a watertight seal between two surfaces. If an O-ring becomes worn or damaged, it can allow water to leak through the faucet. Replacing an O-ring is a relatively simple process, but it's important to make sure that you use the correct size and type of O-ring for your faucet.
If you've replaced the washer and the O-ring, but your faucet is still leaking, the problem may be with the faucet stem. The faucet stem is the part of the faucet that controls the flow of water. If the stem is worn or damaged, it can allow water to leak through the faucet. Replacing a faucet stem is a more involved process than replacing a washer or an O-ring, but it's still a job that you can do yourself with a few simple tools. Just be sure to turn off the water supply to the faucet before you start working on it.
If you're not comfortable working on your faucet yourself, you can always call a plumber. However, if you're handy and you have a few basic tools, fixing a leaky faucet is a project that you can easily do yourself. Just be sure to follow the steps carefully and turn off the water supply to the faucet before you start working on it.

Faucet Repair How To A Leaky Bath

How To Fix A Leaking Bathtub Faucet The Home Depot

How To Fix A Leaky Bathtub Faucet 6 Ways Stop Drips

11 Easy Steps To Fix A Leaking Bathtub Faucet In 2024 Spout

How To Fix A Leaky Bathtub Faucet Delta Shower Cartridge L Replace

Faucet Repair How To A Leaky Bath

How To Fix A Bathroom Faucet 14 Steps

How To Fix A Leaking Bathtub Faucet The Home Depot

How To Fix Leaking Bathtub Faucet

11 Easy Steps To Fix A Leaking Bathtub Faucet
Related Posts