DIY Refinish Bathtub: A Comprehensive Guide
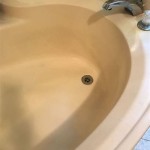
Is your bathtub looking dull, discolored, or outdated? Instead of replacing it, consider refinishing it yourself and save a significant amount of money. This guide will provide you with all the essential aspects of DIY bathtub refinishing, empowering you to revitalize your bathroom without breaking the bank.
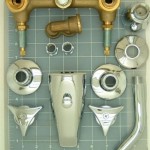
Materials Required
- Bathtub refinishing kit (includes primer, topcoat, and activator)
- Safety gear (gloves, mask, goggles)
- Rubbing alcohol
- Clean rags or microfiber cloths
- Orbital sander or sandpaper (120-grit and 220-grit)
- Putty knife
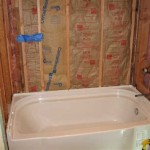
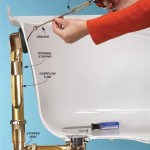
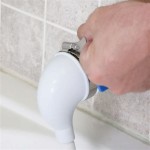
Step 1: Preparation
Thoroughly clean the bathtub with rubbing alcohol and allow it to dry completely. Remove any existing caulk or silicone around the edges. Sand the entire surface of the tub using 120-grit sandpaper to remove the gloss and create a rough surface for adhesion. Wipe away any dust or debris.
Step 2: Repair
Examine the bathtub for any cracks, chips, or holes. Use a putty knife to apply bathtub epoxy to the damaged areas and allow it to cure according to the manufacturer's instructions.
Step 3: Priming
Apply a thin coat of bathtub primer to the entire surface, including the repaired areas. Use smooth, even strokes and allow the primer to dry completely before sanding lightly with 220-grit sandpaper.
Step 4: Topcoat Application
Prepare the topcoat by mixing the base and activator according to the manufacturer's instructions. Apply the topcoat in multiple thin coats, allowing each coat to dry before applying the next. Use a brush or roller to achieve a smooth, even finish.
Step 5: Curing and Maintenance
Allow the topcoat to cure for at least 24-48 hours before using the bathtub. Clean the tub regularly with mild soap and water, avoiding abrasive cleaners or harsh chemicals. To preserve the finish, apply a bathtub sealant or wax every few months.
Tips for Success
- Ensure adequate ventilation throughout the process.
- Follow the manufacturer's instructions carefully, especially regarding mixing ratios and drying times.
- Allow ample time for the refinishing process, including preparation, curing, and maintenance.
- If you encounter any difficulties, consult a professional refinisher for guidance.
Refinishing your bathtub yourself can be a rewarding and cost-effective project. By following these essential steps and adhering to the tips above, you can restore the luster and functionality of your bathtub, enhancing the beauty and value of your bathroom for years to come.

Bathtub Refinishing Kit Guide Diy Bathroom Update

My Painted Bathtub 5 Years Later An Honest Review Of Refinished Jacuzzi Tub

How To Refinish A Bathtub On Budget

How To Refinish An Old Clawfoot Bath Tub

How To Make Your Bathtub And Shower Tile Look New Again Life Should Cost Less

How To Paint A Bathtub And Shower For 50 Refinish Tub Painted Diy Bathroom Makeover Remodel

Diy Painted Bathtub Follow Up Your Questions Answered Addicted 2 Decorating

How To Paint A Tub With Rustoleum What Not Do

Do Diy Bathtub Resurfacing Kits Really Work Todd S Bathtubs

How To Refinish A Bathtub On Budget Erin Spain