DIY Bathtub Replacement: A Step-by-Step Guide
Replacing a bathtub can be a daunting task, especially for DIY enthusiasts. However, with the right tools, knowledge, and a bit of patience, it can be a rewarding project that saves you a significant amount of money. Here's a comprehensive guide to help you through the process of DIY bathtub replacement.
Planning and Preparation
Before you start, gather the necessary materials and plan your approach:
* Materials: New bathtub, tile adhesive, thinset mortar, grout, caulk, plumbing fixtures, and a drain kit. * Tools: Pry bar, hammer, adjustable wrench, pipe wrench, level, and grout saw. * Safety Gear: Gloves, safety glasses, and a mask.Next, prepare your bathroom by removing all fixtures, such as the shower curtain, showerhead, and faucet. Protect the surrounding areas with drop cloths or plastic sheeting.
Removing the Old Bathtub
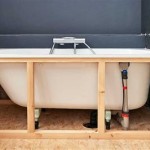
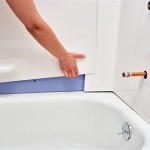
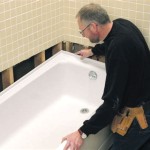
1. Disconnect the plumbing: Turn off the water supply and disconnect the drain and overflow pipes using a pipe wrench. 2. Remove the faucet: Use a wrench to disconnect the faucet and remove the mounting bracket. 3. Detach the bathtub from the studs: Use a pry bar to gently detach the bathtub from the surrounding studs. 4. Lift the bathtub out: Carefully lift the bathtub out of its space and carry it away.
Preparing the New Bathtub
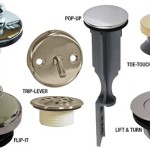
1. Inspect the subfloor: Ensure the subfloor is level and in good condition. Reinforce any weak areas with additional plywood. 2. Install a drain kit: Assemble the drain kit according to the manufacturer's instructions and connect it to the drain pipe. 3. Set the bathtub in place: Carefully lower the bathtub into its space and ensure it is level. Secure it to the studs using screws.
Tiling and Grouting
1. Spread thinset mortar: Apply a layer of thinset mortar to the area around the bathtub's edge. 2. Set the tiles: Start from a corner and press the tiles into the thinset mortar, using a level to ensure they are straight. 3. Grout the tiles: Apply grout between the tiles using a grout float. 4. Clean the excess: Wipe away any excess grout with a damp sponge.
Installing Fixtures and Caulk
1. Reinstall the faucet: Mount the faucet and reconnect it to the plumbing. 2. Install the showerhead and overflow: Mount the showerhead and reconnect the overflow pipe. 3. Caulk the edges: Apply a bead of caulk around the bathtub's edges where it meets the wall and the tile. 4. Connect plumbing: Reconnect the water supply and drain pipes, and check for leaks.
Finishing Touches
1. Clean the bathtub: Wipe down the bathtub with a damp cloth to remove any dirt or residue. 2. Apply a sealant: Apply a sealant around the bathtub's edges to prevent water damage. 3. Install the shower curtain: Install a new shower curtain or shower door.

How To Remove And Replace A Bathtub The Home Depot

How To Install A Bathtub Old Tub Removal Diy

Update An Old Bathtub In Three Easy Steps The Chronicles Of Home Diy Remodel Bathroom

Semi Diy Bathroom Makeover Part 1 Replacing The Tub Professionally

Semi Diy Bathroom Remodel Replacing A Tub Surround The Bathtub Tile

My Painted Bathtub 5 Years Later An Honest Review Of Refinished Jacuzzi Tub

How To Convert A Tub Into Walk In Shower Budget Dumpster

How To Replace A Bathtub Step By

Diy Painted Bathtub Follow Up Your Questions Answered Addicted 2 Decorating

Bathroom Remodeling A Step By Guide Budget Dumpster

