DIY Bathtub Refinishing: A Comprehensive Guide
Bathtub refinishing is a cost-effective way to restore the beauty and functionality of your bathtub without the hassle and expense of a full replacement. With the right materials and a little elbow grease, you can give your bathtub a makeover that will last for years to come.
Here are the essential steps involved in DIY bathtub refinishing:
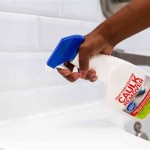
1. Preparation
The first step is to prepare the bathtub for refinishing. This involves thoroughly cleaning the surface with a degreaser and removing any dirt or debris. You may also need to repair any cracks or chips in the bathtub using a patching kit.
2. Etching
Once the bathtub is clean, you will need to etch the surface to create a rough texture that will help the new finish adhere. This is done using an etching solution, which is typically a mixture of muriatic acid and water. Apply the etching solution to the bathtub and allow it to sit for the recommended amount of time.
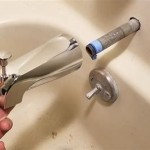
3. Rinsing and Drying
After etching, rinse the bathtub thoroughly with water to remove any remaining acid. Then, allow the bathtub to dry completely before moving on to the next step.
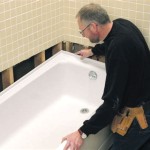
4. Application of the New Finish
Once the bathtub is dry, you can apply the new finish. There are a variety of refinishing kits available, so be sure to choose one that is compatible with your bathtub's surface. Apply the finish according to the manufacturer's instructions, using a brush or roller.
5. Curing
Once the new finish has been applied, it will need to cure for the recommended amount of time. This typically takes several hours or days, depending on the type of finish you have used. During this time, it is important to keep the bathtub free from moisture and debris.
6. Sealing
Once the finish has cured, you can apply a sealant to help protect it from damage. Apply the sealant around the edges of the bathtub and any areas that are likely to come into contact with water.
7. Enjoy Your Newly Refinished Bathtub
Once the sealant has dried, your bathtub is ready to use. Enjoy your newly refinished bathtub for years to come!
Here are some additional tips for a successful DIY bathtub refinishing project:
- Make sure to follow the manufacturer's instructions carefully for the refinishing kit you are using.
- Work in a well-ventilated area and wear a respirator when using etching solutions or other chemicals.
- Allow plenty of time for the bathtub to cure before using it.
- Clean the bathtub regularly to help maintain the finish.

My Painted Bathtub 5 Years Later An Honest Review Of Refinished Jacuzzi Tub

Bathtub Refinishing Kit Guide Diy Bathroom Update

How To Refinish A Bathtub On Budget

How To Refinish An Old Clawfoot Bath Tub

How To Paint A Tub With Rustoleum What Not Do

Do Diy Bathtub Resurfacing Kits Really Work Todd S Bathtubs

Diy Bathtub Refinishing Kits Bathworks

Diy Painted Bathtub Follow Up Your Questions Answered Addicted 2 Decorating

Bathtub Paint Little Rock Thinking About Diy Ing Refinishing

How To Refinish A Bathtub On Budget Erin Spain