Changing a Bathtub Spout: A Comprehensive Guide
Upgrading or repairing your bathtub spout is a relatively simple task that can revitalize your bathroom's appearance and functionality. Here's a comprehensive guide to help you navigate the process seamlessly:
Identifying the Right Spout for Your Bathtub
Before embarking on the spout replacement journey, it's crucial to ensure you select a suitable replacement. Consider factors such as the bathtub's style, finish, and the number of faucet holes. Measure the distance between the faucet holes to determine the correct spout length.
Gathering Necessary Tools and Materials
Assemble the following tools and materials before beginning: - Adjustable wrench - Plumber's tape - Spout wrench (if applicable) - New bathtub spout - Flashlight (optional)
Step 1: Turn Off the Water Supply
Safety first! Locate the water supply valves under the sink or behind the bathtub and turn them off to prevent unwanted flooding.
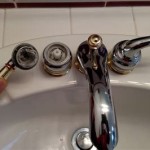
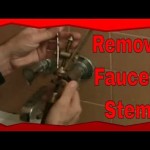
Step 2: Remove the Old Spout
If your bathtub has a separate spout, use an adjustable wrench to loosen the nut that secures it to the faucet body. If the spout is part of the faucet assembly, you'll need a spout wrench or an Allen wrench to remove it.
Step 3: Wrap Plumber's Tape
Apply several layers of plumber's tape around the threads of the new spout's base. This will help create a watertight seal once the spout is installed.
Step 4: Install the New Spout
Hand-tighten the new spout onto the faucet body or the faucet holes. Use the adjustable wrench to further tighten it, ensuring it's secure but not overtightened.
Step 5: Connect the Water Supply
Reconnecting the water supply is essential. Turn on the water valves and check for leaks. If you notice any leaks, tighten the connections further or apply additional plumber's tape.
Step 6: Test the Spout
Turn on the faucet and adjust the water temperature to ensure the spout functions properly. Check for any unusual noises or water leaks.
Additional Tips
- Use a flashlight to illuminate hidden areas beneath the sink or bathtub.
- If you encounter any stubborn bolts or nuts, apply penetrating oil and let it soak before attempting to loosen them.
- Consider consulting a professional plumber if you're not comfortable tackling the task yourself or encounter any unforeseen challenges.

How To Replace A Bathtub Spout Diy Family Handyman

Learn How To Remove And Install Various Tub Spouts

How To Install A Tub Spout The Home Depot With Thisoldhouse

Learn How To Remove And Install Various Tub Spouts

How To Replace A Tub Spout Project Tutorial Bob Vila

How To Replace A Tub Spout Project Tutorial Bob Vila

Learn How To Remove And Install Various Tub Spouts

How To Replace Or Fix Tub Spout Not Working

Learn How To Remove And Install Various Tub Spouts

How To Replace A Bathtub Spout Faucet Repair