Caulk for Bathtub Spout: Sealing and Preventing Water Damage
Caulk plays a critical role in maintaining the integrity and longevity of a bathtub, particularly around the spout. The bathtub spout is a high-traffic area exposed to constant water flow, making it susceptible to leaks and water damage if not properly sealed. Selecting the correct caulk and applying it effectively are essential steps in preventing water intrusion, mold growth, and costly repairs. This article will explore the importance of caulking around the bathtub spout, the different types of caulk available, the proper application techniques, and methods for addressing common issues.
The primary function of caulk around the bathtub spout is to create a watertight seal between the spout and the surrounding surface, typically tile or acrylic. This seal prevents water from seeping behind the spout, a common cause of hidden damage. Water that penetrates these areas can lead to a variety of problems, including the deterioration of drywall, the rotting of wooden structures, and the development of mold and mildew. Mold growth, in particular, poses a significant health risk, affecting indoor air quality and potentially causing respiratory problems. Therefore, a well-maintained caulk seal around the bathtub spout is a preventative measure that safeguards both the structural integrity of the bathroom and the health of its occupants.
Beyond preventing water damage, properly applied caulk enhances the aesthetic appeal of the bathtub area. A clean, uniform bead of caulk creates a finished look, improving the overall appearance of the bathroom. Old, cracked, or discolored caulk can detract from the bathroom's aesthetics and create an impression of neglect. Recaulking the bathtub spout is a relatively inexpensive and straightforward way to refresh the bathroom's appearance and maintain its value. Furthermore, a secure seal around the spout helps to stabilize it, preventing wobbling or movement that can eventually lead to damage to the plumbing connections behind the wall.
Understanding Different Types of Caulk
Choosing the right type of caulk is crucial for achieving a durable and watertight seal around the bathtub spout. Several types of caulk are available, each with its own set of properties and applications. The most common types used in bathrooms include silicone caulk, latex caulk, and acrylic caulk, as well as hybrids that combine the properties of two or more types of caulk. Understanding the characteristics of each type will inform the selection process and ensure a successful application.
Silicone Caulk: Silicone caulk is known for its excellent flexibility, adhesion, and water resistance. It is particularly well-suited for areas that are frequently exposed to moisture, such as around bathtubs, showers, and sinks. Silicone caulk forms a strong, watertight seal that can withstand temperature fluctuations and vibrations without cracking or shrinking. However, silicone caulk can be difficult to paint, and it may not adhere well to all surfaces. It is also more resistant to mold growth than some other types of caulk, but it is not completely immune. Specialized silicone caulks with added mildewcides are available for enhanced protection.
Latex Caulk: Latex caulk, also known as acrylic latex caulk, is easier to apply and clean up than silicone caulk. It is typically less expensive and can be painted to match the surrounding decor. Latex caulk is suitable for filling gaps and cracks, but it is not as water-resistant or flexible as silicone caulk. It is best used in areas that are not constantly exposed to water, such as around trim or baseboards. Latex caulk is more prone to shrinkage and cracking over time, especially in damp environments.
Acrylic Caulk: Acrylic caulk is similar to latex caulk in terms of ease of application and cleanup. It is paintable and offers good adhesion to a variety of surfaces. Acrylic caulk is more durable and water-resistant than latex caulk, making it a better choice for bathrooms. However, it is still not as flexible or water-resistant as silicone caulk. Acrylic caulk is suitable for sealing around bathtubs and showers, but it may require more frequent maintenance than silicone caulk.
Hybrid Caulks: Hybrid caulks combine the best properties of different types of caulk, such as the flexibility of silicone and the paintability of latex or acrylic. These caulks offer excellent adhesion, water resistance, and durability. Hybrid caulks are often more expensive than traditional caulks, but they can provide a superior seal and longer-lasting performance. They are a good option for demanding applications where both flexibility and paintability are desired.
When selecting caulk for the bathtub spout, it is essential to consider the material of the spout and the surrounding surface, the level of water exposure, and the desired finish. Silicone caulk is generally the preferred choice for its superior water resistance and flexibility, but latex or acrylic caulk may be suitable for less critical areas or when paintability is a priority. Reading the product label and consulting with a hardware store professional can help in choosing the most appropriate caulk for the specific application.
Proper Application Techniques for Caulking Around a Bathtub Spout
Applying caulk effectively around the bathtub spout requires careful preparation, precise application, and proper finishing techniques. Following these steps will ensure a watertight seal and a professional-looking result. Neglecting any of these steps can result in a compromised seal and potential water damage.
Preparation: The first step in caulking around the bathtub spout is to prepare the surface. This involves removing any old caulk, cleaning the area thoroughly, and ensuring that it is completely dry. Old caulk can be removed using a utility knife, a caulk removal tool, or a combination of both. Softening the old caulk with a heat gun or hairdryer can make it easier to remove. Once the old caulk is removed, clean the area with a mild detergent and water to remove any dirt, soap scum, or mildew. Rinse thoroughly and allow the area to dry completely before applying new caulk. A damp surface will prevent the caulk from adhering properly.
Application: Once the surface is prepared, load the caulk into a caulking gun. Cut the tip of the caulk tube at a 45-degree angle, making the opening slightly smaller than the width of the gap to be filled. Apply the caulk in a smooth, steady bead along the joint between the spout and the surrounding surface. Maintain consistent pressure on the caulking gun to ensure an even flow of caulk. Avoid applying too much caulk, as this can make it difficult to smooth and result in a messy finish. If the gap is wide, apply multiple thin beads of caulk rather than one thick bead.
Smoothing and Finishing: After applying the caulk, immediately smooth it with a wet finger or a caulk smoothing tool. Dipping your finger or the tool in water or mineral spirits will prevent the caulk from sticking and help create a smooth, concave finish. Apply gentle pressure to the caulk, pushing it into the gap and removing any excess. Wipe away any excess caulk with a damp cloth or paper towel. If necessary, apply additional caulk to fill any gaps or imperfections. Once the caulk is smoothed, allow it to dry completely according to the manufacturer's instructions. This may take 24 to 48 hours, depending on the type of caulk and the humidity level.
Additional Tips: Use painter’s tape to create clean, straight lines on either side of the joint before applying the caulk. This will help to achieve a professional-looking finish. Apply the caulk in a well-ventilated area, as some caulks can release fumes. Wear gloves to protect your hands from the caulk. If you make a mistake, remove the caulk immediately and start over. Avoid using the bathtub or shower until the caulk is completely dry.
Addressing Common Caulking Issues
Even with careful preparation and application, problems can arise with caulk around the bathtub spout. Understanding common issues and how to address them can extend the life of the caulk and prevent water damage. These issues include mold growth, cracking, shrinkage, and adhesion problems. Addressing them promptly can prevent more serious problems from developing.
Mold Growth: Mold and mildew can grow on caulk in damp environments, particularly in bathrooms. Mold growth not only looks unsightly but can also pose health risks. To prevent mold growth, use a caulk that contains mildewcides or fungicides. Regularly clean the caulk with a mild bleach solution to kill any mold spores. For existing mold growth, scrub the caulk with a stiff brush and a bleach solution. If the mold is deeply embedded, it may be necessary to remove the old caulk and replace it with new caulk.
Cracking: Caulk can crack over time due to temperature fluctuations, movement of the spout, or improper application. Cracks in the caulk can allow water to seep behind the spout, leading to water damage. To prevent cracking, use a flexible caulk, such as silicone caulk, and ensure that the surface is properly prepared before application. If cracks develop, remove the old caulk and replace it with new caulk. Before reapplying caulk, inspect the spout and surrounding area for any underlying issues, such as loose tiles or a wobbly spout, that may be contributing to the cracking.
Shrinkage: Some types of caulk, such as latex caulk, can shrink over time, creating gaps between the spout and the surrounding surface. Shrinkage can compromise the watertight seal and allow water to penetrate. To prevent shrinkage, use a high-quality caulk that is specifically designed for bathroom applications. If shrinkage occurs, remove the old caulk and replace it with new caulk. Consider using a backer rod to fill large gaps before applying the caulk. A backer rod is a foam material that is inserted into the gap to provide a base for the caulk and prevent it from shrinking too much.
Adhesion Problems: Caulk may not adhere properly to certain surfaces, particularly if the surface is dirty, oily, or damp. Poor adhesion can result in the caulk peeling or separating from the surface. To ensure proper adhesion, thoroughly clean and dry the surface before applying the caulk. Use a primer or adhesion promoter to improve adhesion to difficult surfaces. If the caulk is not adhering properly, remove it and reapply it after properly preparing the surface. Be sure to select a caulk that is compatible with the materials of the spout and surrounding surface.

How To Install A Tub Spout The Home Depot

How To Seal Tub Spout And Valve Trim With Silicone Caulking The Fixer Clips

How To Fix A Failed Tub Spout Seal Diy Friendly Task

How To Apply Caulk Around A Tub Spout Bathroomaccessories Plumbingissues Howto Diy
:max_bytes(150000):strip_icc()/wipe_dap-56a73ba03df78cf77293815a.jpg?strip=all "How To Caulk Shower And Bathtub Trim")
How To Caulk Shower And Bathtub Trim

How To Caulk A Bathtub 13 Steps With Pictures Wikihow

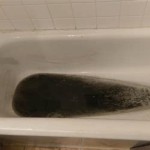
Don T Caulk Here

How To Caulk A Shower Or Bathtub Diy Family Handyman

How To Caulk A Bathtub Perfect Lines Craving Some Creativity

How To Re Caulk A Shower Or Bathtub
Related Posts