Build Your Own Bathtub: A Step-by-Step Guide
Immerse yourself in a luxurious bathing experience by crafting your own bathtub. Whether you're a seasoned DIY enthusiast or a novice seeking a unique project, this step-by-step guide will empower you to build a bespoke bathtub that seamlessly complements your bathroom decor.
Materials and Tools Required
- Fiberglass sheets (thickness: 0.125 to 0.25 inches)
- Polyester resin and hardener
- Gelcoat (optional)
- Mold release agent
- Wooden frame
- Clamps
- Sandpaper
- Angle grinder
- Mixing bowls and brushes
- Personal protective equipment (gloves, mask, goggles)
Step 1: Create a Mold
Construct a wooden frame that defines the desired shape and size of your bathtub. Apply a mold release agent to the inner surfaces of the frame to prevent the fiberglass from sticking.
Step 2: Lay Fiberglass Sheets
Cut fiberglass sheets into manageable sections and drape them over the mold. Use clamps to secure the sheets and ensure a smooth, wrinkle-free surface.
Step 3: Mix and Apply Resin
Mix polyester resin and hardener according to the manufacturer's instructions. Using a brush, apply a thin layer of resin over the fiberglass sheets, ensuring even coverage.
Step 4: Reinforce with Additional Layers
Repeat the process of laying fiberglass sheets and applying resin, building up several layers to create a sturdy structure. The number of layers depends on the desired thickness of your bathtub.
Step 5: Apply Gelcoat (Optional)
For improved durability and aesthetics, apply a layer of gelcoat to the exposed surfaces of the bathtub. Gelcoat provides a glossy, non-porous finish that is resistant to stains and chemicals.
Step 6: Remove from Mold
Once the resin has fully cured, carefully unclamp the bathtub from the mold. Use an angle grinder to trim any excess fiberglass or reshape the edges to your preference.
Step 7: Sand and Smooth
Sand the bathtub thoroughly to remove sharp edges and create a smooth surface. Start with a coarse sandpaper and gradually move to finer grits to achieve a polished finish.
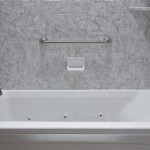
Step 8: Install and Enjoy
Connect the bathtub to the necessary plumbing and secure it in place. Fill it with water and experience the satisfaction of bathing in a bathtub that you have meticulously crafted.
Tips for Success
- Work in a well-ventilated area and wear protective gear.
- Allow ample time for the resin to cure before removing the bathtub from the mold.
- Use a variety of fiberglass thicknesses for different areas to balance strength and weight.
- Consider adding reinforcements such as fiberglass mesh or chopped fiberglass strands.
- Consult a professional if you have any doubts or require guidance.

How To Build A Custom Tub In 10 Steps 2024 Badeloft

Build Your Own Bathtub Size For My Master Bath Another Self Design So Mak Bathroom Interior Modern Contemporary Designs

Custom Made Bathtubs Bathtub Designs Diamond Spas

17 Concrete Bathtub Ideas Modern Bathroom Designs Tips Advice

Can Build A Custom Shape Tile Bathtub That Doubles As Shower Make Sure Top Edges Bathroom Designs Tub Combo Inspiration Decor

Pour It Yourself Concrete Bath An Award Winner Stuff Co
_990x558_90_500X0_90.jpg?strip=all "The Bathtub How To Build Your Own Spa At Home")
The Bathtub How To Build Your Own Spa At Home

18 Ingenious Diy Hot Tub Plans Ideas Suitable For Any Budget

How To Build A Bathtub Frame Step By Diy Guide

Roman Tub Build Thread Ceramic Tile Advice Forums John Bridge