Bathtub Surround Kits With Window Trim Kit: A Comprehensive Guide
Bathtub surround kits offer a practical and aesthetically pleasing solution for updating or renovating bathrooms. These kits typically include panels designed to cover the walls surrounding a bathtub or shower, providing a waterproof barrier and enhancing the overall appearance of the space. The inclusion of a window trim kit elevates the functionality and design, addressing the unique challenges presented by windows within these wet environments. This article delves into the features, benefits, installation considerations, and selection criteria associated with bathtub surround kits featuring window trim kits.
The primary function of a bathtub surround kit is to protect the wall structure from water damage. Water infiltration behind drywall or other wall materials can lead to mold growth, structural deterioration, and costly repairs. Surround kits create a sealed environment, preventing water from seeping into vulnerable areas. Additionally, they offer a more visually appealing alternative to traditional tile, often requiring less maintenance and offering a cleaner, more modern look.
The presence of a window within a bathtub or shower area introduces complexity. Without proper protection, the window frame and surrounding wall are highly susceptible to water damage. A window trim kit is specifically designed to address this issue. These kits provide a watertight seal around the window, preventing water penetration and protecting the window frame from rot and decay. Window trim kits also enhance the aesthetic appeal of the window, integrating it seamlessly with the surrounding surround panels.
The materials used in bathtub surround kits vary, with acrylic, fiberglass, and PVC being the most common. Acrylic is known for its durability, non-porous surface, and resistance to scratches and stains. Fiberglass is a more budget-friendly option, offering good water resistance but potentially being less durable than acrylic. PVC is lightweight, easy to install, and resistant to mold and mildew, making it a suitable choice for some applications. The material selection often depends on budget, desired aesthetic, and intended lifespan of the surround.
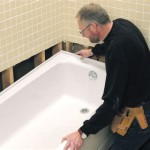
The installation of a bathtub surround kit with a window trim kit typically involves several steps. First, the existing wall surface must be properly prepared. This may involve removing old tile or wall covering, ensuring the surface is clean, level, and free of debris. Next, the surround panels are measured and cut to fit the space. Adhesive or mechanical fasteners are then used to secure the panels to the wall. The window trim kit is installed around the window, creating a watertight seal. Finally, caulk is applied to all seams and edges to further prevent water infiltration.
Choosing the right bathtub surround kit with a window trim kit requires careful consideration of several factors. The size and shape of the bathtub and shower area are crucial, as the kit must be properly sized to fit the space. The location and dimensions of the window must also be taken into account to ensure the window trim kit is compatible. The desired aesthetic, material durability, and budget also play significant roles in the selection process. It is often advisable to consult with a professional installer or contractor to ensure the correct kit is chosen and installed properly.
Understanding the Benefits of Using a Bathtub Surround Kit with Window Trim
One of the most significant advantages of using a bathtub surround kit with window trim is enhanced water protection. The combination of the surround panels and the specialized window trim creates a near-impermeable barrier against water, minimizing the risk of water damage behind the walls. This is particularly important in high-moisture environments like bathrooms, where water exposure is constant. By preventing water infiltration, these kits help to prevent the growth of mold and mildew, contributing to a healthier indoor environment and reducing the likelihood of costly repairs.
Another key benefit is the aesthetic improvement these kits offer. Bathtub surrounds provide a clean, modern, and uniform appearance, instantly transforming the look of a bathroom. The window trim kit seamlessly integrates the window into the overall design, creating a cohesive and visually appealing space. The availability of various colors, textures, and patterns allows homeowners to customize the look to match their personal style and existing bathroom decor. Furthermore, the smooth, non-porous surfaces of most surround materials are easy to clean and maintain, ensuring the bathroom remains looking fresh and new for years to come.
From an installation perspective, bathtub surround kits offer a more efficient and less labor-intensive alternative to traditional tile. Installing tile requires meticulous preparation, precise cutting, and careful placement. In contrast, surround kits are designed for relatively straightforward installation, often requiring less specialized tools and skills. The pre-fabricated panels are typically cut to size and easily attached to the wall using adhesive or mechanical fasteners. The window trim kit is designed to integrate seamlessly with the surround panels, simplifying the process of sealing around the window. This ease of installation can save time and money, making it an attractive option for both DIY enthusiasts and professional contractors.
Key Considerations When Selecting a Bathtub Surround Kit with Window Trim
The material composition of the bathtub surround kit is a primary factor to consider. Acrylic is a popular choice due to its durability, scratch resistance, and non-porous surface, which prevents the absorption of water and stains. Fiberglass reinforced with acrylic offers a more budget-friendly option, providing good water resistance but potentially being less durable than pure acrylic. PVC is another viable option, known for its lightweight nature, ease of installation, and resistance to mold and mildew. Each material has its own set of advantages and disadvantages, so it's crucial to evaluate the specific needs and budget constraints before making a decision.
The size and configuration of the bathroom and window directly influence the choice of surround kit. Precise measurements of the bathtub area and the window opening are essential to ensure a proper fit. The kit must be appropriately sized to cover the entire wall surface around the bathtub, preventing any gaps or exposed areas. The window trim kit must also be compatible with the dimensions of the window, providing a tight and secure seal. Some kits may require custom cutting or modifications to accommodate specific window shapes or sizes. It's advisable to choose a kit that offers a range of sizes and configurations or allows for easy customization to meet the unique requirements of the bathroom.
The design and style of the bathtub surround kit and window trim should complement the overall aesthetic of the bathroom. Consider the existing color scheme, fixtures, and decor when selecting a kit. Surround kits are available in a wide variety of colors, patterns, and textures, ranging from classic white and neutral tones to more contemporary and decorative designs. The window trim should seamlessly integrate with the surround panels, creating a cohesive and visually appealing look. Choose a style that reflects personal preferences and enhances the overall ambiance of the bathroom. Furthermore, consider the ease of cleaning and maintenance. Opt for materials with smooth, non-porous surfaces that are resistant to stains and mildew, simplifying the cleaning process and ensuring the long-term beauty of the surround.
Installation Best Practices for Bathtub Surround Kits with Window Trim
Prior to beginning the installation process, thorough preparation of the existing wall surface is paramount. This typically involves removing old tile, wallpaper, or any other wall coverings. Ensure the underlying surface is clean, dry, and free of any debris. Repair any damaged areas, such as cracks or holes, to create a smooth and even surface for the surround panels. Check the wall for plumb and level, making any necessary adjustments to ensure proper alignment. Proper preparation of the wall surface will contribute to a successful installation and prevent any potential problems in the future.
Careful measurement and cutting of the surround panels are crucial for a precise and professional-looking installation. Use accurate measuring tools and techniques to determine the exact dimensions of the walls and the bathtub area. When cutting the panels, use a sharp utility knife or a circular saw with a fine-tooth blade to avoid chipping or cracking the material. Take your time and double-check the measurements before making any cuts. It's often advisable to cut the panels slightly larger than needed and then trim them down to the exact size during the installation process. This allows for minor adjustments and ensures a tight and seamless fit.
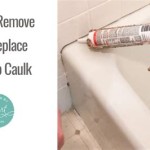
Proper sealing and caulking are essential for creating a watertight barrier and preventing water infiltration. Apply a generous bead of waterproof caulk along all seams, edges, and joints of the surround panels. Pay particular attention to the area around the bathtub and the window trim. Ensure the caulk is applied evenly and smoothly, creating a continuous seal. Use a caulk smoothing tool or a wet finger to remove any excess caulk and create a clean and professional finish. Allow the caulk to fully cure according to the manufacturer's instructions before using the shower or bathtub. Regular inspection and maintenance of the caulk is recommended to ensure its continued effectiveness in preventing water damage.
In conclusion, a bathtub surround kit with a window trim kit represents a valuable investment for homeowners seeking to enhance the functionality and aesthetics of their bathrooms. By understanding the benefits, considering the key selection criteria, and adhering to best installation practices, a successful and long-lasting renovation can be achieved, creating a more enjoyable and water-resistant bathing environment.

Window Kits For Bath Showers Liberty Home Solutions

Professional Bathtub Wall Surround Kits Duraflex

Window Kits For Bath Showers Liberty Home Solutions

Diy Tub Surround Shower Panel Base Kits Innovate Building Solutions

Tub Shower Combo Replacement Kits With Base Walls Doors Innovate Building Solutions

Window Kits For Bath Showers Liberty Home Solutions

Tub Shower Combo Replacement Kits With Base Walls Doors Innovate Building Solutions

Shower Window Trim Kit Showers At Com

Shower Window Trim Kit Showers At Com

How To Install A Bath Tub Surround
Related Posts


