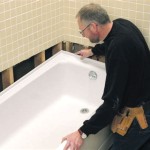
Bathtub Spout Diverter Replacement: A Comprehensive Guide
A bathtub spout diverter is a small but essential component that allows you to switch the water flow between the tub spout and the showerhead. Over time, the diverter can become worn or damaged, causing leaks or difficulty diverting the water. If you're experiencing these problems, replacing the diverter is a relatively simple and inexpensive repair that you can do yourself. ### Tools and Materials To replace a bathtub spout diverter, you will need the following tools and materials: * Adjustable wrench * Phillips head screwdriver * Flat head screwdriver * Channel lock pliers * Replacement diverter * Plumber's putty * Teflon tape ### Step-by-Step Guide 1.Turn off the Water Supply:
Before you begin, turn off the water supply to the bathtub. This is usually done by closing the valve under the sink or behind the toilet. 2.Remove the Old Diverter:
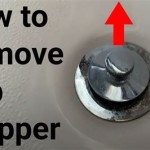
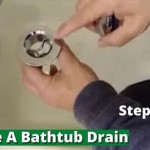
Use the adjustable wrench to loosen the bonnet nut that holds the diverter in place. Once the nut is loose, you can use the flat head screwdriver to pry the diverter out of the spout. 3.Clean the Spout:
Once the diverter is removed, take a moment to clean the inside of the spout. Use a damp cloth to wipe away any dirt or debris. 4.Apply Plumber's Putty:
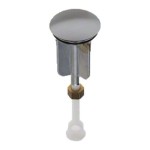
Apply a small amount of plumber's putty to the threads of the new diverter. This will help to create a watertight seal. 5.Wrap the Threads with Teflon Tape:
Wrap the threads of the new diverter with Teflon tape. This will also help to prevent leaks. 6.Install the New Diverter:
Insert the new diverter into the spout and hand-tighten the bonnet nut. Once the nut is snug, use the adjustable wrench to tighten it further. 7.Turn on the Water Supply:
Turn on the water supply and check for leaks. If there are any leaks, tighten the bonnet nut further. 8.Test the Diverter:
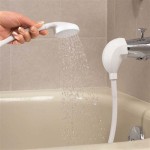
Turn on the shower and make sure that the water is flowing through the showerhead. Then, turn on the tub spout and make sure that the water is flowing through the spout. ### Troubleshooting If you are having difficulty replacing the bathtub spout diverter, here are a few troubleshooting tips: *Make sure that you have the right replacement diverter.
There are many different types of bathtub spout diverters, so it is important to get the one that is specifically designed for your spout. *Check the size of the diverter.
The diverter should be the same size as the old diverter. If it is too big or too small, it will not fit properly and will leak. *Apply enough plumber's putty and Teflon tape.
If you do not apply enough of these materials, the diverter will not be properly sealed and will leak. *Tighten the bonnet nut properly.
The bonnet nut should be snug, but not too tight. If you overtighten the nut, you could damage the diverter. ### Conclusion Replacing a bathtub spout diverter is a relatively simple repair that can be done in a few minutes. By following the steps in this guide, you can easily replace the diverter and get your bathtub working properly again.
Replacing A Tub Diverter

Learn How To Remove And Install Various Tub Spouts

Bathtub Spout Diverter Replacement Ifixit Repair Guide

How To Replace A Bathtub Spout Diy Family Handyman

Danco Tub Spout Diverter Repair Kit 89205 The Home Depot

Danco Tub Spout Diverter Repair Kit For Moen In The Bathtub Parts Department At Com

Everbilt Tub Spout Diverter Repair Kit 865320 The Home Depot

Bathtub Spout Diverter Replacement Ifixit Repair Guide

Bathtub Spout With Diverter Replacement Fix Leaking Tub Jonny Diy

Danco Chrome Universal Fit Bathtub Spout With Diverter In The Spouts Department At Com