Bathtub Rough-In Plumbing: Essential Aspects
A bathtub installation is a complex process that involves several essential plumbing components. Understanding the basics of bathtub rough-in plumbing is crucial to ensure a successful and functional bathroom renovation. Here are some key aspects to consider:
Drain Rough-In
The drain rough-in consists of the drainpipe and the P-trap. The drainpipe carries water away from the bathtub, while the P-trap prevents sewer gases from entering the bathroom. The drain rough-in should be properly installed to avoid leaks and drainage issues.
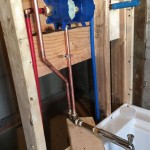
Water Supply Lines
Two water supply lines are required for a bathtub installation: hot and cold water. These lines should be connected to the appropriate valves in the wall to regulate water flow and temperature. The water supply lines should be securely attached to the bathtub fixtures to prevent leaks.
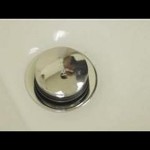
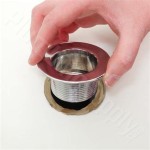
Bathtub Flange
The bathtub flange is a metal or plastic ring that is installed around the tub's drain opening. It provides a waterproof seal between the bathtub and the floor. The flange should be properly secured to prevent leaks and water damage.
Faucet Rough-In
The faucet rough-in includes the water supply lines, drain line, and mounting bracket for the bathtub faucet. The water supply lines should be positioned at the correct height and distance for the faucet to be installed properly. The drain line should be connected to the drainpipe to prevent leaks.
Tub Support
To ensure stability and prevent the bathtub from moving or sinking, it is essential to provide proper support. This can be achieved by using a combination of leg supports, a bathtub base, or a platform. The tub support should be capable of bearing the weight of the bathtub and its occupants.
Additional Considerations
In addition to the above aspects, there are several other factors to consider during a bathtub rough-in plumbing:
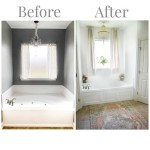
- The placement of the bathtub should be planned strategically to allow for comfortable access and ample space for other bathroom fixtures.
- The bathtub's height and depth should be carefully selected to ensure a comfortable bathing experience for users.
- The type of bathtub material (e.g., acrylic, cast iron) should be chosen based on its durability, aesthetics, and maintenance requirements.
- Professional plumbing services are recommended to ensure the bathtub rough-in plumbing is installed correctly and meets plumbing codes.
Understanding these essential aspects of bathtub rough-in plumbing is crucial for any successful bathroom renovation project. By addressing these elements during the planning and installation stages, you can create a functional, safe, and aesthetically pleasing bathroom space.

Bathtub Drain Rough In Dimensions Shower Plumbing Bathroom Floor Plans

Rough Plumbing Height For Bathtub Shower Installation Bathroom

Plumbing In The Walls

Tub Shower Rough Plumbing Dimensions

Plumbing In The Downstairs Bathroom Blog Homeandawaywithlisa

Bathtub Drain Subgrade Diy Home Improvement Forum

Pin By Ana Sifuentes On Plumbing Shower Bathtub Installation

Testing A Bathtub And Tap After Rough In Installation Mister Plumber

7 Bathtub Plumbing Installation Drain Diagrams

Rough In Plumbing Vs Finish Kulk S Heating Inc
Related Posts