Bathtub Rough In: Essential Considerations for a Seamless Installation
Remodeling a bathroom or constructing a new one involves planning and executing various tasks, including the bathtub rough-in. This critical step lays the foundation for a successful bathtub installation and ensures its proper functioning. While it may seem like a simple process, there are several essential aspects to consider for a hassle-free and long-lasting result.
Key Considerations for Bathtub Rough In
1. Type of Bathtub
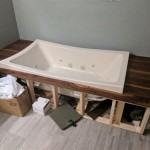
The type of bathtub you choose will determine the rough-in requirements. Freestanding tubs have a self-supporting structure that does not require additional framing or plumbing modifications. Alcove tubs fit into a recessed area framed by walls and typically have three walls and a finished front panel. Drop-in tubs are installed on a platform or deck and require a specific rough-in configuration.
2. Plumbing Location
The location of the plumbing connections, such as the drain and overflow, must be considered. The drain should be positioned directly beneath the bathtub's drain hole, while the overflow should be slightly higher on the opposite end. Proper alignment and slope are crucial to prevent leaks and ensure proper drainage.
3. Framing Support
For alcove and drop-in bathtubs, adequate framing support is essential. The rough-in framing should be sturdy enough to support the weight of the bathtub and water. The framing should extend beyond the bathtub's perimeter and be securely attached to the studs.
4. Subflooring and Waterproofing
Before installing the bathtub, the subflooring should be level, dry, and in good condition. Waterproofing measures are also necessary to prevent water damage to the floor and walls. A waterproofing membrane or sealant can be applied to the subflooring and extended up the walls to create a moisture barrier.
5. Access for Maintenance
Consider future maintenance and repairs when planning the rough-in. Provide access to the plumbing connections and drain by creating a removable access panel or installing a service door. This will allow plumbers to easily inspect and fix any issues without extensive demolition.
Conclusion
A well-executed bathtub rough-in is crucial for a successful and durable bathtub installation. By considering the type of bathtub, plumbing location, framing support, subflooring and waterproofing, and access for maintenance, homeowners and contractors can ensure a smooth and trouble-free process. Consulting a professional plumber or contractor is highly recommended to ensure adherence to the best practices of the industry.

Bathtub Drain Rough In Dimensions Shower Plumbing Bathroom Floor Plans

Rough Plumbing Height For Bathtub Shower Installation Bathroom

Plumbing In The Walls

Testing A Bathtub And Tap After Rough In Installation Mister Plumber
Tub And Faucet Rough In Mister Plumber

Comfortable Bathroom Plumbing Rough In Snapshots Inspirational Or Ba

Bathtub Drain Subgrade Diy Home Improvement Forum

An Overview Of Acrylic Tub Installation Extreme How To

Bathroom Plumbing Addition Shower

Bootz Industries Kona 54 In X 30 Soaking Bathtub With Right Drain White 011 3302 00 The Home Depot

