Essential Aspects of a Bathtub Installation Diagram: A Comprehensive Overview
Whether embarking on a DIY project or hiring a professional, a well-detailed bathtub installation diagram serves as an indispensable guide. This diagram provides a comprehensive blueprint outlining the essential steps and considerations for a successful installation, ensuring proper functionality, safety, and aesthetic appeal in your bathroom.
1. Pre-Installation Planning:
A methodical approach begins with thorough planning. The diagram should accurately depict the bathroom layout, including dimensions, window and door placements, and any existing fixtures. This information helps determine the optimal bathtub size, shape, and position within the space.
2. Materials and Tools:
The diagram should list all necessary materials and tools required for the installation. This includes the bathtub itself, plumbing fixtures (faucets, drainpipes, showerhead), as well as specific tools such as wrenches, screwdrivers, and a level.
3. Plumbing Connections:
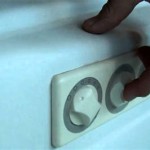
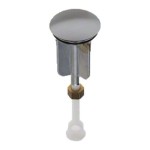
A clear diagram of the plumbing connections is crucial to avoid any potential leaks or malfunctions. It should illustrate the location of the water supply lines, drainpipe, and overflow drain, along with the required fittings and connections.
4. Electrical Wiring:
If the bathtub installation involves electrical components, such as lights or a whirlpool system, the diagram should include a detailed electrical schematic. This ensures proper wiring and grounding, ensuring safety and preventing electrical hazards.
5. Bathtub Support and Framing:
The diagram should specify the required support structure for the bathtub, including any necessary framing or reinforcement. This is essential for ensuring a stable and secure installation, preventing any sagging or movement of the bathtub over time.
6. Waterproofing and Sealing:
To prevent water damage and mold buildup, the diagram should outline the areas that require waterproofing and sealing. This includes the bathtub's rim, the surrounding walls, and the joints between the bathtub and the plumbing fixtures.
7. Step-by-Step Instructions:
A detailed sequence of steps provides a clear roadmap for the installation process. Each step should be clearly explained with accompanying visuals or annotations to guide the installer through the entire procedure, from bathtub placement to final connections.
By incorporating these essential aspects, a bathtub installation diagram becomes a valuable tool that ensures a seamless and professional-looking installation. It serves as a reliable reference throughout the project, minimizing errors and ensuring a successful outcome.

Bathtub Parts Everyone Should Know About Part Names 2024

Drop In Tub Installation Diagram Bathtub Jetted

Bathtub Plumbing Installation Drain Diagrams Shower

7 Bathtub Plumbing Installation Drain Diagrams

Parts Of A Bathtub With Diagram Homenish Plumbing Sizes Drain

Bathtub Plumbing Installation Drain Diagrams Shower

Installation Instructions

Correctly Installing A Bath Bathroom Guru

How A Bathtub Works Types Plumbing Diagrams Hometips

Bathtub Plumbing Installation Drain Diagrams Diagram