Bathtub Glaze Kit: Essential Considerations for a Successful Restoration
Bathtub glaze kits offer a cost-effective way to restore the luster of your old and worn-out bathtub. However, choosing the right kit and properly applying it are crucial to achieving a satisfactory outcome. Here are some essential aspects to consider to ensure a successful bathtub glaze restoration:
Surface Preparation
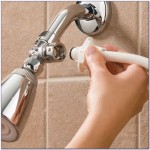
Thorough surface preparation is the foundation of a successful glaze application. The bathtub should be thoroughly cleaned to remove any dirt, soap scum, or mildew. Use a mild cleanser and avoid using harsh chemicals that could damage the surface. Next, sand the bathtub with fine-grit sandpaper to create a smooth, even surface for the glaze to adhere to.
Choosing the Right Glaze Kit
Select a bathtub glaze kit specifically designed for your type of bathtub material, such as porcelain, fiberglass, or acrylic. Different materials require different types of glazes, so using the wrong product could lead to poor adhesion or damage to the bathtub. Additionally, consider the desired finish and durability when choosing a glaze kit.
Application Process
Follow the manufacturer's instructions carefully when applying the glaze. Start by masking off any areas around the bathtub that you don't want to glaze. Mix the glaze components thoroughly and apply the glaze in thin, even coats. Use a roller or brush for large areas and a fine brush for detailing. Allow ample time for each coat to dry before applying the next.
Curing and Maintenance
After applying the glaze, it is crucial to allow sufficient time for it to cure properly. Most glaze kits require a curing time of 24-48 hours. During this time, keep the bathroom well-ventilated and avoid using the bathtub. Once fully cured, the bathtub should be cleaned regularly with mild, non-abrasive cleansers to maintain its appearance and prevent damage.
Additional Tips
To enhance the longevity of the glazed bathtub, consider the following tips:
- Use a bathtub mat to prevent scratches and chipping.
- Avoid using harsh chemicals or abrasive cleaners.
- Clean the bathtub regularly with mild cleansers and a soft sponge.
- Touch up any minor chips or scratches promptly using a compatible touch-up kit.
By following these essential considerations, you can successfully restore the beauty of your bathtub using a bathtub glaze kit. With proper preparation, application, and maintenance, you can enjoy a renewed bathtub for years to come.

Armoglaze Bathtub Refinishing Kit For Porcelain Enamel Acrylic Fiberglass Cast Iron Tubs Easy Pour On Odorless Tested Zero Voc White Tub Coating 2 7kg Standard Made Com

Bathtub Refinishing Kit Easy Pouron Odorless White Tub Coating 2 7 K 704831999914

Rust Oleum Specialty 1 Qt Gloss Coastal Fog Tub And Tile Refinishing Kit 384166 The Home Depot

Sd Glaze Tub Tile Roll Or Spray Refinishing Spr Arb Roof

Bathworks Refinishing Kit Review My Honest Opinion Of Reglazing A Bathtub Diy With Christine

Homax White High Gloss Anti Skid Tub And Tile Refinishing Kit In The Paint Coatings Department At Com

Rust Oleum Tub And Tile Refinishing Kit Review Ask Anna

Ekopel 2k Classic Shower Sink Refinishing Coating Kit Curing Time 4 Bathtub Coatings
:max_bytes(150000):strip_icc()/SPR-Home-best-tub-repair-kits-4158688-5f0f2377a9764effbcbed17ad02e85cf.jpg?strip=all "The 9 Best Tub Repair Kits Of 2024")
The 9 Best Tub Repair Kits Of 2024

Rust Oleum Specialty 1 Qt Gloss Coastal Fog Tub And Tile Refinishing Kit 384166 The Home Depot