Bathtub Fiberglass Repair Kit: A Comprehensive Guide
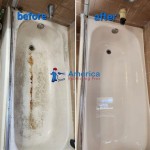
Fiberglass bathtubs offer a blend of durability, affordability, and aesthetic appeal, making them a popular choice for residential bathrooms. However, despite their robust nature, fiberglass tubs are susceptible to damage, including chips, cracks, scratches, and even holes, stemming from impacts, dropped objects, or general wear and tear. A fiberglass repair kit provides a cost-effective and accessible solution for addressing these issues, restoring both the functionality and appearance of the bathtub without the expense and disruption of a full replacement.
This article provides a detailed examination of fiberglass repair kits, covering their components, usage, preparation steps, application techniques, and post-repair maintenance. The aim is to equip readers with the knowledge necessary to effectively utilize these kits and achieve professional-quality results in repairing their fiberglass bathtubs.
Understanding the Components of a Fiberglass Repair Kit
A typical fiberglass repair kit contains a collection of essential materials designed to address various types of damage commonly found in fiberglass bathtubs. While specific components may vary slightly between brands and kit types, most kits include the following:
Fiberglass Resin: This is the primary structural element of the repair. Fiberglass resin is a thermosetting polymer that, when mixed with a hardener, undergoes a chemical reaction to create a rigid, durable material that bonds strongly to the existing fiberglass.
Hardener (Catalyst): The hardener, also known as a catalyst, is a crucial component that initiates the curing process of the fiberglass resin. It is typically a liquid that is mixed with the resin in a specific ratio, triggering the polymerization reaction that solidifies the resin.
Fiberglass Mat or Cloth: Fiberglass mat or cloth is a reinforcement material composed of woven or non-woven fiberglass fibers. It is used to provide additional strength and structural integrity to the repair, especially in cases of larger cracks or holes. The mat or cloth is saturated with the resin, creating a composite material that is significantly stronger than the resin alone.
Filler (Putty or Paste): A filler, often in the form of a putty or paste, is used to fill in larger gaps, chips, or depressions in the damaged area. Fillers provide a smooth, level surface for the resin and fiberglass cloth to adhere to and help to restore the original contour of the bathtub.
Sandpaper (Various Grits): Sandpaper is essential for surface preparation, smoothing the repaired area, and blending the repair with the surrounding surface. Kits typically include a range of sandpaper grits, from coarse to fine, to facilitate different stages of the repair process.
Mixing Sticks and Cups: These tools are used for accurately measuring and mixing the resin and hardener. Proper mixing is critical for ensuring the resin cures correctly and achieves its optimal strength and durability.
Applicators (Brushes or Spreaders): Applicators, such as brushes or spreaders, are used to apply the resin, filler, and other materials to the damaged area. These tools allow for controlled and even application, ensuring a smooth and professional finish.
Color Matching Pigments (Optional): Some kits include color-matching pigments that can be added to the resin or filler to closely match the color of the bathtub. This helps to minimize the visibility of the repair and create a seamless blend with the surrounding surface. If the kit does not contain pigments, separate purchase of suitable pigments is recommended.
Gloves and Safety Glasses: Protection equipment is crucial when working with fiberglass repair materials. Gloves protect the skin from irritation and exposure to chemicals, while safety glasses protect the eyes from splashes and debris.
Step-by-Step Guide to Repairing a Fiberglass Bathtub
Proper preparation and application are essential for achieving a successful and long-lasting repair. The following steps outline the process of repairing a fiberglass bathtub using a standard repair kit:
1. Safety First: Before starting any repair work, ensure adequate ventilation in the bathroom. Open windows and use a fan to circulate air. Wear gloves and safety glasses to protect your skin and eyes from the chemicals in the repair kit.
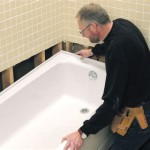
2. Cleaning and Preparation: Thoroughly clean the damaged area with soap and water to remove any dirt, grease, or debris. Use a scrub brush or abrasive pad to ensure the surface is clean and free of contaminants. Rinse thoroughly and allow the area to dry completely.
3. Sanding the Damaged Area: Use coarse-grit sandpaper (e.g., 80-grit) to roughen the surface around the damaged area. This will provide a better bonding surface for the filler and resin. Feather the edges of the damage to create a smooth transition between the damaged and undamaged areas. Sand at least an inch beyond the damaged area.
4. Filling Large Gaps or Holes: If the damage involves a large gap or hole, use the filler provided in the kit to fill it. Apply the filler in thin layers, allowing each layer to dry completely before applying the next. Overfill the area slightly to allow for sanding and shaping later. Following the manufacturer's instructions regarding drying times is paramount. Multiple thin layers are preferable to one thick layer.
5. Sanding the Filler: Once the filler is completely dry, use medium-grit sandpaper (e.g., 120-grit) to sand it down to match the surrounding surface. Gradually switch to finer-grit sandpaper (e.g., 220-grit) to smooth the surface and eliminate any imperfections. Ensure the filler is flush with the surrounding area before proceeding to the next step.
6. Mixing the Resin and Hardener: Carefully follow the manufacturer's instructions for mixing the resin and hardener. Use the provided mixing cups and sticks to accurately measure the correct ratio. Mix thoroughly for the recommended time to ensure proper curing. Avoid mixing too much resin at once, as it will begin to harden within a relatively short period.
7. Applying Fiberglass Mat or Cloth (If Required): If the damage is significant or requires additional reinforcement, apply a layer of fiberglass mat or cloth over the filled area. Cut the mat or cloth to size, slightly larger than the repair area. Saturate the mat or cloth with the mixed resin, ensuring it is completely wetted out. Press the saturated mat or cloth onto the repair area, removing any air bubbles with a brush or spreader.
8. Applying Resin: Apply a thin, even coat of resin over the repaired area, including any fiberglass mat or cloth. Use a brush or spreader to ensure the resin is evenly distributed and there are no runs or drips. Allow the resin to cure completely according to the manufacturer's instructions. Curing times vary depending on the resin type and ambient temperature.
9. Sanding the Resin: Once the resin is fully cured, use medium-grit sandpaper (e.g., 220-grit) to smooth the surface and remove any imperfections. Gradually switch to finer-grit sandpaper (e.g., 400-grit) to achieve a smooth, even finish. Be careful not to sand through the resin layer and expose the filler or fiberglass mat underneath.
10. Polishing (Optional): For a high-gloss finish, use a polishing compound and a polishing pad to buff the repaired area. This will help to blend the repair seamlessly with the surrounding surface and restore the original shine of the bathtub.
11. Cleaning and Sealing: Clean the repaired area with a mild detergent and water to remove any sanding dust or polishing compound residue. Apply a sealant or wax specifically designed for fiberglass surfaces to protect the repair and prevent future damage.
Ensuring a Durable and Long-Lasting Repair
Achieving a durable and long-lasting repair involves meticulous attention to detail throughout the entire process. Several key factors contribute to the success of the repair:
Surface Preparation: Proper surface preparation is paramount for ensuring a strong bond between the repair materials and the existing fiberglass. Thorough cleaning, sanding, and degreasing are essential for removing contaminants and creating a suitable bonding surface. The surface must be completely dry before proceeding with the repair.
Accurate Mixing Ratios: Adhering to the manufacturer's instructions for mixing the resin and hardener is crucial for proper curing. Incorrect ratios can result in a weak, brittle, or tacky repair. Use the provided mixing cups and sticks to accurately measure the components.
Proper Curing Time: Allowing the resin and filler to cure for the recommended time is essential for achieving their full strength and durability. Rushing the curing process can result in a weak or incomplete repair. Refer to the manufacturer's instructions for specific curing times based on ambient temperature and humidity.
Thin Layers: Applying materials in thin layers, rather than thick layers, allows for better adhesion and prevents air bubbles from forming. This is particularly important when applying filler or resin. Allow each layer to dry or cure completely before applying the next.
Feathering Edges: Feathering the edges of the repair area creates a smooth transition between the repaired area and the surrounding surface. This helps to minimize the visibility of the repair and prevents chipping or peeling. Use progressively finer grits of sandpaper to achieve a seamless blend.
Sealing and Protection: Applying a sealant or wax to the repaired area helps to protect it from water damage, staining, and other environmental factors. Choose a sealant or wax specifically designed for fiberglass surfaces. Reapply the sealant or wax periodically to maintain the protection.

Tub Repair Kit White For Acrylic Porcelain Enamel Fiberglass Sink Shower Countertop Bathtub Refinishing Ed Scratches Bases Pans Com

14 1 2 In W X 32 L Bathtub Floor Repair Inlay Kit White Wt 1432 The Home Depot

Bathworks 4 Oz Biscuit Tub And Tile Chip Repair Kit In The Surface Department At Com

Gel Coat Fiberglass Tub And Shower Chip Gouge Surface Repair Kit White

Tub Tile And Shower Repair Kit Color Match Fiberglass White Almond Black Bone Bisque Biscuit Grey Cream Off Beige Odorless Bathtub Paint Porcelain Com

Aquatic Gelcoat Repair Kit In White 35rkwh The Home Depot

Fiberglass Ed Bathtub Floor Repair Inlay Kit Us Bath S

Tub Repair Kit White For Acrylic Porcelain Enamel 57 Off

Tub Tile And Shower Repair Kit Color Match Fiberglass White Almond Black Bone Bisque Biscuit Grey Cream Off Beige Odorless Bathtub Paint Porcelain Com

16 In W X 36 L Bathtub Floor Repair Inlay Kit White Wt 1636 1 The Home Depot