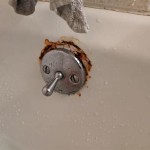
Bathtub Faucet Repair: A Comprehensive Guide
Maintaining a functional bathtub faucet is crucial for a comfortable and efficient bathing experience. If your bathtub faucet starts malfunctioning, don't worry; with the right tools and knowledge, you can tackle the repair yourself. This article will provide a comprehensive guide to essential aspects of bathtub faucet repair, empowering you with the necessary information to restore your faucet to optimal condition.
Before embarking on any repair, it's important to gather the necessary tools. These typically include a wrench, pliers, screwdriver, and a few replacement parts, such as washers, gaskets, and cartridges. Once you have the tools and parts handy, you can proceed with the following steps:
1. Identify the Source of the Problem
The first step is to determine what's causing the faucet to malfunction. Common problems include leaks, dripping, low water pressure, and difficulty in turning the handles. Once you have identified the problem, you can proceed with the appropriate repair.
2. Shut Off the Water Supply
Before working on the faucet, it's crucial to shut off the water supply to prevent flooding and potential damage. Locate the shut-off valves under the sink or behind the bathtub and turn them off completely.
3. Disassemble the Faucet
Once the water is shut off, disassemble the faucet. This typically involves removing the handle, spout, and cartridge. Use a wrench or pliers to loosen the nuts holding these components in place, and carefully disassemble the faucet.
4. Inspect and Replace Faulty Parts
With the faucet disassembled, inspect the parts for any damage or wear. Common culprits include worn-out washers, gaskets, and cartridges. Replace any faulty parts with new ones, ensuring they are compatible with your faucet model.
5. Reassemble the Faucet
Once you have replaced the faulty parts, reassemble the faucet in the reverse order of disassembly. Tighten all the nuts securely, but avoid overtightening to prevent damage. Turn on the water supply and check for any leaks or malfunctions.
6. Troubleshooting
If you encounter any problems after reassembling the faucet, such as leaks or low water pressure, try the following troubleshooting tips:
- Check that all the connections are tight.
- Replace the washer or gasket again.
- Inspect the cartridge for damage and replace it if necessary.
- Contact a professional plumber if the problem persists.
By following these steps and troubleshooting tips, you can successfully repair most bathtub faucet issues. However, if you encounter complex problems or are not comfortable performing the repair yourself, don't hesitate to seek assistance from a qualified plumber to ensure the safety and effectiveness of the repair.

How To Fix A Leaking Bathtub Faucet Diy Family Handyman

How To Fix A Leaking Bathtub Faucet Diy Family Handyman

How To Fix A Leaking Bathtub Faucet The Home Depot

How To Fix A Leaky Bathtub Faucet 6 Ways Stop Drips

Faucet Repair How To A Leaky Bath

How To Fix A Leaking Bathtub Faucet The Home Depot

How To Fix A Leaky Bathtub Faucet 6 Ways Stop Drips

How To Replace A Bathtub Spout Diy Family Handyman

Replacing Shower Tub Faucet How To Install A New

1950 S Bathtub Faucet Repair Step By Guide 1 800 Remodel

