Bathtub Faucet Leaking From Handle: A Comprehensive Guide
A leaking bathtub faucet is a common plumbing problem that can waste water and increase your water bills. If you're experiencing this issue, don't worry; it's usually a relatively simple fix that you can do yourself with the right tools and instructions. This guide will walk you through the essential aspects of bathtub faucet leaking from handle, including identifying the source of the leak and step-by-step instructions on how to repair it.
Identifying the Source of the Leak
The first step in repairing a leaking bathtub faucet is to identify the source of the leak. There are two main places where a faucet can leak from the handle:
- O-rings: O-rings are rubber gaskets that create a watertight seal between the handle and the faucet body. Over time, O-rings can wear out or become damaged, causing water to leak.
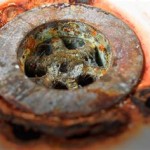
- Cartridge: The cartridge is a component inside the faucet that controls the flow of water. It can develop leaks due to wear and tear or mineral buildup.
Tools and Materials You'll Need
Once you've identified the source of the leak, you'll need the following tools and materials to repair it:
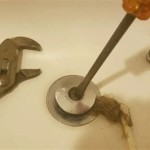
- Adjustable wrench
- Allen wrench
- Phillips head screwdriver
- Flathead screwdriver
- New O-rings (specific to your faucet model)
- Replacement cartridge (if needed)
- Plumber's putty
- Cloth or paper towels
Step-by-Step Repair Instructions
Replacing Handle O-rings
- Turn off the water supply to the faucet.
- Remove the handle by unscrewing the screw that holds it in place.
- Carefully remove the old O-rings from the handle and the faucet body.
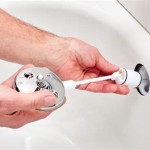
- Apply a thin layer of plumber's putty to the new O-rings.
- Install the new O-rings in the proper locations.
- Reattach the handle by tightening the screw.
- Turn on the water supply and check for leaks.
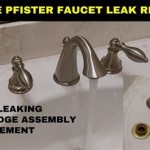
Replacing Cartridge
- Turn off the water supply to the faucet.
- Remove the handle and the trim plate around the handle.
- Use an Allen wrench to unscrew the cartridge retaining nut.
- Pull out the old cartridge and insert the new one.
- Tighten the cartridge retaining nut.
- Reinstall the trim plate and handle.
- Turn on the water supply and check for leaks.
Conclusion
Repairing a leaking bathtub faucet from handle is a straightforward task that can be done in under an hour with the right tools and materials. By following these step-by-step instructions, you can save time and money by fixing it yourself.
Remember to always turn off the water supply before performing any repairs and use caution when handling sharp tools. If you encounter any difficulties or the leak persists, don't hesitate to call a licensed plumber for assistance.

How To Fix A Leaking Bathtub Faucet Diy Family Handyman

How To Fix A Leaky Bathtub Faucet 6 Ways Stop Drips

How To Fix A Leaking Bathtub Faucet Diy Family Handyman

How To Fix A Leaking Bathtub Faucet The Home Depot

How To Fix A Leaky Bathtub Faucet 6 Ways Stop Drips

How To Fix A Leaking Bathtub Faucet The Home Depot

Faucet Repair How To A Leaky Bath

How To Fix A Leaking Bathtub Faucet Diy Family Handyman

How To Stop A Dripping Bathtub Faucet Nj Plumbing Repair Replacement And Maintenance

How To Fix A Leaking Single Handle Bathtub Faucet Quick And Easy
Related Posts